<?xml version="1.0" encoding="UTF-8"?>
<rss version="2.0"
	xmlns:content="http://purl.org/rss/1.0/modules/content/"
	xmlns:wfw="http://wellformedweb.org/CommentAPI/"
	xmlns:dc="http://purl.org/dc/elements/1.1/"
	xmlns:atom="http://www.w3.org/2005/Atom"
	xmlns:sy="http://purl.org/rss/1.0/modules/syndication/"
	xmlns:slash="http://purl.org/rss/1.0/modules/slash/"
	>

<channel>
	<title>CarbonSugar.com - The Secrets of High Performance Windsurfing</title>
	<atom:link href="http://www.carbonsugar.com/feed/" rel="self" type="application/rss+xml" />
	<link>http://www.carbonsugar.com</link>
	<description>Elite Windsurfing Training, Racing, Tactics, Design by Professional Windsurfer Sean O&#039;Brien</description>
	<lastBuildDate>Tue, 16 Oct 2012 14:09:14 +0000</lastBuildDate>
	<language>en-US</language>
	<sy:updatePeriod>hourly</sy:updatePeriod>
	<sy:updateFrequency>1</sy:updateFrequency>
	<generator>http://wordpress.org/?v=350</generator>
		<item>
		<title>
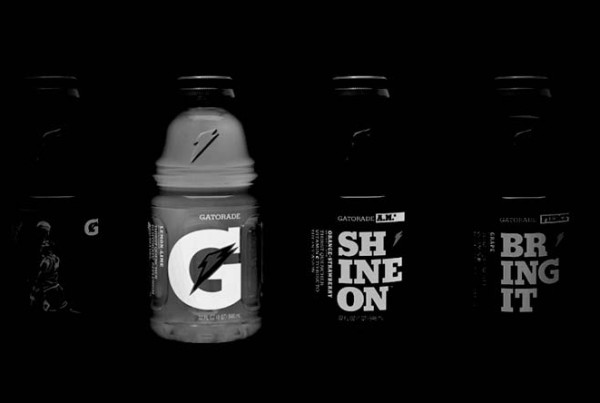
Hydration: Do I Need It?</title>
		<link>http://www.carbonsugar.com/recent/hydration-do-i-need-it/</link>
		<comments>http://www.carbonsugar.com/recent/hydration-do-i-need-it/#comments</comments>
		<pubDate>Mon, 19 Dec 2011 03:01:36 +0000</pubDate>
		<dc:creator>Sean OBrien</dc:creator>
				<category><![CDATA[Health]]></category>
		<category><![CDATA[_Recent]]></category>
		<category><![CDATA[diet]]></category>
		<category><![CDATA[health]]></category>
		<category><![CDATA[hydration]]></category>
		<category><![CDATA[training]]></category>

		<guid isPermaLink="false">http://www.carbonsugar.com/?p=456</guid>
		<description><![CDATA[<p>Ever wonder why you don&#8217;t feel as fresh on Day 4 of the regatta as you did on the first day? Sure, your tired, you&#8217;ve been racing all week, but is it possible you&#8217;re not recovering in the same way that other athletes are recovering? After the last race of the day&#8230;</p>]]></description>
				<content:encoded><![CDATA[<p>Ever wonder why you don&#8217;t feel as fresh on Day 4 of the regatta as you did on the first day? Sure, your tired, you&#8217;ve been racing all week, but is it possible you&#8217;re not recovering in the same way that other athletes are recovering? After the last race of the day, everything you do to your body after that moment, effects your recovery for the following day&#8217;s racing. Let&#8217;s have a quick look at some important recovery tips and techniques that will help you get back to 100% for the next day of racing, despite how much you destroyed yourself on the water that day!</p>
<p><span id="more-456"></span>This article is adapted from an article in Australian Sailing Magazine, written by <strong>Andrew Verdon</strong>, AIS Strength &amp; Conditioning Coach, with input from <strong>Michael Blackburn</strong> (AST Laser Coach) and <strong>Jo Vaile</strong> (AIS Performance Recovery coach).</p>
<p>Windsurfing for long periods of time &#8211; especially under stressful race conditions &#8211; builds lactic acid. A good recovery program at the end of each race day or training session is ESSENTIAL.</p>
<h3>WHEN IS RECOVERY MOST IMPORTANT?</h3>
<ul>
<li>After long training sessions, or if you&#8217;ve done multiple training sessions in one day.</li>
<li>Competing in more than race per day.</li>
<li>Competing regularly.</li>
<li>Competitions over long periods of time (ie, several days)</li>
<li>History of, or current injuries</li>
<li>High levels of fatigue/muscle damage (ie, strong winds/waves etc)</li>
</ul>
<h3>WHAT IS MOST IMPORTANT?</h3>
<p>There are four main aspects you should attend to when doing recovery:</p>
<ol>
<li>Warm down immediately</li>
<li>Stretching</li>
<li>Nutrition</li>
<li>Sleep</li>
</ol>
<p><strong>WARM DOWN IMMEDIATELY:</strong></p>
<p>Spend 5-10 minutes warming down after every training session or race day. This begins the repair process and enhances the removal of waste products from the muscular system. A short walk around the beach or very light jog to the park across the street will suffice here.</p>
<p><strong>STRETCHING:</strong></p>
<p>Always complete five minutes of light stretching. Usually after windsurfing, the muscles that get tight are your calves, hamstrings, quads and shoulders. This stretching is to relax the muscles, so no need to do 60 second hard holds, static stretches of 5-10 seconds are best.</p>
<p><strong>NUTRITION:</strong></p>
<p><strong></strong>You&#8217;ll want 3 things here; fluids, carbohydrates and protein. Focus on re-hydrating with fluid as the MAIN priority, then re-fueling with carbohydrates and protein. There are plenty of liquid drinks that have carbs/protein added, that will make this easier.</p>
<blockquote><p>As soon as you finish the final race of the day and hit the beach, EVERYTHING you put in to your body after that moment effects your recovery for the next day. Maybe skip that Quarter Pound meal with coke and try a protein shake and some cold pasta with a bottle of water.</p></blockquote>
<p><strong>SLEEP:</strong></p>
<p>The foundation of good recovery is always SLEEP. Sleep is probably the most important and significant process in recovery despite a lot of people paying little attention to this during regattas. The bulk of the restorative and renewal processes in your body happen during sleep, so aim to get to bed half and hour earlier to aid these processes. Aim to get 7-9 hours sleep after heavy training sessions or race days to give your body the BEST CHANCE of recovering.</p>
<h3> ADVANCED RECOVERY TECHNIQUES</h3>
<p>Once you&#8217;ve got the basic 4-step recovery process down and comfortable, maybe it&#8217;s time to think about these advanced recovery techniques to give your body all the help it needs to get back in shape for that next race the following morning. These advanced recovery techniques will only really give you an advantage if your stretching, nutrition and sleep is already up to standard. These advanced techniques, used without getting a decent night&#8217;s sleep, might not really give you any result at all; and are also more logistically harder and expensive than the simple 4 steps mentioned above. The advanced techniques include:</p>
<ul>
<li>Contrast Water Therapy</li>
<li>Cold Water Immersion</li>
<li>Compression Garments</li>
</ul>
<p><strong>CONTRAST WATER THERAPY:</strong></p>
<p>Alternating between hot and cold water on the whole body helps to increase blood flow and stimulate the central nervous system, which can reduce swelling, decrease stiffness, increase your range of motion, reduce muscle soreness and improve the removal of metabolites. Research suggests that an equal amount of time in hot and cold water immersion in a bath/spa or shower is ideal. For example, 2 minutes in cold water in the bath, then 2 minutes in hot water under the shower, then repeat this 3 times.</p>
<p>Always finish with cold water to reduce body temperature and inflammation. This cools the whole body which is great for recovery.</p>
<p><strong>COLD WATER IMMERSION &amp; ICE BATHS:</strong></p>
<div id="attachment_464" class="wp-caption alignleft" style="width: 310px"><a href="http://www.carbonsugar.com/wp-content/uploads/2011/12/icebath1.jpg"><img class="size-medium wp-image-464" title="icebath1" src="http://www.carbonsugar.com/wp-content/uploads/2011/12/icebath1-300x199.jpg" alt="" width="300" height="199" /></a><p class="wp-caption-text">Picture courtesy of CombatTrainer.com</p></div>
<p>Cold water immersion (more commonly known as ice-baths) are a great way to reduce muscle and core temperatures, decrease metabolism, reduce inflammation, enhance blood flow, decrease pain and reduce muscle spasm. The best temperature is around 15 degrees, sitting in the bath for about 2-5 mins although you can actually get decent results just using cold tap water and staying under for 5-15 mins. Another option is to take a walk in the ocean water for 5-10 mins after you&#8217;ve finished de-rigging (as long as it&#8217;s not &#8220;tropical island&#8221; warm.</p>
<p><strong>COMPRESSION GARMENTS:</strong></p>
<p>Putting on a compression garment after sailing, is a great way to decrease muscle soreness, increase bloodflow and decrease lactate levels. The claims made by many manufacturers about their supposed benefits to be used whilst training are yet to be validated.</p>
<p>For windsurfers, where we use A LOT of leg strength, full length tights are a great option. These full length versions push blood back up the legs to the heart; like a pump. If you&#8217;ve done a lot of pumping that day, a full length shirt could also be a good option.</p>
<p>&nbsp;</p>
<p><em>Jo Vaille, AIS Performance Recovery expert, recommends that recovery should be approached in this order:</em></p>
<ol>
<li>Warm-down and stretching.</li>
<li>Nutrition (ie, sports drink / food)</li>
<li>Hydrotherapy (using water or showers)</li>
<li>Compression garments (these can be worn for 2 hours or more)</li>
<li>Nutrition (meal &#8211; usually dinner)</li>
<li>Massage (either self-massage or use a foam roller or book yourself a massage therapist if you can!)</li>
</ol>
<p>&nbsp;</p>
]]></content:encoded>
			<wfw:commentRss>http://www.carbonsugar.com/recent/hydration-do-i-need-it/feed/</wfw:commentRss>
		<slash:comments>6</slash:comments>
		</item>
		<item>
		<title>Pro FW Desktop Wallpapers (PT II)</title>
		<link>http://www.carbonsugar.com/downloads/pro-fw-desktop-wallpapers-pt-ii/</link>
		<comments>http://www.carbonsugar.com/downloads/pro-fw-desktop-wallpapers-pt-ii/#comments</comments>
		<pubDate>Fri, 25 Mar 2011 16:24:02 +0000</pubDate>
		<dc:creator>Sean OBrien</dc:creator>
				<category><![CDATA[Downloads]]></category>

		<guid isPermaLink="false">http://www.carbonsugar.com/?p=390</guid>
		<description><![CDATA[<p>Another year has gone by and looking at the stats on this website it&#8217;s easy to see that one of the most viewed articles is the first <a href="http://www.carbonsugar.com/downloads/pro-fw-desktop-wallpapers/">Pro FW Desktop Wallpapers</a> collection I posted on here a while back, as a means to put together some nice photos of Formula Windsurfing. There i&#8230;</p>]]></description>
				<content:encoded><![CDATA[<p>Another year has gone by and looking at the stats on this website it&#8217;s easy to see that one of the most viewed articles is the first <a href="http://www.carbonsugar.com/downloads/pro-fw-desktop-wallpapers/">Pro FW Desktop Wallpapers</a> collection I posted on here a while back, as a means to put together some nice photos of Formula Windsurfing. There is still very little in the way of hi-resolution images floating around the internet and the major brands still shy away from using them in their photoshoots, so I thought it would be nice to put together some images that were collected over the last few months in Australia, as a number of big names were in town for some of the Australian FW racing events. Here are 14 wallpapers available FREE right here on CarbonSugar in a variety of screen resolutions. Enjoy!</p>
<p><span id="more-390"></span></p>
<p>To give credit where its due, the list of wallpapers includes:</p>
<ul>
<li><a href="http://www.schurmann.com">Wilhelm Schurmann</a></li>
<li><a href="http://www.storm-riders.com.au">Brett Morris</a></li>
<li><a href="http://www.vesterstrom.com">Jesper Vesterstrøm</a></li>
<li><a href="http://www.seanobrien.com.au">Sean O&#8217;Brien</a></li>
<li><a href="http://www.vmgblades.com">Chris Ting</a></li>
</ul>
<p>Photographers include Paul Santelmann, Rob Plim, Tam Ting and Adam Craven however all images have been edited, airbrushed and otherwise touched-up and dirtied by myself.</p>
<p>Enjoy!</p>
<div class="grid_4">
<p><a href="http://www.carbonsugar.com/wp-content/uploads/wallpapers2/1920x1200/1920x1200-wilhelm.jpg"><img src="http://www.carbonsugar.com/wp-content/uploads/wallpapers2/wilhelm-1.jpg" border="0" alt="" width="270" height="169" /></a></p>
<p><strong>Wilhelm Schurmann (BRA-999)</strong></p>
<p><a href="http://www.carbonsugar.com/wp-content/uploads/wallpapers2/1920x1200/1920x1200-wilhelm.jpg">1920&#215;1200</a> (Widescreen 16:10)<br />
<a href="http://www.carbonsugar.com/wp-content/uploads/wallpapers2/1600x1200/1600x1200-wilhelm-1.jpg">1600&#215;1200</a> (Fullscreen 4:3)<br />
<a href="http://www.carbonsugar.com/wp-content/uploads/wallpapers2/1280x1024/1280x1024-wilhelm-1.jpg">1280&#215;1024</a> (Fullscreen 5:4)</p>
</div>
<div class="grid_4r">
<p><a href="http://www.carbonsugar.com/wp-content/uploads/wallpapers2/1920x1200/1920x1200-jesper-brett-2.jpg"><img src="http://www.carbonsugar.com/wp-content/uploads/wallpapers2/jesper-brett-1.jpg" border="0" alt="" width="270" height="169" /></a></p>
<p><strong>Jesper Vesterstom / Brett Morris</strong></p>
<p><a href="http://www.carbonsugar.com/wp-content/uploads/wallpapers2/1920x1200/1920x1200-jesper-brett-2.jpg">1920&#215;1200</a> (Widescreen 16:10)<br />
<a href="http://www.carbonsugar.com/wp-content/uploads/wallpapers2/1600x1200/1600x1200-jesper-brett-2.jpg">1600&#215;1200</a> (Fullscreen 4:3)<br />
<a href="http://www.carbonsugar.com/wp-content/uploads/wallpapers2/1280x1024/1280x1024-jesper-brett-2.jpg">1280&#215;1024</a> (Fullscreen 5:4)</p>
</div>
<div class="clear4"></div>
<div class="grid_4">
<p><a href="http://www.carbonsugar.com/wp-content/uploads/wallpapers2/1920x1200/1920x1200-jesper-3.jpg"><img src="http://www.carbonsugar.com/wp-content/uploads/wallpapers2/jesper-3.jpg" border="0" alt="" width="270" height="169" /></a></p>
<p><strong>Jesper Vesterstrøm (DEN-111)</strong></p>
<p><a href="http://www.carbonsugar.com/wp-content/uploads/wallpapers2/1920x1200/1920x1200-jesper-3.jpg">1920&#215;1200</a> (Widescreen 16:10)<br />
<a href="http://www.carbonsugar.com/wp-content/uploads/wallpapers2/1600x1200/1600x1200-jesper-3.jpg">1600&#215;1200</a> (Fullscreen 4:3)<br />
<a href="http://www.carbonsugar.com/wp-content/uploads/wallpapers2/1280x1024/1280x1024-jesper-3.jpg">1280&#215;1024</a> (Fullscreen 5:4)</p>
</div>
<div class="grid_4r">
<p><a href="http://www.carbonsugar.com/wp-content/uploads/wallpapers2/1920x1200/1920x1200-sean-2.jpg"><img src="http://www.carbonsugar.com/wp-content/uploads/wallpapers2/sean-2.jpg" border="0" alt="" width="270" height="169" /></a></p>
<p><strong>Sean O&#8217;Brien (AUS-120)</strong></p>
<p><a href="http://www.carbonsugar.com/wp-content/uploads/wallpapers2/1920x1200/1920x1200-sean-2.jpg">1920&#215;1200</a> (Widescreen 16:10)<br />
<a href="http://www.carbonsugar.com/wp-content/uploads/wallpapers2/1600x1200/1600x1200-sean-2.jpg">1600&#215;1200</a> (Fullscreen 4:3)<br />
<a href="http://www.carbonsugar.com/wp-content/uploads/wallpapers2/1280x1024/1280x1024-sean-2.jpg">1280&#215;1024</a> (Fullscreen 5:4)</p>
</div>
<div class="clear4"></div>
<div class="grid_4">
<p><a href="http://www.carbonsugar.com/wp-content/uploads/wallpapers2/1920x1200/1920x1200-jesper-sean-1.jpg"><img src="http://www.carbonsugar.com/wp-content/uploads/wallpapers2/jesper-sean-1.jpg" border="0" alt="" width="270" height="169" /></a></p>
<p><strong>Jesper Vesterstrøm / Sean O&#8217;Brien</strong></p>
<p><a href="http://www.carbonsugar.com/wp-content/uploads/wallpapers2/1920x1200/1920x1200-jesper-sean-1.jpg">1920&#215;1200</a> (Widescreen 16:10)<br />
<a href="http://www.carbonsugar.com/wp-content/uploads/wallpapers2/1600x1200/1600x1200-jesper-sean-1.jpg">1600&#215;1200</a> (Fullscreen 4:3)<br />
<a href="http://www.carbonsugar.com/wp-content/uploads/wallpapers2/1280x1024/1280x1024-jesper-sean-1.jpg">1280&#215;1024</a> (Fullscreen 5:4)</p>
</div>
<div class="grid_4r">
<p><a href="http://www.carbonsugar.com/wp-content/uploads/wallpapers2/1920x1200/1920x1200-jesper-1.jpg"><img src="http://www.carbonsugar.com/wp-content/uploads/wallpapers2/jesper-1.jpg" border="0" alt="" width="270" height="169" /></a></p>
<p><strong>Jesper Vesterstrøm (DEN-111)</strong></p>
<p><a href="http://www.carbonsugar.com/wp-content/uploads/wallpapers2/1920x1200/1920x1200-jesper-1.jpg">1920&#215;1200</a> (Widescreen 16:10)<br />
<a href="http://www.carbonsugar.com/wp-content/uploads/wallpapers2/1600x1200/1600x1200-jesper-1.jpg">1600&#215;1200</a> (Fullscreen 4:3)<br />
<a href="http://www.carbonsugar.com/wp-content/uploads/wallpapers2/1280x1024/1280x1024-jesper-1.jpg">1280&#215;1024</a> (Fullscreen 5:4)</p>
</div>
<div class="clear4"></div>
<div class="grid_4">
<p><a href="http://www.carbonsugar.com/wp-content/uploads/wallpapers2/1920x1200/1920x1200-riders-2.jpg"><img src="http://www.carbonsugar.com/wp-content/uploads/wallpapers2/riders-2.jpg" border="0" alt="" width="270" height="169" /></a></p>
<p><strong>Downwind Racing</strong></p>
<p><a href="http://www.carbonsugar.com/wp-content/uploads/wallpapers2/1920x1200/1920x1200-riders-2.jpg">1920&#215;1200</a> (Widescreen 16:10)<br />
<a href="http://www.carbonsugar.com/wp-content/uploads/wallpapers2/1600x1200/1600x1200-riders-2.jpg">1600&#215;1200</a> (Fullscreen 4:3)<br />
<a href="http://www.carbonsugar.com/wp-content/uploads/wallpapers2/1280x1024/1280x1024-riders-2.jpg">1280&#215;1024</a> (Fullscreen 5:4)</p>
</div>
<div class="grid_4r">
<p><a href="http://www.carbonsugar.com/wp-content/uploads/wallpapers2/1920x1200/1920x1200-jesper-brett-1.jpg"><img src="http://www.carbonsugar.com/wp-content/uploads/wallpapers2/jesper-brett-2.jpg" border="0" alt="" width="270" height="169" /></a></p>
<p><strong>Jesper Vesterstrøm / Brett Morris</strong></p>
<p><a href="http://www.carbonsugar.com/wp-content/uploads/wallpapers2/1920x1200/1920x1200-jesper-brett-1.jpg">1920&#215;1200</a> (Widescreen 16:10)<br />
<a href="http://www.carbonsugar.com/wp-content/uploads/wallpapers2/1600x1200/1600x1200-jesper-brett-1.jpg">1600&#215;1200</a> (Fullscreen 4:3)<br />
<a href="http://www.carbonsugar.com/wp-content/uploads/wallpapers2/1280x1024/1280x1024-jesper-brett-1.jpg">1280&#215;1024</a> (Fullscreen 5:4)</p>
</div>
<div class="clear4"></div>
<div class="grid_4">
<p><a href="http://www.carbonsugar.com/wp-content/uploads/wallpapers2/1920x1200/1920x1200-sean-1.jpg"><img src="http://www.carbonsugar.com/wp-content/uploads/wallpapers2/sean-1.jpg" border="0" alt="" width="270" height="169" /></a></p>
<p><strong>Sean O&#8217;Brien (AUS-120)</strong></p>
<p><a href="http://www.carbonsugar.com/wp-content/uploads/wallpapers2/1920x1200/1920x1200-sean-1.jpg">1920&#215;1200</a> (Widescreen 16:10)<br />
<a href="http://www.carbonsugar.com/wp-content/uploads/wallpapers2/1600x1200/1600x1200-sean-1.jpg">1600&#215;1200</a> (Fullscreen 4:3)<br />
<a href="http://www.carbonsugar.com/wp-content/uploads/wallpapers2/1280x1024/1280x1024-sean-1.jpg">1280&#215;1024</a> (Fullscreen 5:4)</p>
</div>
<div class="grid_4r">
<p><a href="http://www.carbonsugar.com/wp-content/uploads/wallpapers2/1920x1200/1920x1200-jesper-2.jpg"><img src="http://www.carbonsugar.com/wp-content/uploads/wallpapers2/jesper-2.jpg" border="0" alt="" width="270" height="169" /></a></p>
<p><strong>Jesper Vesterstrøm (DEN-111)</strong></p>
<p><a href="http://www.carbonsugar.com/wp-content/uploads/wallpapers2/1920x1200/1920x1200-jesper-2.jpg">1920&#215;1200</a> (Widescreen 16:10)<br />
<a href="http://www.carbonsugar.com/wp-content/uploads/wallpapers2/1600x1200/1600x1200-jesper-2.jpg">1600&#215;1200</a> (Fullscreen 4:3)<br />
<a href="http://www.carbonsugar.com/wp-content/uploads/wallpapers2/1280x1024/1280x1024-jesper-2.jpg">1280&#215;1024</a> (Fullscreen 5:4)</p>
</div>
<div class="clear4"></div>
<div class="grid_4">
<p><a href="http://www.carbonsugar.com/wp-content/uploads/wallpapers2/1920x1200/1920x1200-jesper-4.jpg"><img src="http://www.carbonsugar.com/wp-content/uploads/wallpapers2/jesper-4.jpg" border="0" alt="" width="270" height="169" /></a></p>
<p><strong>Jesper Vesterstrøm (DEN-111)</strong></p>
<p><a href="http://www.carbonsugar.com/wp-content/uploads/wallpapers2/1920x1200/1920x1200-jesper-4.jpg">1920&#215;1200</a> (Widescreen 16:10)<br />
<a href="http://www.carbonsugar.com/wp-content/uploads/wallpapers2/1600x1200/1600x1200-jesper-4.jpg">1600&#215;1200</a> (Fullscreen 4:3)<br />
<a href="http://www.carbonsugar.com/wp-content/uploads/wallpapers2/1280x1024/1280x1024-jesper-4.jpg">1280&#215;1024</a> (Fullscreen 5:4)</p>
</div>
<div class="grid_4r">
<p><a href="http://www.carbonsugar.com/wp-content/uploads/wallpapers2/1920x1200/1920x1200-chris-1.jpg"><img src="http://www.carbonsugar.com/wp-content/uploads/wallpapers2/chris-1.jpg" border="0" alt="" width="270" height="169" /></a></p>
<p><strong>Chris Ting (AUS-5)</strong></p>
<p><a href="http://www.carbonsugar.com/wp-content/uploads/wallpapers2/1920x1200/1920x1200-chris-1.jpg">1920&#215;1200</a> (Widescreen 16:10)<br />
<a href="http://www.carbonsugar.com/wp-content/uploads/wallpapers2/1600x1200/1600x1200-chris-1.jpg">1600&#215;1200</a> (Fullscreen 4:3)<br />
<a href="http://www.carbonsugar.com/wp-content/uploads/wallpapers2/1280x1024/1280x1024-chris-1.jpg">1280&#215;1024</a> (Fullscreen 5:4)</p>
</div>
<div class="clear4"></div>
<div class="grid_4">
<p><a href="http://www.carbonsugar.com/wp-content/uploads/wallpapers2/1920x1200/1920x1200-jesper-5.jpg"><img src="http://www.carbonsugar.com/wp-content/uploads/wallpapers2/jesper-5.jpg" border="0" alt="" width="270" height="169" /></a></p>
<p><strong>Jesper Vesterstrøm (DEN-111)</strong></p>
<p><a href="http://www.carbonsugar.com/wp-content/uploads/wallpapers2/1920x1200/1920x1200-jesper-5.jpg">1920&#215;1200</a> (Widescreen 16:10)<br />
<a href="http://www.carbonsugar.com/wp-content/uploads/wallpapers2/1600x1200/1600x1200-jesper-5.jpg">1600&#215;1200</a> (Fullscreen 4:3)<br />
<a href="http://www.carbonsugar.com/wp-content/uploads/wallpapers2/1280x1024/1280x1024-jesper-5.jpg">1280&#215;1024</a> (Fullscreen 5:4)</p>
</div>
<div class="grid_4r">
<p><a href="http://www.carbonsugar.com/wp-content/uploads/wallpapers2/1920x1200/1920x1200-riders-1.jpg"><img src="http://www.carbonsugar.com/wp-content/uploads/wallpapers2/riders-1.jpg" border="0" alt="" width="270" height="169" /></a></p>
<p><strong>Racing Action</strong></p>
<p><a href="http://www.carbonsugar.com/wp-content/uploads/wallpapers2/1920x1200/1920x1200-riders-1.jpg">1920&#215;1200</a> (Widescreen 16:10)<br />
<a href="http://www.carbonsugar.com/wp-content/uploads/wallpapers2/1600x1200/1600x1200-riders-1.jpg">1600&#215;1200</a> (Fullscreen 4:3)<br />
<a href="http://www.carbonsugar.com/wp-content/uploads/wallpapers2/1280x1024/1280x1024-riders-1.jpg">1280&#215;1024</a> (Fullscreen 5:4)</p>
</div>
<div class="clear4"></div>
]]></content:encoded>
			<wfw:commentRss>http://www.carbonsugar.com/downloads/pro-fw-desktop-wallpapers-pt-ii/feed/</wfw:commentRss>
		<slash:comments>7</slash:comments>
		</item>
		<item>
		<title>WHY YOUR FW STARTS NEED TO BE BETTER (Pt II)</title>
		<link>http://www.carbonsugar.com/racing/why-your-fw-starts-need-to-be-better-pt-ii/</link>
		<comments>http://www.carbonsugar.com/racing/why-your-fw-starts-need-to-be-better-pt-ii/#comments</comments>
		<pubDate>Tue, 15 Jun 2010 02:32:18 +0000</pubDate>
		<dc:creator>Sean OBrien</dc:creator>
				<category><![CDATA[Racing]]></category>
		<category><![CDATA[Technique]]></category>
		<category><![CDATA[favoured]]></category>
		<category><![CDATA[port]]></category>
		<category><![CDATA[starboard]]></category>
		<category><![CDATA[starts]]></category>
		<category><![CDATA[transit]]></category>

		<guid isPermaLink="false">http://www.carbonsugar.com/?p=366</guid>
		<description><![CDATA[<p>Without a doubt, the most crucial part of any race is how you get off the startline. Sailing off the line at the favoured end in clean air, ahead of your competitors allows you to control the fleet in to the first tack and help cement your position in to the first upwind mark. That be&#8230;</p>]]></description>
				<content:encoded><![CDATA[<p>Without a doubt, the most crucial part of any race is how you get off the startline. Sailing off the line at the favoured end in clean air, ahead of your competitors allows you to control the fleet in to the first tack and help cement your position in to the first upwind mark. That being said, great starts are one of the most difficult skills to master in windsurfing racing. We have already looked at some <a href="http://www.carbonsugar.com/featured/why-your-fw-starts-need-to-be-better/">basic starting tactics</a> in a previous article, so in this &#8216;Part II&#8217; of formula windsurfing starts we will revisit some of those ideas and explain them further, as well as introduce some simple ideas on how you can test startlines accurately everytime.</p>
<p>As we discovered in the previous article:</p>
<blockquote><p>In a fleet of 50 boats, roughly 4-5 sailors will get a great start, another 10 will get an OK start and the rest of the fleet will get a bad start. There is usually not enough “clean air” for everyone to have room to get a great start.</p></blockquote>
<p>Knowing the theory of how great starts are set up is important and consists of 4 factors. Great starts involve mastering these factors:</p>
<ol>
<li>Knowing the possible places to start on a line</li>
<li>Working out which end is favoured</li>
<li>Getting a transit</li>
<li>Timing and anticipating the gun</li>
</ol>
<h3>1. Knowing the Possible Places to Start On A Line</h3>
<p>For simplicity, a startline can be divided in to 5 areas.</p>
<p><img class="alignnone size-full wp-image-368" title="Sailing start line (port starboard start)" src="http://www.carbonsugar.com/wp-content/uploads/2010/06/Starts-Fig-1A.jpg" alt="" width="590" height="281" /></p>
<ul>
<li>Boat end Starboard start</li>
<li>Middle of the line Starboard start</li>
<li>Pin end Starboard start</li>
<li>Pin end Port start</li>
<li>Boat end Port start</li>
</ul>
<p>Typically, when starting on port tack sailors look for a pin-end start to travel to the right side of the course and/or reduce the number of upwind tacks. Starting in the middle of the line on port is usually a result of having to dip behind Starboard sailors, and thus for simplicity, the line can be just divided in to pin-end and boat-end for port starting.</p>
<h3>2. Working Out Which End is Favoured</h3>
<p>The most crucial part of the start is being able to quickly and accurately work out which area of the line is the best to start on. A line can be favoured in different areas for more than one reason:</p>
<ul>
<li>The wind direction favours a particular end of the line</li>
<li>The position of the first mark favours a particular end of the line</li>
<li>A geographical feature or other change effects the wind on a particular side of the course</li>
</ul>
<p><strong>HOW DO WE QUICKLY TEST THE LINE FOR STARBOARD/PORT FAVOUR?</strong></p>
<p>When testing a startline, keep it simple. Look for ‘major’ advantages; you are not able to pick 1-2 degree changes by eye.</p>
<p><em>Boat or Pin End?</em></p>
<p>A quick and easy way to test whether the line is boat, middle or pin end favoured is to sail to a spot about 2-3m directly downwind of the start boat and on Starboard tack, begin a short upwind run from that mark. Look at the angle you are sailing out of the line. If you are able to cross the startline within 10-15m of the starboard you can ‘generally’ say the line is boat favoured. If you take nearly 20-30m to cross the startline from 2-3m downwind of the boat then the line is more favoured towards the pin of the line. Figure 2A shows this drill being performed.</p>
<p><img class="alignnone size-full wp-image-369" title="Sailing star line (port starboard start)" src="http://www.carbonsugar.com/wp-content/uploads/2010/06/Starts-Fig-2A.jpg" alt="" width="590" height="281" /></p>
<p>Remember you are only looking for ‘major’ differences between the favoured ends of the line. The distances shown in blue in Figure 2A should be measured by eye ‘roughly’. On a planing windsurfer you travel too fast to be able to measure individual degrees or metres on the water, so your aim here is to just be able to tell whether the line is boat or pin-end favoured.</p>
<p>Repeat this same drill on port tack from the pin end of the line. Assuming the wind hasn’t changed dramatically since your test at the boat-end, using deduction you should be able to get a better idea of which end of the line is favoured.</p>
<blockquote><p>*NB. If a line can be crossed easily on Port tack, then the PIN-END will be favoured if you decide to start on Starboard.</p></blockquote>
<p><strong>Position of the Marks:</strong></p>
<p>A good race director will set the top mark directly upwind of the startline. As we know, courses are not always perfect and marks can sometimes drift, so it’s important you always check upwind from the centre of the startline how the first mark sits in relation to the startline. If the mark is placed dramatically to the left or right side of the course, you may wish to change your start position to get toward the particular side of the course the mark is placed in quicker.</p>
<p><strong>Favoured Side of the Course:</strong></p>
<p>Every location is different and often times there can be a favoured side of the course because of a:</p>
<ul>
<li>A geographical feature (ie, a mountain, shore or river entrance along one side of the course)</li>
<li>A tidal feature(ie, a deep channel on one side of the course); or</li>
<li>A general wind phenomenon (ie, a seabreeze with less wind out to sea)</li>
</ul>
<p>If there is a majorly favoured side of the course due to one of the above factors you should investigate whether to change your start position to take advantage and sail to the favoured side of the course quickest.</p>
<p><img class="alignleft size-full wp-image-370" title="sailing startline (port starboard start)" src="http://www.carbonsugar.com/wp-content/uploads/2010/06/Starts-Fig-3A.jpg" alt="" width="300" height="300" />In <strong>Figure 3A</strong> a windward/leeward course with a reach mark is being used. The line is slightly port favoured (notice the direction of the wind) and Sailor 2 has started at the pin end on starboard tack. The first mark has been placed dramatically to the right side of the course, and Sailor 1 has seen this and tacked on to Port for a boat-end port start taking him to the right side of the course quicker and taking advantage of the better angle on Port tack.</p>
<p>This is an example of when a startline may have been Pin-End, Port favoured, but getting to the right side of the course may have been more important, so a boat-end Port start could be utilised.</p>
<p><strong>Relative Abilities:</strong></p>
<p>Something that is often overlooked but is still a crucial factor is understanding and knowing your abilities against other sailors in the fleet. It might not be possible to line-up against every sailor before a race start or you may have never sailed against this fleet before, but where possible, note your pointing angle and speed relative to the sailors you consider your main rivals in the fleet.</p>
<p>It is not always a good idea to start in a position which may give you a direct disadvantage against a rival sailor. An example of this is someone who sails very fast upwind but at a low angle. If that sailor was to start above the line on starboard against a sailor who sailed slower, but pointed much higher, he may not be able to clear the higher pointing sailor and have to dip below them, thus negating the extra speed.</p>
<p>In this instance a better tactic would have been to start just below this high-pointing, slower sailor to blast with extra speed off the startline and be in clear air even with the lower angle upwind.</p>
<p>One of the secrets to a great start is to not have better sailors in close proximity to you who can take your clean air and/or force you to tack early. If you sail in a regular fleet you should have a good idea who the better sailors are and know their strongpoints.</p>
<p>By knowing who the stronger sailors are, you can also identify the WEAKER sailors. When jostling for positions on the startline, you can often find gaps on the line to accelerate in to where the weaker sailors are positioned.</p>
<h3>3. Getting A Transit</h3>
<p>Once you’ve ascertained where you think you will be starting on the line, it is now important to get a TRANSIT of the startline. A transit is an imaginery line that runs through the startline to a marker on the shore  so that at any point you can work out where you are on the startline relative to this marker.</p>
<p>To get your transit, park yourself at the startboat (either on the inside of it if it is a big boat, or on the upwind, outside of it if you can see through the boat to the pin-end buoy standing on your board) and line yourself up with the pin-end buoy and the flagpole on the boat. Imagine a piece of string between each end of the line then extend this mental string all the way to a clearly visible landmark on the horizon. Now that you have that marker on the shore, drift upwind/downwind a few metres and get an idea of how that marker changes in relation to the line.</p>
<p>Getting a reference to your shore marker above and below the line will help if you need to sail over/under someone on the line during the pre-start.</p>
<p>The transit becomes very important in larger fleets with longer startlines. The larger the fleet, generally the ‘transit-sag’ becomes bigger.</p>
<p>The transit-sag effect is that the sailors in the middle of the line will drop 3-4m below the level of the line because they believe they are over the line. This is what makes a ‘middle of the line, starboard start’ quite famous as in planing conditions you can sail over the top of these sailors taking their clean air and creating a gap for you to accelerate in to.</p>
<h3>4. Timing &amp; Anticipating the Gun</h3>
<p>Syncing your watch correctly with the starter is extremely important. A planing board travels at 8m per second, so if you sync your watch 1 second out you are throwing away 8m at the start which is a huge margin.</p>
<p>The windier it gets, the slower and more distorted sound travels as well as the more difficult it is for the starters on the boat to put the flag up and down. There can always be discrepancies between the sounding of the gun and the flag hitting the top of the flagpole. To make it easier on yourself, stay as close to the starboat as practical for the first warning signal and check the sync on the next signal to make any corrections. If you are downwind 100m from the starboat, by the time the sound of the horn reaches you, you are 1-2 seconds out of sync!</p>
<p><strong>Anticipate the Gun.</strong></p>
<p>Having your watched synced is extremely important for the final step in the ‘great start’. As mentioned earlier, in planing conditions, boards travel at 8m/sec, which makes major changes in direction very difficult. Formula boards are particularly unresponsive when you going from a broad reach to a tight upwind angle as you do when you are running the startline on Starboard tack. It might take you as long as 3 seconds to get up to a good upwind angle out of the start and as long as 8 seconds to reach full speed and angle.</p>
<p>For this reason, in planing conditions (only!) if you are running down the startline you should ‘anticipate’ the starting gun and go on -1 seconds.</p>
<p><strong><em>Yes, go on -1 seconds. </em></strong></p>
<p>Why? Firstly because on the formula boards you require the extra second to begin rounding up in to the wind and secondly, because that extra second could give you the extra advantage to the sailors around you on the line, getting your nose in front of them and giving them dirty air instead of them doing it to you!</p>
]]></content:encoded>
			<wfw:commentRss>http://www.carbonsugar.com/racing/why-your-fw-starts-need-to-be-better-pt-ii/feed/</wfw:commentRss>
		<slash:comments>4</slash:comments>
		</item>
		<item>
		<title>Better Buoy Rounding</title>
		<link>http://www.carbonsugar.com/technique/better-buoy-rounding/</link>
		<comments>http://www.carbonsugar.com/technique/better-buoy-rounding/#comments</comments>
		<pubDate>Tue, 27 Apr 2010 12:14:27 +0000</pubDate>
		<dc:creator>Sean OBrien</dc:creator>
				<category><![CDATA[Advanced Tactics]]></category>
		<category><![CDATA[Technique]]></category>
		<category><![CDATA[buoy rounding]]></category>
		<category><![CDATA[downwind]]></category>
		<category><![CDATA[top mark]]></category>
		<category><![CDATA[upwind]]></category>

		<guid isPermaLink="false">http://www.carbonsugar.com/?p=348</guid>
		<description><![CDATA[<p>Buoy roundings are an important part of any windsurfing race and a key area to make (or lose) places and positions in a race. Done correctly, bottom buoy roundings can set up your position for the next upwind beat and create opportunities for passing or protecting a lead early o&#8230;</p>]]></description>
				<content:encoded><![CDATA[<p>Buoy roundings are an important part of any windsurfing race and a key area to make (or lose) places and positions in a race. Done correctly, bottom buoy roundings can set up your position for the next upwind beat and create opportunities for passing or protecting a lead early on in the next upwind beat. Top buoy roundings are equally important as they set up the lines taken on the downwind run. Correct buoy roundings involve a small number of steps; here we will discuss them all.<span id="more-348"></span></p>
<p>The steps to a correct buoy rounding are:</p>
<ol>
<li>Line in to the buoy</li>
<li>Unhooking from the harness for control</li>
<li>Shift of body weight to manoeuvre around the buoy</li>
<li>Pumping to accelerate once the buoy is rounded</li>
</ol>
<h3><strong>1. Line in to the Buoy</strong></h3>
<p><strong>BOTTOM BUOY</strong></p>
<p>Rounding the bottom buoy, whether a gate or a single mark, to start the next upwind leg, the line you take in to the buoy will determine your line out of the buoy (as you round it). Starting the next windward leg it is important to get to your maximum upwind angle as soon as possible to gain a safe-leeward position upwind. Sailors behind you will find it difficult to pass you to windward sailing in your dirty air, however if you round the buoy too tight and take longer to start pointing on the new leg you create a space where sailors behind you could get an advantage if they round the buoy tighter.</p>
<p><a href="http://www.carbonsugar.com/wp-content/uploads/2010/04/figure-1A-1B.jpg"><img class="alignleft size-full wp-image-351" title="Figure 1A - 1B" src="http://www.carbonsugar.com/wp-content/uploads/2010/04/figure-1A-1B.jpg" alt="Figure 1A - 1B" width="590" height="291" /></a></p>
<p>Figure 1A shows the RIGHT and WRONG lines you can take in to the bottom buoy. The RIGHT line is to head slightly deeper in the last 20-30m before the buoy travelling a few metres below the buoy and then aggressively turning upwind as you round the buoy to make a very tight angle around the buoy. The WRONG line is to head straight to the buoy and as formula boards turn much slower than waveboards it is very difficult to change direction so quickly and you will take a few metres after the buoy to get to your optimum upwind angle.</p>
<p>Figure 1B shows the WRONG line taken in to a buoy which creates a space upwind of the sailor and  the buoy which sailors behind who round the buoy correctly can use to their advantage to gain positions on the next upwind leg. To protect a lead you must take the RIGHT line around the buoy to keep all sailors behind and to leeward of you making it difficult for them to pass you in your dirty air or forcing them to tack away.</p>
<p>The actual distance in metres between the RIGHT and WRONG lines is only approx 4-5m difference. This is not an exact figure but merely an educated guess that the sailor will judge themselves on the water nearing the buoy. When other sailors are in close proximity you must obey all the normal sailing rules and choose the best line in to the buoy that is available given the circumstances.</p>
<p><strong>TOP BUOY</strong></p>
<p>Rounding the top buoy does not require a particular line in to the buoy. Techniques involved in rounding the top buoy will be discussed in Section 3.</p>
<p><a href="http://www.carbonsugar.com/wp-content/uploads/2010/04/figure-2A-2B.jpg"><img class="alignleft size-full wp-image-353" title="Figure-2A-2B" src="http://www.carbonsugar.com/wp-content/uploads/2010/04/figure-2A-2B.jpg" alt="Figure-2A-2B" width="590" height="291" /></a></p>
<p>In Figure 2A two sailors approach the bottom buoy. Sailor 2 will not likely get clear ahead before the buoy and will have to give Sailor 1 &#8216;mark-room&#8217;, which essentially allows Sailor 1 to pass him to round the buoy.</p>
<p>In this instance, the best option is for Sailor 2 to slow down dramatically, let Sailor 1 gain a distance of 10-15m ahead and then ‘ooch’ downwind as far as possible below the buoy to round extremely tight on the buoy. If you put a little pressure on Sailor 1 they will often take a very tight line in to the buoy and have to round the buoy very wide, creating a space for you to attack on the upwind like in Figure 1B.</p>
<p>Figure 2B shows the path Sailor 2 should take if given this opportunity by the mistake of Sailor 1.</p>
<h3><strong>2 &amp; 3. Unhook for Control &amp; Shift Weight Forward</strong></h3>
<p><strong>BOTTOM BUOY</strong></p>
<p>Rounding the bottom buoy in medium to strong wind conditions it is important that you UNHOOK FROM THE HARNESS. Distinct changes in direction on windsurfing boards with large fin sizes creates a large spike in load on the fin which usually causes the board to excessively rail, the nose of the board to lift and become unstable and the board to slow down very quickly. The stronger the wind gets the more this will have an effect and sailors can actually be at risk of crashing due to the behaviour of the board when the fin is maximum loaded.</p>
<p>To help with control, unhook from the harness and keep your legs slightly bent and body weight forward to keep the nose of the board down and keep the speed up. You should be unhooking from the harness 2-4 seconds before you reach the buoy.</p>
<p>As you round the buoy, tilt the rig back aggressively as in doing a tack to get the board to point as soon as you round the buoy.</p>
<p>In lighter winds or if your line in to the buoy is a little too tight, you can throw in a few pumps and ‘ooch’ the board downwind (losing a bit of speed) to get yourself deeper than the buoy to have a good line close to the buoy when you round it. These extra few pumps will mean you are already out of the harness and have your body weight forward for when you round the buoy.</p>
<p><strong>TOP BUOY</strong></p>
<p>Rounding the upwind buoy and heading to a downwind leg requires footwork and position of the rig to get the board to foot off aggressively downwind. With your front foot, pull up in the strap, lean the rig forward and shift your bodyweight forward for a few seconds while the board turns downwind.</p>
<p>This is the same technique as initiating a gybe, except that the back foot does not move from the back footstrap as in a gybe. This is a ‘sail by feel’ technique and requires the sailor to feel the movement of the board under their feet and apply more pressure when necessary needed to push the board.</p>
<p><strong><strong>4. Pumping to Accelerate</strong></strong></p>
<p><strong>BOTTOM BUOY</strong></p>
<p>In planing conditions it is important to put in a strong 3-6 pumps after rounding the buoy to get the best angle upwind after the buoy and help accelerate after the change in direction. By pumping and going for maximum height after the buoy, you will make it difficult for the sailors behind you who will usually have to foot-off to get out of your dirty air and lose considerable ground.</p>
<p>In very strong winds it may not always be beneficial to pump however sometimes making 1 pump as you hook yourself in to the harness is good for acceleration.</p>
<p><strong><strong>TRAINING DRILLS.</strong></strong></p>
<p>Training for bottom buoy roundings is very easy and requires little setup.</p>
<p>If you have access to a buoy, place one anywhere in the water.</p>
<p><strong>DRILL 1</strong></p>
<p>1-      Practice approaching the buoy from a normal downwind angle 50m from the buoy. As you get 20-30m from the buoy, head deeper to get 4-5m below the normal line in to the buoy then using the techniques discussed above, round the buoy.</p>
<p>2-      After rounding the buoy, sail upwind for 20 seconds to practice getting to maximum height and speed quickly after the buoy.</p>
<p><em>3- </em>Repeat 10 roundings on one tack, then 10 roundings on the other tack. <em>(Despite most courses having port rounding of the buoys, with gate courses you will inevitably need to be skilled in round buoys both directions).</em></p>
<p><strong>DRILL 2</strong></p>
<p><strong>1- </strong>With a partner, repeat the same as Drill 1 but start the run to the buoy from 150m away. Run in close proximity with your partner, fighting to see who can get to the buoy first. 30m from the buoy make a decision about who will arrive at the buoy first. <strong></strong></p>
<p><strong>2- </strong>If you have overlap nearing the buoy, force yourself downwind as in the techniques discussed and try and hold your height and position around the buoy.<br />
If you are behind, practice the techniques in Section 1. <strong></strong></p>
<p><strong>3- </strong>After rounding the buoy, sail upwind for 30 seconds to practice holding your position with a sailor behind or in front of you.  <strong></strong></p>
<p><em>4- </em>Repeat 10 roundings on one tack, then 10 roundings on the other tack. <em>(Despite most courses having port rounding of the buoys, with gate courses you will inevitably need to be skilled in round buoys both directions).</em></p>
<p><strong>Final Notes:</strong></p>
<p>If you do not have the ability to use a buoy, you can practice Drill 1 with an imaginary buoy; just pick a spot on the water to practice the techniques. Be conscious of starting the manoeuvre on the exact spot on the water you have chosen.<strong></strong></p>
<p>Also remember that in the <strong>Windsurfing Appendix B rules</strong> (which we use), we are ALLOWED to touch the buoys.</p>
]]></content:encoded>
			<wfw:commentRss>http://www.carbonsugar.com/technique/better-buoy-rounding/feed/</wfw:commentRss>
		<slash:comments>9</slash:comments>
		</item>
		<item>
		<title>Tuning Your Kit for High Wind</title>
		<link>http://www.carbonsugar.com/technique/tuning-your-kit-for-high-wind/</link>
		<comments>http://www.carbonsugar.com/technique/tuning-your-kit-for-high-wind/#comments</comments>
		<pubDate>Tue, 16 Feb 2010 05:23:07 +0000</pubDate>
		<dc:creator>Sean OBrien</dc:creator>
				<category><![CDATA[Technique]]></category>
		<category><![CDATA[tuning]]></category>
		<category><![CDATA[high wind]]></category>
		<category><![CDATA[settings]]></category>

		<guid isPermaLink="false">http://www.carbonsugar.com/?p=300</guid>
		<description><![CDATA[<p>High wind Formula racing! It doesn&#8217;t get any more exciting, challenging, fulfilling and hardcore than that! With class rules that allow the Formula boards to be raced in up to 35 knots, its important that regular racers learn the do&#8217;s and do not&#8217;s of setti&#8230;</p>]]></description>
				<content:encoded><![CDATA[<p>High wind Formula racing! It doesn&#8217;t get any more exciting, challenging, fulfilling and hardcore than that! With class rules that allow the Formula boards to be raced in up to 35 knots, its important that regular racers learn the do&#8217;s and do not&#8217;s of setting up their equipment to stay in control in high winds. Here we will discuss different tuning ideas and suggestions to get the most out of your equipment as well as sharing some secrets that most sailors wouldn&#8217;t know that the pros are doing to keep their gear on the water and going fast.<span id="more-300"></span></p>
<ol>
<li>Downhaul Settings</li>
<li>Outhaul Settings</li>
<li>Batten Tuning</li>
<li>Board Setup</li>
<li>Boom Setup</li>
<li>Technique</li>
</ol>
<h3>1. Downhaul Settings:</h3>
<p>All formula sails work best when rigged to the specs on the sail using the correct mast for that sail (except of course when brands print the incorrect sail specs!). In the case of strong winds, it usually is ok to pull on an extra 2-3mm downhaul but very rarely does it help to pull on more than this!</p>
<ul>
<li>A sail which is <strong>underdownhauled </strong>is unstable, heavy, has no acceleration, feels sluggish and creates a lot of backhand pressure which often creates a lot of spinout on your fin due to the draft being too far back.</li>
<li>An <strong>overdownhauled </strong>sail on the other hand becomes twitchy, unstable, unable to point and feels unresponsive.</li>
</ul>
<p>Although the tendency for the guys who&#8217;ve joined the formula racing from years of slalom racing is to just pull more downhaul, once you&#8217;ve exceeded the max-downhaul point for your sail you are actually making it more difficult by pulling more downhaul. Overdownhauling your sail can do two things; 1) release the pressure on the nose of your board, making the board fly out of the water and 2) make the sail feel very twitchy and unstable in your hands.</p>
<p>If you are using a widesleeve modern sail, look at the two battens above and below the boom when rigging. If either of these is &#8216;s&#8217; bending towards the luff then you are most likely using too much downhaul.</p>
<p>For the best performance, rig you sail to specs and work on the next 5 points to get control of your gear; downhaul is probably the last thing you should resort to in strong winds.</p>
<h3>2. Boom Settings:</h3>
<p><strong>OUTHAUL:</strong></p>
<p>Outhaul plays a MAJOR role in control in high winds. Put your boom out an extra hole (or two) and make sure your outhaul lines are setup that you can pull a lot of outhaul on. There is a point you will reach that you will start to lose angle with this amount of outhaul pulled on but it will give you control. As you improve, you can start to use less outhaul in the same winds which will give you better angle. See the <em>Batten Tuning</em> section below for more ideas on improving your use of outhaul for control.</p>
<p><strong>HARNESS LINES:</strong></p>
<p><a href="http://www.carbonsugar.com/wp-content/uploads/2009/12/IMG_4690.jpg"><img class="alignleft size-thumbnail wp-image-313" title="Harness Lines" src="http://www.carbonsugar.com/wp-content/uploads/2009/12/IMG_4690-150x150.jpg" alt="" width="150" height="150" /></a>Longer harness lines will help in strong winds. Most top sailors are using fixed lines despite the popularity of adjustable lines in different styles of windsurfing such as RS:X and slalom. A good option is to run adjustable lines that stay relatively fixed (ie, are hard to adjust on the fly) as these can be adjusted in between races on the beach fairly easily but still are stiff enough to not slip during races and become too long. A good example is the Neilpryde Adjustable harness lines which are extremely difficult to adjust on the water without breaking the clips, but stay in the length you adjust them to forever if you change them on the beach.</p>
<p><strong>BOOM HEIGHT:</strong></p>
<p>This is an interesting one. A lot of people advise lowering the boom in strong winds for control. This is a technique used in slalom boards where you are not relying on fin and rail pressure to the extent we are on formula boards. Lowering your booom 1-2cm may help for control, but lowering it any more than 1-2cm will actually make sailing more difficult!</p>
<p>Why, you ask?</p>
<p><a href="http://www.carbonsugar.com/wp-content/uploads/2009/12/IMG_7503.jpg"><img class="alignleft size-thumbnail wp-image-320" title="Boom Height" src="http://www.carbonsugar.com/wp-content/uploads/2009/12/IMG_7503-150x150.jpg" alt="" width="150" height="150" /></a>Lowering the boom shortens the triangle you make between your boom, your arms holding the boom and your legs touching the board. This is the centre of lateral resistance and effects your power-to-weight ratio on a board. A heavier, taller sailor with longer arms, will usually be much faster and more in control in high winds (if all equipment and skill levels are the same). By lowering the boom you are reducing the amount of leverage you have on the board and it actually makes it more difficult to hold on to the sail in strong winds believe it or not. It is liken to the effect of using a board with a smaller tail in high winds, you don&#8217;t get the same leverage which makes holding the rig down much easier.</p>
<h3>3. Batten Tuning:</h3>
<p><span style="font-weight: normal; font-size: 13px;">This may suprise a lot of people, but many top pros are doing some tricky things with their battens to give them more control in stronger winds and sometimes allow them to hang on to a bigger rig than others out on the course.</span></p>
<p>When you get very overpowered, most people&#8217;s tendency is to pull on a lot of outhaul. This moves the drive of the sail further back which can sometimes make you lose angle upwind and make your sail feel very twitchy. Although most of us would happily exchange a little angle to gain some control, on certain sails it is possible to have both!</p>
<p><a href="http://www.carbonsugar.com/wp-content/uploads/2009/12/IMG_2397.jpg"><img class="alignleft size-thumbnail wp-image-319" title="Batten Tuning" src="http://www.carbonsugar.com/wp-content/uploads/2009/12/IMG_2397-150x150.jpg" alt="" width="150" height="150" /></a>Find a piece of 8mm tube batten around 40-60cm long. 8mm is the same diameter as the large section (the opposite  end to the thin tip section). Push this piece of batten in to the batten pocket above the boom whilst still having the original batten in place. With a bit of effort, there is usually enough room to get both pieces in to the batten pocket.</p>
<p>What this does is stiffen the back section of your sail dramatically, which keeps the draft forward on your sail and gives you much more stability. More stability means you might be able to sail in strong winds with the outhaul pulled on only 90%, not 100%!</p>
<p>Generally speaking this is only necessary in some brands of sails. From our experience, <strong>Neilpryde </strong>and <strong>Point-7</strong> sails which have more luff curve than other brands have more neutral back hand pressure and probably wouldn&#8217;t benefit from this extra batten. <strong>Gaastra</strong>, <strong>North</strong>, <strong>MauiSails </strong>and <strong>Severne </strong>sails which have a less radical luff shape would be better suited to this idea.</p>
<p>For extra stability you can even add this extra batten to the batten below the boom; with two extra battens in (above and below the boom) you get very good stability in the top end of the windrange however you may lose some sail shape in light winds, so remember to take them out on the light wind days.</p>
<h3>4. Board Setup:</h3>
<p><strong>MAST TRACK:</strong></p>
<p>The best thing you can do in strong winds which will help the most is to move your track forward. Usually more wind means more waves/chop and much more fin pressure, so the nose of your board will usually start to lift and that&#8217;s where you can get in to trouble. Move your track 1-3cm forward and test your board once again. If you can hold it down, keep it there, if not, try it even more forward. Don&#8217;t be afraid to move the track all the way to the front, if that is the only way you can keep your board down, then go for it.</p>
<p>Note that the further you move your track forward the harder it is to sail downwind sometimes. This is because with the track all the way forward the nose keeps very flat and downwind in chop it can be harder to get the nose clear of the waves to stop it catching. It is usually much better to be in control upwind rather than downwind in strong winds as there are features on the board that can help with the downwind more than upwind (see below).</p>
<p><strong>FOOTSTRAPS:</strong></p>
<p><a href="http://www.carbonsugar.com/wp-content/uploads/2009/12/IMG_7620.jpg"><img class="alignleft size-full wp-image-315" title="Footstraps" src="http://www.carbonsugar.com/wp-content/uploads/2009/12/IMG_7620.jpg" alt="" width="150" height="150" /></a>Try running your back footstraps a little looser. This will allow you to get your foot much deeper in to the strap which is the equivalent of having a footstrap 5cm further in to towards the middle of the board. If you can&#8217;t handle downwind in the outside strap then get in to the chicken strap&#8230;</p>
<p>&#8230;in high winds you should ALWAYS run a chicken strap. Even if your board is comfortable and your skill level is up to allow you to sail downwind without it (which is usually faster), it&#8217;s nice to have one on for the time in between races where you are cruising around; it saves quite a bit of energy.</p>
<p>Find a nice light strap and make sure it is SUPER tight. Having a loose strap for a chicken strap is counter productive as you don&#8217;t want your foot completely flat on the back of the board. It is much better to be on the balls of your feet so you can control the railing of your board to help dodge rogue swells and compensate when you get out of control. The tighter you have your chicken strap the more control you have of your board; aim to only have the beginning of your arch in the strap, not your entire foot.</p>
<p><a href="http://www.carbonsugar.com/wp-content/uploads/2009/12/IMG_2391.jpg"><img class="alignleft size-thumbnail wp-image-317" title="Double Chicken Strap" src="http://www.carbonsugar.com/wp-content/uploads/2009/12/IMG_2391-150x150.jpg" alt="" width="150" height="150" /></a>Even better than a chicken strap is a DOUBLE CHICKEN STRAP. These were made popular by the Mike&#8217;s Labs boards in San Francisco, who&#8217;s owners were used to racing in the strong winds and vicious chop of the Bay area. A double chicken strap allows you to have a strap closer to half way between the outside strap and the centre of your board instead of just being in the middle. This gives the best placement for leverage and control whereas in the middle like a normal chicken strap is a little bit unbalanced.</p>
<p>The new 2010 Exocet and JP FW boards have a double chicken strap feature which is sure to be very popular as it also means the chicken strap can be utilised in much lighter winds as it can sometimes be more effective. Traditionally most other brands have shied away from double chicken straps as it means extra plugs need to be built in to the board which adds weight (as does the extra strap).</p>
<p><strong>BOARD CHOICE:</strong></p>
<p>Sorry to break it to everyone but there are certain boards which are designed for high winds better than others. As a &#8216;general&#8217; guide, here are the boards we&#8217;ve found to be the best in stronger winds:</p>
<ul>
<li>Gaastra Vapor (all versions)</li>
<li>Starboard LWR</li>
<li>Exocet Warp (2010)</li>
<li>JP 100 Pro</li>
<li>Starboard F159, F160 and F161</li>
</ul>
<p>These boards usually have a combination of vee the length of the board (often all the way to the finbox), wide tails for leverage and concaves to give a smoother ride over the swells. The nose shape also plays a role in a boards abilities in strong winds; all these boards have nose shapes designed to handle strong winds and chop very easily.</p>
<h3>5. Fins:</h3>
<p><a href="http://www.carbonsugar.com/wp-content/uploads/2009/11/geometrictwist.jpg"><img class="alignleft size-thumbnail wp-image-308" title="geometrictwist" src="http://www.carbonsugar.com/wp-content/uploads/2009/11/geometrictwist-150x150.jpg" alt="geometrictwist" width="150" height="150" /></a>Fins play a bigger role than anyone could imagine. It is simply not as simple as saying <em>&#8220;I should use a smaller fin&#8221; </em>when you go out in strong winds.</p>
<p>You should pay much more attention to the characteristics of fins. A great high wind fin will have a lot of <strong>&#8216;twist&#8217;</strong> in the tip. Twist allows the fin to depower when it gets overloaded. Much like the leech of a sail spills off the power in a gust, the tip of the fin spills off the power and stops you getting out of control. The more twist you have in a fin, usually the more controllable it is in high winds if the foil is working, however it is then at the expense of angle upwind if you have too much twist.</p>
<p>Raking your fin (less upright) also helps create more &#8216;geometric twist&#8217; in a fin, however having a more upright fin will keep the nose of the board down a little. It&#8217;s a catch 22. Older style fins like a Deboichet R13 were commonly sailed at +8cm (2.5 degrees from vertical) which helped keep the nose down in stronger winds as this is a fairly upright fin, however, these fins didn&#8217;t have a lot of twist and were quite stiff compared to newer fins so aren&#8217;t as controllable in strong winds as the new shapes available. The rake can sometimes be a little confusing for some people, so our recommendation is to find the rake (consult your fin maker) that suits your board in light/med winds; you should be safe using that same rake in strong winds but add a little more twist to the fin for control.</p>
<p>Next comes the stiffness. In modern formula boards of the past 4 seasons with wide tails of +78cm at the one-foot-off mark, stiff fins will be the worst thing you can use for control. In the old days (&lt;2005) everyone thought you&#8217;d need a stiffer fin in high winds as the soft fins would have too much power. This really isn&#8217;t the case as usually stiff fins (from the old days) have much less twist and are very bitey under your feet.</p>
<p>A new, modern, soft fin such as a VMG Blade, Kashy, Virus, Ifju, Z fin or others in certain circumstances create a lot of &#8216;vertical lift&#8217; under the board which helps keep the nose down and have a better ratio of twist and flex which will help control the board in strong winds. Whereas a lot of guys used to change down to 66cm fins a few years ago, a modern fin will allow you to use even a 70cm in stronger winds than you could imagine.</p>
<p>If you want to learn more about fins then check our previous article on <a href="http://www.carbonsugar.com/design/everything-you-should-know-about-fw-fins/">&#8220;Everything You Should Know About Formula Fins&#8221;</a>.</p>
<h3>6. Technique:</h3>
<p><a href="http://www.carbonsugar.com/wp-content/uploads/2010/02/HighWind.jpg"><img class="alignleft size-full wp-image-342" title="High Wind Formula Technique" src="http://www.carbonsugar.com/wp-content/uploads/2010/02/HighWind.jpg" alt="" width="590" height="312" /></a></p>
<p>Technique plays a major role in all wind strengths in Formula Windsurfing. Where it makes the largest difference, is in strong winds as good technique will help keep you on the water.</p>
<p>The most important part of technique is your <strong>STANCE</strong>. Arms should be straight, and your body should be hiked out as far as possible from the sail. To hike even, further, you can even try tilting your head to windward as this increases the hike your torso gets. A few points to remember when hiking:</p>
<ul>
<li>Straight arms</li>
<li>Shoulders rolled forward (to make your arms longer)</li>
<li>Front leg &#8216;relatively&#8217; straight and back leg slightly bent (see above photo)</li>
<li>Forcefully arch your torso backward (it doesn&#8217;t need to twist forward, but its ok if you do)</li>
<li>Tilt your head to windward to get the torso even further out.</li>
</ul>
<p>The further you can hike, the better ability you have to <em>absorb</em> the gusts as they hit you and create more leverage against your sail and fin, which helps prevent you getting slammed. This also goes back to the &#8216;lowering boom&#8217; argument from earlier. My experiences suggest lowering the boom any lower than 1-2cm will take away the leverage you have from your stance and make holding down the sail even harder. Move the track forward, before you move your boom.</p>
<p><strong>Technique Over Chop:</strong></p>
<p>Finally, the biggest liability for sailors in high wind is keeping control of the board as you go over chop and swell. Usually, when overpowered, your board rails excessively at the top of a swell and then spins downwind aggressively as the wind gets under the nose of the board, then you die.</p>
<p>There is a special technique to getting over the swell which is a combination of timing and shifting your body weight. Much like driving a rally car fast is about shifting the weight through the corners, keeping a formula board on the water is about shifting your body weight to compensate for the extra lift over swells.</p>
<p>This is what SHOULD happen:</p>
<ol>
<li>Nearing the top of the swell &#8211; sheet out a TINY bit to reduce power, shift your body weight forward.</li>
<li>Going over the swell &#8211; keep the sail slightly unsheeted, BEND YOUR KNEES (all the way to your chin if you need) in time with the wave to absorb the steepness of the swell whilst still keeping your body VERY far forward.</li>
<li>As you enter the crest after the swell &#8211; sheet in aggressively and point the board hard in to the wind to compensate for the extra power generated by lifting over the swell.</li>
</ol>
<p>All that should happen in 2 seconds!</p>
<p>To explain further, each swell you go over you should be bending your knees as the wave moves underneath you to keep the board trimming flat. Much like a mogul skiier uses his knees to absorb the bumps in the snow. Don&#8217;t unsheet the sail completely, as this will fly the nose of the board. Simply unsheet 5-10cm to reduce the power in the fin as you go over the swell. Shift your entire body forward (in the harness) about 30cm to help keep the nose of the board down.</p>
<p>If you have no choice but to get airborne over the swell, lift your back foot to raise the back of the board and keep it flat so it is not flipping whilst in the air.</p>
<p style="text-align: center;">*   *   *   *   *   *   *   *   *   *   *   *   *   *   *   *   *   *   *   *   *  *   *   *   *   *   *   *</p>
<p>That&#8217;s all you need to know about high-wind formula sailing. The most important part to all this is PRACTICE.</p>
<p>Singlehandedly, the best way I&#8217;ve improved my high-wind skills was when everytime I arrived at the beach with +25 knots and all my friends would be rigging slalom. I would rig my 10m and go for a very short blast on the formula board before switching to slalom. Gradually over time I&#8217;d get more and more used to the feeling and control in strong winds and be comfortable enough to try new settings in this wind. Then at the next race event it blew +30 knots and I was the only one who was prepared for these kind of winds. It&#8217;s that simple. Go get out there!</p>
]]></content:encoded>
			<wfw:commentRss>http://www.carbonsugar.com/technique/tuning-your-kit-for-high-wind/feed/</wfw:commentRss>
		<slash:comments>17</slash:comments>
		</item>
		<item>
		<title>HWR vs LWR</title>
		<link>http://www.carbonsugar.com/design/hwr-vs-lwr/</link>
		<comments>http://www.carbonsugar.com/design/hwr-vs-lwr/#comments</comments>
		<pubDate>Wed, 27 Jan 2010 12:06:56 +0000</pubDate>
		<dc:creator>Sean OBrien</dc:creator>
				<category><![CDATA[Design]]></category>
		<category><![CDATA[Review]]></category>
		<category><![CDATA[boards]]></category>
		<category><![CDATA[hwr]]></category>
		<category><![CDATA[lwr]]></category>
		<category><![CDATA[starboard]]></category>
		<category><![CDATA[vesterstrom]]></category>

		<guid isPermaLink="false">http://www.carbonsugar.com/?p=323</guid>
		<description><![CDATA[<p>Being the bigger of the formula board manufacturers <a href="http://www.star-board.com">Starboard</a> decided to cover their customer market this season by releasing two formula boards instead of the usual one. With the board designs fixed for two years (2010-11), for those who aren&#8217;t lucky enough to own bo&#8230;</p>]]></description>
				<content:encoded><![CDATA[<p>Being the bigger of the formula board manufacturers <a href="http://www.star-board.com">Starboard</a> decided to cover their customer market this season by releasing two formula boards instead of the usual one. With the board designs fixed for two years (2010-11), for those who aren&#8217;t lucky enough to own both, a difficult decision lies ahead to choose whether the HWR or LWR will be the board under your feet this season. Starboard chose to market these boards specifically tailored to different weight riders; heavy and light, simple right? The numerous posts on forums and emails to this author would have us believe the opposite. So to help everyone with their confusion and to find out the differences between these two boards, we sat down with Starboard/Severne teamrider <a href="http://www.vesterstrom.com">Jesper Vesterstrøm</a> (DEN-111) whose been in Australia over the January period testing the new boards, to find out his take on what people should be riding this season.<span id="more-323"></span></p>
<p>Before we start with Jesper&#8217;s comments, let&#8217;s go through a few things about the boards for those who don&#8217;t already know; starting with the names.</p>
<p><strong>HWR</strong> = stands for Heavy Weight Racing<br />
<strong>LWR </strong>= stands for Light Weight Racing</p>
<p>With the below specs of each board, you can quickly see that the LWR has a larger volume and a smaller tail width. Having a larger board for &#8216;lighter&#8217; sailors essentially started the confusion as you would think, that a lighter sailor would need a smaller board right?</p>
<p></p>
<table class="wptable rowstyle-alt" id="wptable-9"  cellspacing="1" cellpadding="1">
	<thead>
	<tr>
		<th class="sortable" style="width:30px" align="center">MODEL</th>
		<th class="sortable" style="width:30px" align="center">VOLUME</th>
		<th class="sortable" style="width:30px" align="center">LENGTH</th>
		<th class="sortable" style="width:30px" align="center">WIDTH</th>
		<th class="sortable" style="width:30px" align="center">TAIL WIDTH</th>
		<th class="sortable" style="width:30px" align="center">WEIGHT (kg)</th>
	</tr>
	</thead>
	<tr>
		<td style="width:30px" align="center">HWR</td>
		<td style="width:30px" align="center">162</td>
		<td style="width:30px" align="center">228</td>
		<td style="width:30px" align="center">100.2</td>
		<td style="width:30px" align="center">81.1</td>
		<td style="width:30px" align="center">8.88</td>
	</tr>
	<tr class="alt">
		<td style="width:30px" align="center">LWR</td>
		<td style="width:30px" align="center">168</td>
		<td style="width:30px" align="center">228</td>
		<td style="width:30px" align="center">100.5</td>
		<td style="width:30px" align="center">78.0</td>
		<td style="width:30px" align="center">9.07</td>
	</tr>
</table><p>
</p>
<p>Some other things to note about the boards is their development pathways. Essentially, the previous 160 and 161 have been very popular boards with many top riders last season, even more so than the later 162 model. Starboard noted this and took the path of developing two very different boards which each show some important characteristics of their predecessors. Despite the new cutouts and tailshape and slightly different rockerline, it&#8217;s fair to say that the LWR is a development of the 160, with it&#8217;s &#8216;looser&#8217; feel and smaller tail for blasting off the wind. As the 160 was popular in windier, choppier conditions, so too will the LWR be. The HWR, is a development of the 161 and 162, capturing a few great features of each board whilst making some certain improvements as Jesper will discuss.</p>
<p>So now to Jesper&#8217;s comments &#8230;</p>
<p style="text-align: center;">*  *  *  *  *  *  *  *  *  *  *  *  *  *  *  *  *  *  *  *  *  *  *  *  *  *  *  *  *  *  *  *  *  *  *  *  *  *  *  *</p>
<p>After some training in Sydney I may have some insight in to what board would be best for you to choose&#8230;</p>
<p><img class="alignleft size-thumbnail wp-image-332" title="Jesper Vesterstrom" src="http://www.carbonsugar.com/wp-content/uploads/2010/01/jesper1-150x150.jpg" alt="" width="150" height="150" /></p>
<p>We have all seen that all the boards developed over the last four years are working really well even now. It&#8217;s really up to the racer to get the best out of it on the course. Many sailors quickly blame their gear for being slow, but hey, if you are stuck in the 2nd row on the startline &#8211; everything is pretty slow right?</p>
<p>I have been testing the HWR and LWR quite a lot in a variety of conditions. Mainly in flat to choppy water &#8211; which is pretty much like what the worlds in Argentina will be held in and also what we race in on the international circuit.</p>
<p>The HWR and LWR are two totally different boards, no question about that. The most fun board to ride is the LWR &#8211; it reminds me of a slalom board with a narrow tail, round nose and is really just easy to sail. Despite this, I am still choosing the HWR for racing at most events this season!</p>
<p>To put things in perspective I am <strong>189cm</strong> tall and <strong>89kg</strong>.</p>
<p>The LWR is as I said before, a great board. It will work really well for smaller guys 60-78kg. It rides a lot different than the HWR and depending on the size of the rider you probably want to look in to riding bigger fins in light winds. If the board get&#8217;s clear wind it really goes fast and keeps accelerating whilst still being easy. Downwind the board sits high and there is no chance that the nose will ever catch the chop, one can go super deep and fast. If I come to an event where it&#8217;s going to be windy each day, I would not make any doubt to register the LWR. The Grand-Prix in Fortaleza, Brazil for example would be the perfect place for that kind of board. Or Łeba, Poland with side/on shore 15-25 knots.</p>
<p>In bigger fleets however, lighter winds and being a bigger rider you definitely want to go for the HWR. Why?! Because this board you can really push to the max. When saying push I mean it really points upwind and you can push on the back leg and it just goes for more angle. If you are stuck in bad air/water there is always a chance where it will become a lot harder on the LWR as you need to go more for speed, especially being a bigger guy. Since everything is settled on the first upwind in most races &#8211; you don&#8217;t wanna be losing angle and going for speed. I have tried experimenting by getting myself into the worst situation and I can always comeback on the HWR. On the LWR I can too, but to a lesser extent as I need to go for more speed and I lose too much angle.</p>
<p>The HWR takes smaller fins. The tail is powerful compared to the LWR and I am still using 70cm fins on the board at all times. Being a lot wider the board planes really early and you don&#8217;t have to bear away too much when pumping onto the plane after tacking or starting.</p>
<p>To summarise:</p>
<ul>
<li>If you are +80kg go for the HWR.</li>
<li>If you are &lt;80kg and you usually sail in light winds, go for the HWR.</li>
<li>If you live in a place where there is consistent medium winds, like in Sydney where the wind varies from 12-20 knots, go for the HWR.</li>
<li>If you live in a windier place with swell and chop (like Fortaleza) go for the LWR.</li>
<li>If you live in a light super wind place, like Florida, go for the HWR, regardless of your weight.</li>
</ul>
<p>I will be using the HWR mostly this season, but for the windy events, I will be on the LWR.</p>
<p>Any questions, you can drop me a mail; find me on <a href="http://www.vesterstrom.com">www.vesterstrom.com</a>.</p>
<div class="ngg-galleryoverview" id="ngg-gallery-10-323">


	<!-- Thumbnails -->
		
	<div id="ngg-image-68" class="ngg-gallery-thumbnail-box"  >
		<div class="ngg-gallery-thumbnail" >
			<a href="http://www.carbonsugar.com/wp-content/uploads/hwr-lwr/IMG_1384.jpg" title=" " class="shutterset_set_10" >
								<img title="IMG_1384" alt="IMG_1384" src="http://www.carbonsugar.com/wp-content/uploads/hwr-lwr/thumbs/thumbs_IMG_1384.jpg" width="100" height="75" />
							</a>
		</div>
	</div>


	<div id="ngg-image-69" class="ngg-gallery-thumbnail-box"  >
		<div class="ngg-gallery-thumbnail" >
			<a href="http://www.carbonsugar.com/wp-content/uploads/hwr-lwr/IMG_1385.jpg" title=" " class="shutterset_set_10" >
								<img title="IMG_1385" alt="IMG_1385" src="http://www.carbonsugar.com/wp-content/uploads/hwr-lwr/thumbs/thumbs_IMG_1385.jpg" width="100" height="75" />
							</a>
		</div>
	</div>


	<div id="ngg-image-70" class="ngg-gallery-thumbnail-box"  >
		<div class="ngg-gallery-thumbnail" >
			<a href="http://www.carbonsugar.com/wp-content/uploads/hwr-lwr/IMG_1386.jpg" title=" " class="shutterset_set_10" >
								<img title="IMG_1386" alt="IMG_1386" src="http://www.carbonsugar.com/wp-content/uploads/hwr-lwr/thumbs/thumbs_IMG_1386.jpg" width="100" height="75" />
							</a>
		</div>
	</div>


	<div id="ngg-image-71" class="ngg-gallery-thumbnail-box"  >
		<div class="ngg-gallery-thumbnail" >
			<a href="http://www.carbonsugar.com/wp-content/uploads/hwr-lwr/IMG_1387.jpg" title=" " class="shutterset_set_10" >
								<img title="IMG_1387" alt="IMG_1387" src="http://www.carbonsugar.com/wp-content/uploads/hwr-lwr/thumbs/thumbs_IMG_1387.jpg" width="100" height="75" />
							</a>
		</div>
	</div>


	<div id="ngg-image-72" class="ngg-gallery-thumbnail-box"  >
		<div class="ngg-gallery-thumbnail" >
			<a href="http://www.carbonsugar.com/wp-content/uploads/hwr-lwr/IMG_1388.jpg" title=" " class="shutterset_set_10" >
								<img title="IMG_1388" alt="IMG_1388" src="http://www.carbonsugar.com/wp-content/uploads/hwr-lwr/thumbs/thumbs_IMG_1388.jpg" width="100" height="75" />
							</a>
		</div>
	</div>


	<div id="ngg-image-73" class="ngg-gallery-thumbnail-box"  >
		<div class="ngg-gallery-thumbnail" >
			<a href="http://www.carbonsugar.com/wp-content/uploads/hwr-lwr/IMG_1389.jpg" title=" " class="shutterset_set_10" >
								<img title="IMG_1389" alt="IMG_1389" src="http://www.carbonsugar.com/wp-content/uploads/hwr-lwr/thumbs/thumbs_IMG_1389.jpg" width="100" height="75" />
							</a>
		</div>
	</div>


	<div id="ngg-image-74" class="ngg-gallery-thumbnail-box"  >
		<div class="ngg-gallery-thumbnail" >
			<a href="http://www.carbonsugar.com/wp-content/uploads/hwr-lwr/IMG_1390.jpg" title=" " class="shutterset_set_10" >
								<img title="IMG_1390" alt="IMG_1390" src="http://www.carbonsugar.com/wp-content/uploads/hwr-lwr/thumbs/thumbs_IMG_1390.jpg" width="100" height="75" />
							</a>
		</div>
	</div>


	<div id="ngg-image-75" class="ngg-gallery-thumbnail-box"  >
		<div class="ngg-gallery-thumbnail" >
			<a href="http://www.carbonsugar.com/wp-content/uploads/hwr-lwr/IMG_1392.jpg" title=" " class="shutterset_set_10" >
								<img title="IMG_1392" alt="IMG_1392" src="http://www.carbonsugar.com/wp-content/uploads/hwr-lwr/thumbs/thumbs_IMG_1392.jpg" width="100" height="75" />
							</a>
		</div>
	</div>


	<!-- Pagination -->
 	<div class='ngg-clear'></div>
 	
</div>

]]></content:encoded>
			<wfw:commentRss>http://www.carbonsugar.com/design/hwr-vs-lwr/feed/</wfw:commentRss>
		<slash:comments>30</slash:comments>
		</item>
		<item>
		<title>The 10-Step Carbon Extender</title>
		<link>http://www.carbonsugar.com/construction/the-10-step-carbon-extender/</link>
		<comments>http://www.carbonsugar.com/construction/the-10-step-carbon-extender/#comments</comments>
		<pubDate>Fri, 16 Oct 2009 02:41:42 +0000</pubDate>
		<dc:creator>Sean OBrien</dc:creator>
				<category><![CDATA[Construction]]></category>
		<category><![CDATA[Design]]></category>
		<category><![CDATA[Tutorial]]></category>
		<category><![CDATA[carbon]]></category>
		<category><![CDATA[extendor]]></category>
		<category><![CDATA[how-to]]></category>

		<guid isPermaLink="false">http://www.carbonsugar.com/?p=268</guid>
		<description><![CDATA[<p>If you&#8217;ve been sailing FW for a few seasons then no doubt you&#8217;ve <a href="http://www.carbonsugar.com/construction/why-do-masts-keep-breaking/">broken a mast</a> at some point or know someone who has. Ever wondered what you could do with the broken pieces? With just one &#8216;bottom section&#8217; you can build yourself a custom <strong>carbon extende</strong><strong>r</strong>&#8230;</p>]]></description>
				<content:encoded><![CDATA[<p>If you&#8217;ve been sailing FW for a few seasons then no doubt you&#8217;ve <a href="http://www.carbonsugar.com/construction/why-do-masts-keep-breaking/">broken a mast</a> at some point or know someone who has. Ever wondered what you could do with the broken pieces? With just one &#8216;bottom section&#8217; you can build yourself a custom <strong>carbon extende</strong><strong>r</strong> at any length, which will help prevent you bending your expensive aluminium extension when you are extending it +30cm. In 10 easy steps we will show you how to build an extender out of your broken mast section and impress your friends at the beach.</p>
<p><strong>INGREDIENTS:</strong></p>
<ul>
<li>1x mast bottom section (broken or complete)</li>
<li>1x mast top section (to be used as a hammer!)</li>
<li>Hacksaw &amp; sharp knife/blade</li>
<li>Sandpaper with block (80-120 grit)</li>
<li>Acetone &amp; an old rag</li>
<li>Epoxy &amp; Q-Cell Filler</li>
<li>300mm x 200mm piece of 200g per m<sup>2</sup> &#8220;plain weave&#8221; carbon</li>
<li>File (the bigger the better)</li>
<li>Bank/Credit card (an expired one!)</li>
<li>Plastic cup &amp; stirrer</li>
<li>Rubber gloves</li>
<li>Masking Tape &amp; a Pen</li>
<li>Clear Plastic film (any thickness, any size)</li>
<li>Tape measure.</li>
<li>Glass of beer <em>(optional)</em></li>
</ul>
<p><em>Let&#8217;s get to work.</em> I would suggest doing this outside (or in the garage if you&#8217;d like to escape your other half).</p>
<p><a href="http://www.carbonsugar.com/wp-content/uploads/2009/10/mast-extension_0001.jpg"><img class="aligncenter size-full wp-image-297" title="Figure 1a" src="http://www.carbonsugar.com/wp-content/uploads/2009/10/mast-extension_0001.jpg" alt="Figure 1a" width="590" height="354" /></a>
<div class="clear"></div>
<h3>Step 1 &#8211; Cutting.</h3>
<p><a href="http://www.carbonsugar.com/wp-content/uploads/2009/10/step1.jpg"><img class="alignleft size-thumbnail wp-image-275" title="Step 1" src="http://www.carbonsugar.com/wp-content/uploads/2009/10/step1-150x150.jpg" alt="Step 1" width="150" height="150" /></a>Cut the broken mast section to a length of 460mm (obviously one end is the bottom of the mast) – important to make the cut square to the edge of the section (otherwise in use the mast will bear on a point instead of the full circumference – refer Step 9.).  You can check by putting the cut edge against the bottom of a mast and marking the high points; sand the high points using 80 grit on a sanding block.</p>
<div class="clear"></div>
<h3>Step 2 &#8211; Sliding.</h3>
<p><a href="http://www.carbonsugar.com/wp-content/uploads/2009/10/step2.jpg"><img class="alignleft size-thumbnail wp-image-276" title="Step 2" src="http://www.carbonsugar.com/wp-content/uploads/2009/10/step2-150x150.jpg" alt="Step 2" width="150" height="150" /></a>Select the section to use as the <em>spigot </em>which needs to be 270mm long (pink section in Figure 1a).  The mast has a taper starting at about 600-900mm above the base.  Slide the ferrule of the broken mast through the mast extender from the bottom until it is a firm fit.  Mark 150mm above the top of the mast extender; this is approximately the top of the spigot.  Remove the broken mast and mark the 270mm spigot + 50mm both ends of the proposed spigot. I use the masking tape to make these markings.</p>
<div class="clear"></div>
<h3>Step 3 &#8211; Knife Me.</h3>
<p><a href="http://www.carbonsugar.com/wp-content/uploads/2009/10/step3.jpg"><img class="alignleft size-thumbnail wp-image-282" title="Step 3" src="http://www.carbonsugar.com/wp-content/uploads/2009/10/step3-150x150.jpg" alt="Step 3" width="150" height="150" /></a>Remove any plastic film/stickers/graphics on the mast so that carbon is exposed (best to use the sharp knife/blade to scrape and remove any film).   Give the spigot  a clean with the acetone to remove any glue used on the film and then a light sand to remove any high spots.  Now slide the broken mast inside the mast extender, get a firm fit – maybe force it a little and then re-mark 150mm above the top of the mast extender.  This point may have moved from the mark you made in Step 2. After you have removed the film and given it a sand, remove the broken mast.
<div class="clear"></div>
<h3>Step 4 &#8211; More Cutting.</h3>
<p><a href="http://www.carbonsugar.com/wp-content/uploads/2009/10/step4.jpg"><img class="alignleft size-thumbnail wp-image-283" title="Step 4" src="http://www.carbonsugar.com/wp-content/uploads/2009/10/step4-150x150.jpg" alt="Step 4" width="150" height="150" /></a>Cut the mast 270mm below the mark made in Step 3. Next, cut the broken mast 50mm above the mark made in step 3.  Now the spigot will be 270mm long + 50mm at the top as a contingency that you will remove later (Step 6) after the spigot is glued to the mast extender.</p>
<div class="clear"></div>
<h3>Step 5 &#8211; Cleaning &amp; Peanut Butter</h3>
<p><a href="http://www.carbonsugar.com/wp-content/uploads/2009/10/step5.jpg"><img class="alignleft size-thumbnail wp-image-284" title="Step 5" src="http://www.carbonsugar.com/wp-content/uploads/2009/10/step5-150x150.jpg" alt="Step 5" width="150" height="150" /></a>Clean the inside of the top of the mast extender and the outside of the bottom of the spigot with acetone.  In your plastic cup, mix up an adhesive paste using epoxy and Q-cell (filler) to the consistency of soft peanut butter and coat both surfaces with this adhesive.  Slide the spigot up from the bottom until you have 150mm + 50mm of contingency extending above the top of the mast extender.  Now with a rag and acetone clean any adhesive on the inside of the mast extender below the spigot (otherwise it will foul the adjustable mast extension).</p>
<div class="clear"></div>
<h3>Step 6 &#8211; Cutting? Oh yes we do.</h3>
<p><a href="http://www.carbonsugar.com/wp-content/uploads/2009/10/step6.jpg"><img class="alignleft size-thumbnail wp-image-285" title="Step 6" src="http://www.carbonsugar.com/wp-content/uploads/2009/10/step6-150x150.jpg" alt="Step 6" width="150" height="150" /></a>When the adhesive is set, cut the extension of the spigot to length – 150mm above the tip of the mast extender.  Next repeat Steps 2. 3. 4. &amp; 5 for the reinforcing cylinder (blue section in Figure 1a).  Tap the reinforcing cylinder into position with a mast top section.  Important to get a firm fit;  it will not be perfect as the taper angles vary slightly, but it needs to be firm!</p>
<div class="clear"></div>
<h3>Step 7 &#8211; Carbon Time!</h3>
<p><a href="http://www.carbonsugar.com/wp-content/uploads/2009/10/step7.jpg"><img class="alignleft size-thumbnail wp-image-286" title="Step 7" src="http://www.carbonsugar.com/wp-content/uploads/2009/10/step7-150x150.jpg" alt="Step 7" width="150" height="150" /></a>When Step 6 is complete before the adhesive sets, you can then build up the diameter of the spigot where it extends inside the mast.  As this section is tapered use 1 layer of carbon reinforcement 150mm long and then a second wrap 75mm long (carbon rectangular strips will be approx 170mm wide – circumference of spigot + 10mm overlap).  Mask the top 50mm of the mast extender to avoid painting with epoxy in the next step.  Give the spigot a light sand and then clean with acetone. Wet-out the carbon with epoxy resin on a film of plastic and then use your bank card to remove the surplus resin.    Apply a light coat of epoxy resin to the surface of the spigot and then lay-up the carbon over the spigot using a gloved hand.  Now you need a strip of clear plastic about 40mm wide that you will wind tightly around the carbon overlapping the proceeding layer by 50%.  If you cannot find plastic, use insulation tape <strong><em>(do not use masking tape – it will stick to the carbon). </em></strong></p>
<p>This plastic/tape clamps the carbon around the spigot to ensure a good adhesion and squeeze out the air and surplus resin that may be entrapped below the carbon.  Do this step carefully so that the carbon threads in the weave remain straight (If you try to tighten too much the carbon layer will twist around the spigot).  Position the lap in the top layer at 90<sup>0 </sup>to the lap in the bottom layer.</p>
<div class="clear"></div>
<h3>Step 8 &#8211; File Me!</h3>
<p><a href="http://www.carbonsugar.com/wp-content/uploads/2009/10/step8.jpg"><img class="alignleft size-thumbnail wp-image-287" title="Step 8" src="http://www.carbonsugar.com/wp-content/uploads/2009/10/step8-150x150.jpg" alt="Step 8" width="150" height="150" /></a>After the epoxy has cured, use a file or sand paper to remove surplus epoxy at the step where the mast touches the mast extender.  It is important to have a well defined step to seat against the bottom of the mast.  Now sand the carbon layers on the spigot until the mast will fit; it is preferable to have a firm fit not sloppy. You will need to sand the lapped areas first to remove high spots.  I find it best to get a strip of sandpaper about 50mm wide, 250mm long and use it like you would polish your shoes (covering half a circumference).</p>
<div class="clear"></div>
<h3>Step 9 &#8211; More Filing.</h3>
<p><a href="http://www.carbonsugar.com/wp-content/uploads/2009/10/step9.jpg"><img class="alignleft size-thumbnail wp-image-288" title="Step 9" src="http://www.carbonsugar.com/wp-content/uploads/2009/10/step9-150x150.jpg" alt="Step 9" width="150" height="150" /></a>When the mast will slide over the spigot check that you have good contact around the full circumference at the step; you may need to use a file to remove any high spots.</p>
<div class="clear"></div>
<h3>Step 10 &#8211; Oh yes!</h3>
<p><a href="http://www.carbonsugar.com/wp-content/uploads/2009/10/step10.jpg"><img class="alignleft size-thumbnail wp-image-289" title="Step 10" src="http://www.carbonsugar.com/wp-content/uploads/2009/10/step10-150x150.jpg" alt="Step 10" width="150" height="150" /></a>Drink your glass of beer.</p>
<div class="clear"></div>
<blockquote><p><strong>SAFETY</strong></p>
<p>Use a pair of disposal gloves to avoid getting epoxy or acetone in contact with your skin.  Step 7 is quite messy as you will have to handle the wet epoxy carbon laminate.  If you get epoxy on your skin it is preferable to use a laundry power to remove the epoxy – not acetone as it is absorbed through your skin and will lodge in you kidneys.</p></blockquote>
<div class="clear2"></div>
<div class="ngg-galleryoverview" id="ngg-gallery-9-268">


	<!-- Thumbnails -->
		
	<div id="ngg-image-53" class="ngg-gallery-thumbnail-box"  >
		<div class="ngg-gallery-thumbnail" >
			<a href="http://www.carbonsugar.com/wp-content/uploads/carbon-extender/IMG_0526.jpg" title=" " class="shutterset_set_9" >
								<img title="Carbon Extender                          " alt="Carbon Extender                          " src="http://www.carbonsugar.com/wp-content/uploads/carbon-extender/thumbs/thumbs_IMG_0526.jpg" width="100" height="75" />
							</a>
		</div>
	</div>


	<div id="ngg-image-54" class="ngg-gallery-thumbnail-box"  >
		<div class="ngg-gallery-thumbnail" >
			<a href="http://www.carbonsugar.com/wp-content/uploads/carbon-extender/IMG_0527.jpg" title=" " class="shutterset_set_9" >
								<img title="Carbon Extender                                                    " alt="Carbon Extender                                                    " src="http://www.carbonsugar.com/wp-content/uploads/carbon-extender/thumbs/thumbs_IMG_0527.jpg" width="100" height="75" />
							</a>
		</div>
	</div>


	<div id="ngg-image-55" class="ngg-gallery-thumbnail-box"  >
		<div class="ngg-gallery-thumbnail" >
			<a href="http://www.carbonsugar.com/wp-content/uploads/carbon-extender/IMG_0528.jpg" title=" " class="shutterset_set_9" >
								<img title=" Carbon Extender                                                  " alt=" Carbon Extender                                                  " src="http://www.carbonsugar.com/wp-content/uploads/carbon-extender/thumbs/thumbs_IMG_0528.jpg" width="100" height="75" />
							</a>
		</div>
	</div>


	<div id="ngg-image-56" class="ngg-gallery-thumbnail-box"  >
		<div class="ngg-gallery-thumbnail" >
			<a href="http://www.carbonsugar.com/wp-content/uploads/carbon-extender/IMG_0529.jpg" title=" " class="shutterset_set_9" >
								<img title="Carbon Extender                                                    " alt="Carbon Extender                                                    " src="http://www.carbonsugar.com/wp-content/uploads/carbon-extender/thumbs/thumbs_IMG_0529.jpg" width="100" height="75" />
							</a>
		</div>
	</div>


	<div id="ngg-image-57" class="ngg-gallery-thumbnail-box"  >
		<div class="ngg-gallery-thumbnail" >
			<a href="http://www.carbonsugar.com/wp-content/uploads/carbon-extender/step1.jpg" title=" " class="shutterset_set_9" >
								<img title="Carbon Extender                  " alt="Carbon Extender                  " src="http://www.carbonsugar.com/wp-content/uploads/carbon-extender/thumbs/thumbs_step1.jpg" width="100" height="75" />
							</a>
		</div>
	</div>


	<div id="ngg-image-58" class="ngg-gallery-thumbnail-box"  >
		<div class="ngg-gallery-thumbnail" >
			<a href="http://www.carbonsugar.com/wp-content/uploads/carbon-extender/web (10).jpg" title=" " class="shutterset_set_9" >
								<img title="Carbon Extender" alt="Carbon Extender" src="http://www.carbonsugar.com/wp-content/uploads/carbon-extender/thumbs/thumbs_web (10).jpg" width="100" height="75" />
							</a>
		</div>
	</div>


	<div id="ngg-image-59" class="ngg-gallery-thumbnail-box"  >
		<div class="ngg-gallery-thumbnail" >
			<a href="http://www.carbonsugar.com/wp-content/uploads/carbon-extender/web (13).jpg" title=" " class="shutterset_set_9" >
								<img title="Carbon Extender" alt="Carbon Extender" src="http://www.carbonsugar.com/wp-content/uploads/carbon-extender/thumbs/thumbs_web (13).jpg" width="100" height="75" />
							</a>
		</div>
	</div>


	<div id="ngg-image-60" class="ngg-gallery-thumbnail-box"  >
		<div class="ngg-gallery-thumbnail" >
			<a href="http://www.carbonsugar.com/wp-content/uploads/carbon-extender/web (2).jpg" title=" " class="shutterset_set_9" >
								<img title="Carbon Extender                          " alt="Carbon Extender                          " src="http://www.carbonsugar.com/wp-content/uploads/carbon-extender/thumbs/thumbs_web (2).jpg" width="100" height="75" />
							</a>
		</div>
	</div>


	<div id="ngg-image-61" class="ngg-gallery-thumbnail-box"  >
		<div class="ngg-gallery-thumbnail" >
			<a href="http://www.carbonsugar.com/wp-content/uploads/carbon-extender/web (20).jpg" title=" " class="shutterset_set_9" >
								<img title="Carbon Extender                          " alt="Carbon Extender                          " src="http://www.carbonsugar.com/wp-content/uploads/carbon-extender/thumbs/thumbs_web (20).jpg" width="100" height="75" />
							</a>
		</div>
	</div>


	<div id="ngg-image-62" class="ngg-gallery-thumbnail-box"  >
		<div class="ngg-gallery-thumbnail" >
			<a href="http://www.carbonsugar.com/wp-content/uploads/carbon-extender/web (21).jpg" title=" " class="shutterset_set_9" >
								<img title="Carbon Extender                          " alt="Carbon Extender                          " src="http://www.carbonsugar.com/wp-content/uploads/carbon-extender/thumbs/thumbs_web (21).jpg" width="100" height="75" />
							</a>
		</div>
	</div>


	<div id="ngg-image-63" class="ngg-gallery-thumbnail-box"  >
		<div class="ngg-gallery-thumbnail" >
			<a href="http://www.carbonsugar.com/wp-content/uploads/carbon-extender/web (5).jpg" title=" " class="shutterset_set_9" >
								<img title="Carbon Extender                          " alt="Carbon Extender                          " src="http://www.carbonsugar.com/wp-content/uploads/carbon-extender/thumbs/thumbs_web (5).jpg" width="100" height="75" />
							</a>
		</div>
	</div>


	<div id="ngg-image-64" class="ngg-gallery-thumbnail-box"  >
		<div class="ngg-gallery-thumbnail" >
			<a href="http://www.carbonsugar.com/wp-content/uploads/carbon-extender/web (6).jpg" title=" " class="shutterset_set_9" >
								<img title="Carbon Extender                          " alt="Carbon Extender                          " src="http://www.carbonsugar.com/wp-content/uploads/carbon-extender/thumbs/thumbs_web (6).jpg" width="100" height="75" />
							</a>
		</div>
	</div>


	<div id="ngg-image-65" class="ngg-gallery-thumbnail-box"  >
		<div class="ngg-gallery-thumbnail" >
			<a href="http://www.carbonsugar.com/wp-content/uploads/carbon-extender/web (7).jpg" title=" " class="shutterset_set_9" >
								<img title="Carbon Extender                          " alt="Carbon Extender                          " src="http://www.carbonsugar.com/wp-content/uploads/carbon-extender/thumbs/thumbs_web (7).jpg" width="100" height="75" />
							</a>
		</div>
	</div>


	<div id="ngg-image-66" class="ngg-gallery-thumbnail-box"  >
		<div class="ngg-gallery-thumbnail" >
			<a href="http://www.carbonsugar.com/wp-content/uploads/carbon-extender/web (8).jpg" title=" " class="shutterset_set_9" >
								<img title="Carbon Extender                          " alt="Carbon Extender                          " src="http://www.carbonsugar.com/wp-content/uploads/carbon-extender/thumbs/thumbs_web (8).jpg" width="100" height="75" />
							</a>
		</div>
	</div>


	<div id="ngg-image-67" class="ngg-gallery-thumbnail-box"  >
		<div class="ngg-gallery-thumbnail" >
			<a href="http://www.carbonsugar.com/wp-content/uploads/carbon-extender/web (9).jpg" title=" " class="shutterset_set_9" >
								<img title="Carbon Extender                          " alt="Carbon Extender                          " src="http://www.carbonsugar.com/wp-content/uploads/carbon-extender/thumbs/thumbs_web (9).jpg" width="100" height="75" />
							</a>
		</div>
	</div>


	<!-- Pagination -->
 	<div class='ngg-clear'></div>
 	
</div>

<p><em>Photos by James Briggs &amp; Sean O&#8217;Brien</em></p>
]]></content:encoded>
			<wfw:commentRss>http://www.carbonsugar.com/construction/the-10-step-carbon-extender/feed/</wfw:commentRss>
		<slash:comments>12</slash:comments>
		</item>
		<item>
		<title>Recovering Lost Races</title>
		<link>http://www.carbonsugar.com/racing/recovering-lost-races/</link>
		<comments>http://www.carbonsugar.com/racing/recovering-lost-races/#comments</comments>
		<pubDate>Mon, 22 Jun 2009 01:45:36 +0000</pubDate>
		<dc:creator>Sean OBrien</dc:creator>
				<category><![CDATA[Advanced Tactics]]></category>
		<category><![CDATA[Racing]]></category>
		<category><![CDATA[_Recent]]></category>
		<category><![CDATA[damage]]></category>
		<category><![CDATA[race]]></category>
		<category><![CDATA[recover]]></category>
		<category><![CDATA[start]]></category>

		<guid isPermaLink="false">http://www.carbonsugar.com/?p=233</guid>
		<description><![CDATA[<p>No doubt, nailing the <a href="http://www.carbonsugar.com/featured/why-your-fw-starts-need-to-be-better/">start</a> of any race is one of the most important factors in winning windsurfing races. Starting well requires great board handling skills, a good knowledge of the conditions and the fastest lanes around the course as well as nerves of steel and a tiny bit of g&#8230;</p>]]></description>
				<content:encoded><![CDATA[<p>No doubt, nailing the <a href="http://www.carbonsugar.com/featured/why-your-fw-starts-need-to-be-better/">start</a> of any race is one of the most important factors in winning windsurfing races. Starting well requires great board handling skills, a good knowledge of the conditions and the fastest lanes around the course as well as nerves of steel and a tiny bit of guts. A great start usually paves the way for a great race as everyone behind you is fighting in your dirty air. But what happens when you <strong>don&#8217;t</strong> get a good start? No matter how much preparation you do, there can always be some unforseable disaster such as other boards crashing around you, sudden drastic wind changes that leave you stuck on the line or even a bit of carelessness on your behalf. So what do you do when you&#8217;re left floundering on the startline after the gun? Do you give up? Or do you shift gears and go on the comeback trail? This article we look at adjusting your game plan to minimise the damage done in a bad start.</p>
<blockquote><p>This article is adapted from a great article in the latest <a href="http://www.yaffa.com.au/cmag/asl.html">Australian Sailing Magazine</a> (June/July 2009). The article was written by 1992 America&#8217;s Cup winning tactician David Dellenbaugh and originally published in Speed &amp; Smarts, a newsletter by David on tactics, rules and boathandling. We have adapted it for Formula Windsurfers.</p></blockquote>
<p>When your position on the race course suddenly goes pear-shaped, it&#8217;s time to change gears and re-adjust your game plan. It&#8217;s important not to throwaway your original race strategy, but consider making a few adjustments:</p>
<h3>Take A Moment</h3>
<p>Before you start punching holes in your sail or sailing back to the beach without so much as even attempting one upwind beat, take a moment to assess your current situation.</p>
<ul>
<li>Is this early or late in the race series?</li>
<li>Do you already have a discard?</li>
<li>How good is your boardspeed in relation to others on the course?</li>
<li>How confident are you in your pre-race strategic plan?</li>
</ul>
<p>Why you should ask yourself these questions is to do with how much &#8220;risk&#8221; you would want to be applying when you get back on the comeback trail in the race. If you already have a few bad discards, it&#8217;s probably not worth risking everything to get back the bullet in this race.</p>
<h3>Evaluate Your Risk</h3>
<p><a href="http://www.carbonsugar.com/wp-content/uploads/2009/06/Arnon.jpg"><img class="alignleft size-medium wp-image-248" title="Arnon Dagan in FW Worlds - Brazil" src="http://www.carbonsugar.com/wp-content/uploads/2009/06/Arnon-300x200.jpg" alt="Arnon Dagan in FW Worlds - Brazil" width="300" height="200" /></a>In any moment in a race, especially when you&#8217;ve had a terrible start, you must decide how much risk to take. Are you willing to go out on a limb and take a flyer out to one far corner of the course? Sure, it might be a winner and you&#8217;re back with the leading pack at the top mark, but it could just as easily be a loser, and you&#8217;ve wasted a chance to get a solid recovery score which will help consolidate your regatta results sheet. As a rule of thumb, when it&#8217;s <strong>early</strong> in the event (depending on how many races will be run at this regatta), you should generally take fewer risks. If you are recovering from a bad start, try to sail to your strengths; if you have good boardspeed, use that with one-on-one tactics to pass each board in front of you at a time. Taking large risks early on in the race can sometimes be a disaster. When you get closer to the finish line (eg, Lap 2) it&#8217;s time to start taking more risks to get the points you need.</p>
<p>A good example of this is if after your bad start, you see most of the fleet heading left on starboard tack. There is a one in three chance (33%) the right side could pay off. These odds are probably not high enough to take the right side on the first beat, however, if you are still doing poorly on the second lap, it might be worth giving the right side a try.</p>
<h3>Minimise The Damage</h3>
<p>Not making simple tactical mistakes is always good, but it&#8217;s even <strong>more </strong>important when you are behind in a race. Usually, the leaders in a race are further spread apart, so taking risks to get from 3rd to 1st doesn&#8217;t have much damage associated with failing. When you are down the back of the fleet, there is much more traffic and dirty air; the boards are usually closer together so small mistakes can result in larger damages.</p>
<p>When you get behind in a start, resist the urge to get frustrated and go for impulsive tactics. Sure, a bit of frustration is great for getting your adrenaline up, but don&#8217;t let it put blinkers on your race strategy. When you are behind, be patient and always pay attention to the boards in front of you to see the mistakes they are making and avoid them. It&#8217;s very easy to pick the best areas of the course for wind when you are watching the boards in front of you sail in to a big hole or a gust. Avoid making mistakes by sticking to your strengths and pass the boards in front of you when they make mistakes.</p>
<h3>Strategy or Tactics?</h3>
<p>When you are playing catch up, another decision you will have to make is whether to focus on strategy (wind shifts) or tactics (other boards). Both are important, but which to favour depends mostly on whereabouts you are in the race. Immediately after a bad start, don&#8217;t worry about other boards, get as quickly as you can to the favoured side of the course and close the distance on the rest of the fleet.</p>
<p>As you get closer to the finish line, the boards are spread out and you begin to run out of time to make large strategic plans. The second lap is when you should switch into tactical mode and start racing the boards immediately around you.</p>
<h3>Don&#8217;t Throw Your Plan Away!</h3>
<p><img class="alignleft size-medium wp-image-239" title="Recovery from a bad start in Formula Windsurfing" src="http://www.carbonsugar.com/wp-content/uploads/2009/06/startline-300x122.jpg" alt="Recovery from a bad start in Formula Windsurfing" width="300" height="122" /></p>
<p>Many sailors often spend a long time before the start of the day&#8217;s racing collecting information out on the course about the wind, current, startline etc to find out which side of the first beat is favoured. But if they get a bad start they often seem very willing to forget about this information and head to the other side of the course. This often doesn&#8217;t make sense. Unless something changed in the start, the side that was favoured before, should still be just as favoured afterwards; if you decide to go to the other side of the course &#8211; you might be putting yourself even further behind!</p>
<p>A common example of this is getting buried on starboard tack on the startline and then tacking on to port to get clear air &#8211; the sailor then usually sails to the right side of the course instead of tacking back on to starboard when he&#8217;s clear of the starting boards (see Figure 1a for a diagram of this). If the right side isn&#8217;t favoured &#8211; why sail to it? One tack should take you roughly 8 seconds, at 8m/sec speed (average planing speed for a FW board) you would only lose 64m. Be aware that on a normal 1200m windward/leeward course (taking 15-20 mins) you would lose MORE than 64m by sailing to the non-favoured side of the course.</p>
<p>If your pre-start race plan said to go left, you might consider changing your mind after a bad start and going right when:</p>
<ul>
<li>You only had a slight preference for the left;</li>
<li>Going right is the only way to get clear air (but it&#8217;s usually a bad sign and a risky strategy, if everyone else is going left); or,</li>
<li>Conditions changed after the pre-start.</li>
</ul>
<h3>End Note</h3>
<p>Racing windsurfers is a very <em>mental</em> game. Very few sports place such a high value on sharp analytical thnking, so it is suprising that sailors don&#8217;t focus more on psychological training (we hope to get some more articles about &#8216;psychology&#8217; on here in the future). A sailor can have the fastest gear and the best fin on the planet, but this doesn&#8217;t help you if you are &#8216;psyched out&#8217; of the starts. It is difficult enough to remain focused when things are going right on the race course, let alone when they go wrong. Take a moment to read through this article again and hopefully having some more informed ideas about &#8216;what to do&#8217; when it all goes pear-shaped, will give you that confidence boost you need to get back in to the race.</p>
<p style="font-size:9px;">Photos by AllegroCup.pl &amp; WindBrasil.com</p>
]]></content:encoded>
			<wfw:commentRss>http://www.carbonsugar.com/racing/recovering-lost-races/feed/</wfw:commentRss>
		<slash:comments>2</slash:comments>
		</item>
		<item>
		<title>The Ultimate FW Board Tuning Guide</title>
		<link>http://www.carbonsugar.com/design/the-ultimate-fw-board-tuning-guide/</link>
		<comments>http://www.carbonsugar.com/design/the-ultimate-fw-board-tuning-guide/#comments</comments>
		<pubDate>Thu, 02 Apr 2009 12:55:22 +0000</pubDate>
		<dc:creator>Sean OBrien</dc:creator>
				<category><![CDATA[Design]]></category>
		<category><![CDATA[Racing]]></category>
		<category><![CDATA[Review]]></category>
		<category><![CDATA[_Featured]]></category>
		<category><![CDATA[_Recent]]></category>
		<category><![CDATA[162]]></category>
		<category><![CDATA[board]]></category>
		<category><![CDATA[Construction]]></category>
		<category><![CDATA[exocet]]></category>
		<category><![CDATA[f2]]></category>
		<category><![CDATA[fins]]></category>
		<category><![CDATA[fwod]]></category>
		<category><![CDATA[gaastra]]></category>
		<category><![CDATA[starboard]]></category>
		<category><![CDATA[tuning]]></category>

		<guid isPermaLink="false">http://www.carbonsugar.com/?p=151</guid>
		<description><![CDATA[<p>In late 2007, the IFWC elected to lock the registration of Formula Boards for 2 years, meaning we&#8217;d all be riding the same boards in 2009 as we had been in 2008. Now, after a full season on the current boards, there exists an unprecedented opportunity to have your board &#8&#8230;</p>]]></description>
				<content:encoded><![CDATA[<p>In late 2007, the IFWC elected to lock the registration of Formula Boards for 2 years, meaning we&#8217;d all be riding the same boards in 2009 as we had been in 2008. Now, after a full season on the current boards, there exists an unprecedented opportunity to have your board &#8216;already&#8217; dialled in for the new 2009 season. So, in order to help you to go faster, here at CarbonSugar we&#8217;ve asked some of the sports&#8217; top professional FW sailors, to share their settings and opinions on the boards they are riding in both 2008 and 2009. Coupled with precise measurements and some inside information about the development of each board, here we present the most comprehensive current formula board tuning guide available anywhere on the internet; everything from mast-track, footstrap and boom positions, to recommended fins and cutout plate strategies. Enjoy!</p>
<p><span id="more-151"></span></p>
<p>There were 8 boards registered with ISAF for use on the FW circuit. These included, the <strong>F2 FX-Z/FX-VI</strong>, <strong>Mike&#8217;s Lab L8</strong>, <strong>Starboard F162/Apollo</strong>, <strong>Gaastra Vapor</strong>, <strong>Lorch Thunderbird Formula F1</strong> and the <strong>Exocet Warp Formula 100</strong>. We haven&#8217;t had access to all of these boards as some of them weren&#8217;t available in the countries we tested in or weren&#8217;t properly represented on the FW Pro Circuit during 2008, so for the purpose of this tuning guide we&#8217;ve only reviewed the more mainstream and widely available of the boards which included, Starboard F162, Gaastra Vapor, F2 FX-Z/FX-VI, Exocet Warp Formula 100.</p>
<p>The riders interviewed for this tuning guide include:</p>
<div class="content">
<ul>
<li>Jesper Vesterstrøm (DEN-111)</li>
<li>Gonzalo Costa-Hoevel (ARG-3)</li>
<li>Steve Allen (AUS-0)</li>
<li>Sean O&#8217;Brien (AUS-120)</li>
<li>Allison Shreeve (AUS-911)</li>
<li>Dennis Littel (NED-13)</li>
<li>Markus Bouman (NED-6)</li>
<li>Steve Bodner (USA-4)</li>
</ul>
</div>
<p></p>
<table class="wptable rowstyle-alt" id="wptable-3"  cellspacing="1" cellpadding="1">
	<thead>
	<tr>
		<th class="sortable" style="width:170px" align="left">BOARD<br />MODEL</th>
		<th class="sortable" style="width:120px" align="center">Gaastra<br />Vapor</th>
		<th class="sortable" style="width:120px" align="center">Starboard<br />F162</th>
		<th class="sortable" style="width:120px" align="center">Exocet<br />Warp</th>
		<th class="sortable" style="width:100px" align="center">F2 FX-Z</th>
		<th class="sortable" style="width:100px" align="center">F2 FX-VI</th>
	</tr>
	</thead>
	<tr>
		<td style="width:170px" align="left"><strong>Width at 30cm off</strong></td>
		<td style="width:120px" align="center">813mm</td>
		<td style="width:120px" align="center">821mm</td>
		<td style="width:120px" align="center">833mm</td>
		<td style="width:100px" align="center">-</td>
		<td style="width:100px" align="center">-</td>
	</tr>
	<tr class="alt">
		<td style="width:170px" align="left"><strong>Mast-track (from back)</strong></td>
		<td style="width:120px" align="center">1260mm</td>
		<td style="width:120px" align="center">1265mm</td>
		<td style="width:120px" align="center">1295mm</td>
		<td style="width:100px" align="center">-</td>
		<td style="width:100px" align="center">1230mm</td>
	</tr>
	<tr>
		<td style="width:170px" align="left"><strong>Mast-track Length</strong></td>
		<td style="width:120px" align="center">170mm</td>
		<td style="width:120px" align="center">170mm</td>
		<td style="width:120px" align="center">170mm</td>
		<td style="width:100px" align="center">-</td>
		<td style="width:100px" align="center">170mm</td>
	</tr>
	<tr class="alt">
		<td style="width:170px" align="left"><strong>Finbox (from back)</strong></td>
		<td style="width:120px" align="center">90mm</td>
		<td style="width:120px" align="center">90mm</td>
		<td style="width:120px" align="center">99mm</td>
		<td style="width:100px" align="center">-</td>
		<td style="width:100px" align="center">70mm</td>
	</tr>
	<tr>
		<td style="width:170px" align="left"><strong>Flat (from back)</strong></td>
		<td style="width:120px" align="center">600mm</td>
		<td style="width:120px" align="center">640mm*</td>
		<td style="width:120px" align="center">755mm</td>
		<td style="width:100px" align="center">-</td>
		<td style="width:100px" align="center">-</td>
	</tr>
	<tr class="alt">
		<td style="width:170px" align="left"><strong>Cutouts (at centre)</strong></td>
		<td style="width:120px" align="center">14mm</td>
		<td style="width:120px" align="center">10mm</td>
		<td style="width:120px" align="center">-</td>
		<td style="width:100px" align="center">-</td>
		<td style="width:100px" align="center">55mm</td>
	</tr>
	<tr>
		<td style="width:170px" align="left"><strong>30cm off (Vee/Concave)</strong></td>
		<td style="width:120px" align="center">5mm / 7mm</td>
		<td style="width:120px" align="center">0.5mm / 2.7mm</td>
		<td style="width:120px" align="center">4.5mm / 1.2mm</td>
		<td style="width:100px" align="center">-</td>
		<td style="width:100px" align="center">-</td>
	</tr>
	<tr class="alt">
		<td style="width:170px" align="left"><strong>90cm off</strong></td>
		<td style="width:120px" align="center">11.5mm / 5mm</td>
		<td style="width:120px" align="center">3.8mm / 5mm</td>
		<td style="width:120px" align="center">9.5mm / 2.3mm</td>
		<td style="width:100px" align="center">-</td>
		<td style="width:100px" align="center">-</td>
	</tr>
	<tr>
		<td style="width:170px" align="left"><strong>120cm off</strong></td>
		<td style="width:120px" align="center">13mm / 7mm</td>
		<td style="width:120px" align="center">10mm / 3.5mm</td>
		<td style="width:120px" align="center">14.5mm / 4.5mm</td>
		<td style="width:100px" align="center">-</td>
		<td style="width:100px" align="center">-</td>
	</tr>
	<tr class="alt">
		<td style="width:170px" align="left"><strong>40cm from front</strong></td>
		<td style="width:120px" align="center">14mm / 9mm</td>
		<td style="width:120px" align="center">14.5mm / 2mm</td>
		<td style="width:120px" align="center">0mm / 2.2mm</td>
		<td style="width:100px" align="center">-</td>
		<td style="width:100px" align="center">-</td>
	</tr>
	<tr>
		<td style="width:170px" align="left"><strong>2mm Scoop</strong></td>
		<td style="width:120px" align="center">1010mm</td>
		<td style="width:120px" align="center">-</td>
		<td style="width:120px" align="center">1060mm</td>
		<td style="width:100px" align="center">-</td>
		<td style="width:100px" align="center">-</td>
	</tr>
	<tr class="alt">
		<td style="width:170px" align="left"><strong>12mm Scoop</strong></td>
		<td style="width:120px" align="center">1320mm</td>
		<td style="width:120px" align="center">-</td>
		<td style="width:120px" align="center">1400mm</td>
		<td style="width:100px" align="center">-</td>
		<td style="width:100px" align="center">-</td>
	</tr>
	<tr>
		<td style="width:170px" align="left"><strong>20mm Scoop</strong></td>
		<td style="width:120px" align="center">-</td>
		<td style="width:120px" align="center">-</td>
		<td style="width:120px" align="center">1510mm</td>
		<td style="width:100px" align="center">-</td>
		<td style="width:100px" align="center">-</td>
	</tr>
	<tr class="alt">
		<td style="width:170px" align="left"><strong>Volume (L)</strong></td>
		<td style="width:120px" align="center">156</td>
		<td style="width:120px" align="center">160</td>
		<td style="width:120px" align="center">158</td>
		<td style="width:100px" align="center">155</td>
		<td style="width:100px" align="center">150</td>
	</tr>
	<tr>
		<td style="width:170px" align="left"><strong>Registered Weight</strong></td>
		<td style="width:120px" align="center">9.35kg</td>
		<td style="width:120px" align="center">9.22kg</td>
		<td style="width:120px" align="center">8.3kg</td>
		<td style="width:100px" align="center">9.3kg</td>
		<td style="width:100px" align="center">9.4kg</td>
	</tr>
	<tr class="alt">
		<td style="width:170px" align="left"><strong>Length</strong></td>
		<td style="width:120px" align="center">230cm</td>
		<td style="width:120px" align="center">228cm</td>
		<td style="width:120px" align="center">233cm</td>
		<td style="width:100px" align="center">230cm</td>
		<td style="width:100px" align="center">230cm</td>
	</tr>
</table><p>
</p>
<p><em>* right now, we haven&#8217;t been able to get access to any of the new F2 boards for measurement. If someone would like to supply these measurements, that would be great! Email them to </em><a href="mailto:seanobrien@aus120.com"><em>Sean</em></a><em>. </em></p>
<blockquote><p><strong>IMPORTANT NOTE:</strong></p>
<p>We&#8217;ve supplied fin suggestions based on the fins the riders have previously tried with the boards. Its possibly that many different styles of fins will work with each board. We&#8217;re not suggesting you need have one of the suggested fins or you are wasting your time, merely that if you had already decided to buy a fin, here&#8217;s some helpful suggestions on model. We&#8217;ve tried to suggest a model from each brand but obviously not every fin was available to every rider. Consult your fin maker for more specifics before making a decision.</p>
<p>Mast-track settings and boom-height will change dramatically based on the fin you are using. We have given the settings as a &#8216;guide&#8217; only. Start with our settings and then make adjustments to your own preferences and sailing styles.</p></blockquote>
<h3>Starboard F162 / FWOD</h3>
<p><a href="http://www.carbonsugar.com/wp-content/uploads/2009/03/formula162.jpg"></a><a href="http://www.carbonsugar.com/wp-content/uploads/2009/03/formula162-fwod.jpg"><img class="alignleft size-medium wp-image-162" title="Starboard F162 Formula Board" src="http://www.carbonsugar.com/wp-content/uploads/2009/03/formula162-fwod-141x300.jpg" alt="Starboard F162 Formula Board" width="141" height="300" /></a></p>
<p>Starboard released two versions of their F162 board. The second version, released mid way through 2008, was an identical board given the graphics of FWOD (Formula Windsurfing One-Design, pictured left) as Starboard made a bid to create the new Olympic Windsurfing equipment for the 2012 Olympics. Although Starboard always maintained the shapes were identical, there was some speculation that the rocker lines were changed on the newer FWOD versions (weweren&#8217;t able to find this on the boards we measured however) to give them less flat towards the tail however, the main feature riders will notice is that the new F162&#8242;s or FWOD versions, sport a thicker grey paint and logo on the bottom of the board, either to stay with ISAF&#8217;s policies on Olympic equipment being difficult to modify by sanding or to help with early problems they had with the board with the veneer of the bottom of the boards weeping.</p>
<p>The F162 came under early criticism from the general public on the windsurfing forums that the board wasn&#8217;t performing well compared to its competitor&#8217;s boards, however, after a 12 months on the market it would appear now that it was just a case of sailors not realising how different this board was to its predecessors and not tuning the board correctly.</p>
<p><strong><span style="color: #000000;">BOARD DESIGN / CHARACTERISTICS:</span></strong></p>
<p>Compared to the F160/F161 Starboards, the new F162 is considerably wider in the tail and has a wider and thinner nose, with considerably less nose-rocker leading up to the front of the board. The concept behind the thinner and flatter nose, was to aid with the &#8216;sticking&#8217; problems that the 160 and to some extent the 161 had downwind, whereby the big and bulky noses of these boards would catch each wave and slow the board down. This new nose has been quite successful in improving downwind speed on the F162 even with the wider tail, which although helps immensely with upwind ability, the wider the tail, the more wetted surface-area you are dragging downwind.</p>
<p>This board sails incredibly &#8216;flat&#8217;, meaning that the nose sticks to the water and the board feels very rigid and stiff under your feet.  Because of the flat nose-rocker, you need to be mindful of always trying to set up your gear to keep the nose clear of the water. Even with good rail pressure, without the nose lifting you can produce too much leeward rail engagement, which slows the board down. As a result, the best tuning settings are ones that free the nose and help to rail the board.</p>
<p><strong><span style="color: #000000;">FINS:</span></strong></p>
<p>No doubt, with the &#8216;flat&#8217; characteristics this board has when it sails makes fin choice a lot more critical then previous Starboard boards. The F162 requires an extremely powerful fin to help rail the board and lift the nose to get the board to &#8216;free up&#8217; and stop sticking to the water. Don&#8217;t mistake a powerful fin for simply just an &#8216;upright&#8217; fin; <a href="http://www.carbonsugar.com/design/everything-you-should-know-about-fw-fins/">these are two different things</a>. What the board requires is a powerful fin and the best way to do this is to try fins with little to no &#8216;geometric twist&#8217; and torsionally stiff. The best fins showing these characteristics are the <strong>Kashy XS/XXS</strong>, <strong>VMG Blades &#8216;K&#8217; model </strong>and <strong>Hurricane FRB6</strong> with &#8217;0&#8242; twist. During testing this board we found the Deboichet R20 not powerful enough to keep the nose of the board lifting.</p>
<p>The fins we recommended for this board are currently:<br />
{column1}<br />
<span style="color: #000000;"><strong>Light Winds</strong></span>:</p>
<p>- Kashy 72/70 XS<br />
- Ifju LWXS 70*<br />
- VMG Blades K76/70<br />
- Hurricane FRB6 &#8217;680&#8242; S- 72/70<br />
{/column1}</p>
<p>{column2}<br />
<span style="color: #000000;"><strong>Strong Winds</strong></span>:</p>
<p>- Kashy 70cm XS<br />
- Ifju LWXS 70<br />
- VMG Blades K70<br />
- Hurricane FRB6 &#8217;680&#8242; S- 70</p>
<p>{/column2}</p>
<p><em> *We hadn&#8217;t tried a cutdown Ifju at the time of testing. But presumably they would be as good as the 70. </em></p>
<p><img class="alignright size-medium wp-image-166" title="Starboard F162 Formula Board" src="http://www.carbonsugar.com/wp-content/uploads/2009/03/formula1622-144x300.jpg" alt="Starboard F162 Formula Board" width="144" height="300" /></p>
<p>In lightwinds, the tail width of this board will allow cutdown fins up to 72/76cm however most of the riders using this board used 72/74cm fins. The board requires a lot of power both from your fin and also from your sail, so it is recommended in light/medium winds to always use the biggest sail possible. Pro rider Jesper Vesterstrøm suggested he used his 11.8m sail up to 18 knots which is higher than other riders on other boards.  The extra power from your sail will help generate the lift the board needs to rail and also help power the bigger cutdown fins you are using.</p>
<p><strong><span style="color: #000000;">MAST-TRACK and STRAP POSITIONS:</span></strong></p>
<p>This board sails very flat, so to counteract this characteristic you need to get all the power and leverage towards the back of the board. Start with the mast-track all the way in the back (with your plate covering the serial number even) and straps in the back holes (front and back straps). Your boom height will depend on your style, however it is recommended to use as higher boom height as possible to help lift the nose of the board. Using larger cutdown fins, may cause the nose to sit lower in the water due to the amount of vertical-lift they produce; having a high boom, straps and mast-track back will help to counteract the fin and the boards insitence to keep sailing flat.</p>
<p>In stronger winds, the mast-track can be moved forward to aid with control, however it is not recommended to go much further than the middle of the track, even in hurricane conditions.</p>
<p></p>
<table class="wptable rowstyle-alt" id="wptable-8"  cellspacing="1" cellpadding="1">
	<thead>
	<tr>
		<td style="width:80px" >&nbsp;</td>
		<th class="sortable" style="width:30px" align="center">FOOTSTRAPS</th>
		<th class="sortable" style="width:100px" align="center">MAST-TRACK</th>
		<th class="sortable" style="width:20px" align="center">FIN SIZE</th>
		<th class="sortable" style="width:30px" align="center">BOOM HEIGHT</th>
	</tr>
	</thead>
	<tr>
		<td style="width:80px" align="center"><strong>Front Strap</strong></td>
		<td style="width:30px" align="center">Back hole</td>
		<td style="width:100px" align="center">-</td>
		<td style="width:20px" align="center">-</td>
		<td style="width:30px" align="center">-</td>
	</tr>
	<tr class="alt">
		<td style="width:80px" align="center"><strong>Back Strap</strong></td>
		<td style="width:30px" align="center">Back hole</td>
		<td style="width:100px" align="center">-</td>
		<td style="width:20px" align="center">-</td>
		<td style="width:30px" align="center">-</td>
	</tr>
	<tr>
		<td style="width:80px" align="center"><strong>Light Winds</strong></td>
		<td style="width:30px" align="center">-</td>
		<td style="width:100px" align="center">Very back</td>
		<td style="width:20px" align="center">72-76cm</td>
		<td style="width:30px" align="center">Top of head</td>
	</tr>
	<tr class="alt">
		<td style="width:80px" align="center"><strong>Strong Winds</strong></td>
		<td style="width:30px" align="center">-</td>
		<td style="width:100px" align="center">2cm back from middle</td>
		<td style="width:20px" align="center">68/70cm</td>
		<td style="width:30px" align="center">Top of head</td>
	</tr>
</table><p>
</p>
<p>Overall, this is a very comfortable board to sail and the specified weights of the boards we measured were all within tolerances. It may require a little bit more tuning than other boards if you have been riding the previous Starboard FW boards as the F162 is a very different animal to its predecessors.</p>
<h3>Gaastra Vapor Racing</h3>
<p><a href="http://www.carbonsugar.com/wp-content/uploads/2009/03/gaastravapor1.jpg"><img class="alignleft size-medium wp-image-173" title="Gaastra Vapor Board" src="http://www.carbonsugar.com/wp-content/uploads/2009/03/gaastravapor1-166x300.jpg" alt="Gaastra Vapor Board" width="166" height="300" /></a>Gaastra entered the Formula Board market quite late, with the Vapor Racing 2008 board their first ever FW board. Shaped by Tabou shaper Fabien Vollenweider and developed by Steve Allen (AUS-0) and Hubert Mokrzycki (POL-25), Gaastra were pretty quick to snag a good market share of the FW boards sold in 2008, even if it took them 10 months to acknowledge the board even existed on their website!</p>
<p><strong><span style="color: #000000;">BOARD DESIGN / CHARACTERISTICS:</span></strong></p>
<p>We&#8217;ve written a more in depth review of the Gaastra board which you can <a href="http://www.carbonsugar.com/design/the-new-gaastra-vapor-fw-board/">read here</a>, however, the fins have changed immensely since that article was published and we recommend using the settings mentioned below rather than in the previous review.</p>
<p>The general characteristics of the Vapor board are that its got a nice amount of scoop-rocker, a very wide tail, similar (which we like!) cutouts to the F162 and a very well designed nose which has just the right amount of vee/concave and thin outline built in to it to make this board a real performer downwind, even in strong winds.</p>
<p>The board arguably feels similar under the feet to a Starboard F160, however, with the wider tail, the board feels much more &#8216;free&#8217; even in light winds. It is a very &#8216;aggressive&#8217; board, meaning that the nose rides high in the water and the board feels very twitchy and responsive under your feet. Although, there will be no problems with control, even in high winds, with this board, the general ride characteristics are that the board is extremely loose and &#8216;flighty&#8217; with the nose being lifted easily and fin/rail pressure being generated easily. All the tuning settings for this board are to keep the nose tracking straight without bobbing up and down which is can do with the wrong mast-track position. This is one of the few boards that is not very fin specific, almost any fin will work and feel comfortable with the board, which is a great attribut to its design.</p>
<p><strong><span style="color: #000000;">FINS:</span></strong></p>
<p>As we mentioned, this board works well with almost any from an old Deboichet R13 up to the latest Kashy/VMG etc super soft fins. With the very forgiving feeling this board has in high winds and the safety the nose of this board creates when sailing downwind in big swell, it will be possible to use much larger fins in higher winds with the Vapor board. We found the best fins suited to this board are the newer, much softer, swept-back fins such as <strong>Kashy</strong>, <strong>VMG Blades</strong>, <strong>Deboichet R20</strong> and <strong>Hurricane FRB6</strong> as these fins create a bit of vertical lift under the board which helps to keep the nose down a little and under control.</p>
<p>Different to the Starboard F162, you don&#8217;t need as much power from the fin to generate rail pressure with this board, so we recommend getting fins with maximum amount of twist in the tip which will help depower and settle the board down when the fin loads up in high winds and will also allow a much more comfortable and smooth ride downwind at deeper angles.</p>
<p>The fins we recommended for this board are currently:<br />
{column1}<br />
<span style="color: #000000;"><strong>Light Winds</strong></span><strong>: </strong></p>
<p>- Kashy 74/70 XS<br />
- Ifju LWXS<br />
- VMG Blades K76/70 (Gaastra model)<br />
- Hurricane FRB6 &#8217;682&#8242; S- 72/70<br />
- Deboichet R20<br />
{/column1}</p>
<p>{column2}</p>
<p><span style="color: #000000;"><strong>Strong Winds</strong></span>:</p>
<p>- Kashy 70cm XS<br />
- Ifju LWXS<br />
- VMG Blades K73 or K70 (Gaastra model)<br />
- Hurricane FRB6 &#8217;682&#8242; S- 70<br />
- Deboichet R20<br />
{/column2}</p>
<p><strong><span style="color: #000000;">MAST-TRACK and STRAP POSITIONS:</span></strong></p>
<p>With a 12m sail, the mast-track should sit in the middle of the track. Any further back and you begin to stall the board as it does not require the track so far back to lift the nose, the shape of the board does this automatically. As it is quite an aggressive board, when the wind gets up you need to move the track forward to keep control of the nose. With the track 2-3cm further forward than centre, the board comes in to its own in strong winds, with a very comfortable and easy ride, despite how responsive the board feels under your feet. It might be possible to stay in the outside straps in strong winds much longer on this board compared with any other, due to its nose shape and wide tail. Straps should always be in the back holes on this board and boom height needs to be as high as comfortable.</p>
<p>We recommend running a higher boom and mast-track further forward to keep the nose at the optimum control level. If you were to move your mast-track further back than middle (to help lift the nose) and then run your boom lower to compensate, the board seems to &#8216;stall&#8217; a little and be slower to get planing.</p>
<p></p>
<table class="wptable rowstyle-alt" id="wptable-7"  cellspacing="1" cellpadding="1">
	<thead>
	<tr>
		<td style="width:80px" >&nbsp;</td>
		<th class="sortable" style="width:30px" align="center">FOOTSTRAPS</th>
		<th class="sortable" style="width:100px" align="center">MAST-TRACK</th>
		<th class="sortable" style="width:20px" align="center">FIN SIZE</th>
		<th class="sortable" style="width:30px" align="center">BOOM HEIGHT</th>
	</tr>
	</thead>
	<tr>
		<td style="width:80px" align="center"><strong>Front Strap</strong></td>
		<td style="width:30px" align="center">Back hole</td>
		<td style="width:100px" align="center">-</td>
		<td style="width:20px" align="center">-</td>
		<td style="width:30px" align="center">-</td>
	</tr>
	<tr class="alt">
		<td style="width:80px" align="center"><strong>Back Strap</strong></td>
		<td style="width:30px" align="center">Back hole</td>
		<td style="width:100px" align="center">-</td>
		<td style="width:20px" align="center">-</td>
		<td style="width:30px" align="center">-</td>
	</tr>
	<tr>
		<td style="width:80px" align="center"><strong>Light Winds</strong></td>
		<td style="width:30px" align="center">-</td>
		<td style="width:100px" align="center">middle</td>
		<td style="width:20px" align="center">76cm</td>
		<td style="width:30px" align="center">Top of head</td>
	</tr>
	<tr class="alt">
		<td style="width:80px" align="center"><strong>Strong Winds</strong></td>
		<td style="width:30px" align="center">-</td>
		<td style="width:100px" align="center">3cm in front of middle</td>
		<td style="width:20px" align="center">70cm</td>
		<td style="width:30px" align="center">Eye height</td>
	</tr>
</table><p>
</p>
<p>Overall, Gaastra have done a very good job providing one of the few boards this season that is as fast as it is easy to sail and tune. Any fin, any sail and any sized rider will suit this board.</p>
<h3>Exocet Warp Formula 100</h3>
<p><a href="http://www.carbonsugar.com/wp-content/uploads/2009/03/exocet.jpg"><img class="alignleft size-medium wp-image-180" title="Exocet Warp Formula 100 Formula Board" src="http://www.carbonsugar.com/wp-content/uploads/2009/03/exocet-132x300.jpg" alt="Exocet Warp Formula 100 Formula Board" width="132" height="300" /></a>It was said that Exocet&#8217;s Patrice Belbeoch developed the Warp Formula 100 entirely on his own without testing against another rider or another board brand. Whether that is true or not, Patrice certainly came up with a very different board for the 2008 season, turning away from trends or copying other designs and creating one of the most talked about boards in 2008. With its slick carbon look and black paint, the new Exocet, aka the &#8220;Black Machine&#8221; turned a few heads this year when Argentinian rider Gonzalo Costa-Hoevel ended his long-term deal with F2 to ride the new Exocet.</p>
<p><span style="color: #000000;"><strong>BOARD DESIGN / CHARACTERISTICS:</strong></span></p>
<p>The first thing to notice about this board is the weight. At its ISAF registered weight, the Warp Formula is nearly 1kg lighter than than any other board on the market and we&#8217;ve found by weighing a number of different boards the gap could even be more than 1kg.</p>
<p>Much like the F162, the Exocet sails extremely flat, with the nose sticking to the water, however this characteristic is due much more to the underside of the board&#8217;s shape. There is very little rocker and concave in this board and very little nose-rocker towards the front. Exocet have widened the tail of this board immensely and the Exocet has become the widest tailed board behind the new F2&#8242;s, with an extra 1cm over the F162 and 2cm over the Vapor at the 30cm off mark.</p>
<p>The board has a similar sailing feeling to the F162 upwind in that the board sails incredibly &#8216;flat&#8217; with the nose sticking to the water, however it feels a lot more stiff and rigid under your feet than the F162, probably due to the wider tail and flatter rockerline. With the super light weight, the board planes up considerably earlier than other boards with an 11m sail and has extremely good upwind angles in lightwind with its flat bottom shape. The nose appears to stick a little downwind in stronger breezes however this can be fine-tuned with the right fins and setup.</p>
<p><span style="color: #000000;"><strong><span style="color: #000000;">FINS:</span></strong></span></p>
<p>Much like the Vapor board, the Exocet&#8217;s strengths are that it appears to suit a variety of fins. Everything from older R13 fins up to the latest Kashy/VMG etc super soft fins. The extra width in the tail allows the rider to use a big fin in stronger breezes however the fin must be working to help lift the nose of the board otherwise it could be counter-productive. Different fins give this board a different riding style. Using more traditional fins such as the R13, the board feels incredibly stiff under your feet and generates a lot of lift and speed upwind. As the R13 is a fin that generates a lot of &#8216;railing&#8217; very easily downwind, we found this fin to give almost the best performance downwind in a variety of windstrengths as it helped rail the board which could clear the &#8216;sucking&#8217; nose of swells and also reduce the wetted surface area of the board downwind; decreasing drag.</p>
<p>Despite what fin you decide to use, the fin needs to have considerably less rake than other board models. A fin that is less upright will help to lift the nose of the board and may also generate a little more geometric twist in the fin which can help with speed downwind and giving the board a more comfortable ride downwind.</p>
<p>The fins we recommended for this board are currently:<br />
{column1}<br />
<span style="color: #000000;"><strong>Light Winds</strong></span><strong>: </strong></p>
<p>- Kashy 72/70 XS (rake 4.5 deg)<br />
- VMG Blades K73/70 (rake 5 deg)<br />
- Deboichet R13 S&#8211; 70 (rake +4)<br />
- Deboichet R20 70 (rake +4)<br />
{/column1}</p>
<p>{column2}</p>
<p><span style="color: #000000;"><strong><span style="color: #000000;">Strong Winds</span></strong></span><strong><span style="color: #000000;">:</span></strong></p>
<p>- Kashy 72/70 XS (rake 4.5 deg)<br />
- VMG Blades K70 or K68 (rake 5 deg)<br />
- Deboichet R13 S&#8211; 70 (rake +4)<br />
- Deboichet R20 70 (rake +4)<br />
{/column2}</p>
<p><strong><span style="color: #000000;">MAST-TRACK and STRAP POSITIONS:</span></strong></p>
<p>The mast-track on this board needs to be run as far back as possible at all times; even in strong winds. The same goes for the footstraps. The reason being, upwind you need to release the nose of the board and having your setup all in the back with maximum pressure on your fin will help to generate the rail pressure needed to lift the nose of the board. Downwind, this board is susceptible to the nose catching waves and slowing down. To counteract this you must get your weight centralised over the back of the board and aggresively rail the board with your feet. Hitting the swell at an angle, whilst the board is extremely railed, will help reduce drag and improve your speed downwind. Fin choice will help with this and one of the main reasons we&#8217;ve included the R13 fin with this board is that it is arguably the best fin to generate the rail pressure needed to rail this board downwind and &#8216;fly the fin&#8217;.</p>
<p>On another note, there has been mixed responses as to whether this smaller, lighter board can handle a 12m. The Exocet feels lower on volume than other boards on the market (even though on paper, it is even bigger than some of the other baords) because the overall thickness of the board is less at the the tail and the flatter rockline makes the board appear to sit lower in the water. Although, Gonzalo has been using 12m successfully in light winds in the early part of this season, some heavier riders might find this board a little harder to get planing with the bigger rigs because the board will stall when the nose is pushed down during pumping.</p>
<p></p>
<table class="wptable rowstyle-alt" id="wptable-6"  cellspacing="1" cellpadding="1">
	<thead>
	<tr>
		<td style="width:80px" >&nbsp;</td>
		<th class="sortable" style="width:30px" align="center">FOOTSTRAPS</th>
		<th class="sortable" style="width:100px" align="center">MAST-TRACK</th>
		<th class="sortable" style="width:20px" align="center">FIN SIZE</th>
		<th class="sortable" style="width:30px" align="center">BOOM HEIGHT</th>
	</tr>
	</thead>
	<tr>
		<td style="width:80px" align="center"><strong>Front Strap</strong></td>
		<td style="width:30px" align="center">Back hole</td>
		<td style="width:100px" align="center">-</td>
		<td style="width:20px" align="center">-</td>
		<td style="width:30px" align="center">-</td>
	</tr>
	<tr class="alt">
		<td style="width:80px" align="center"><strong>Back Strap</strong></td>
		<td style="width:30px" align="center">Back hole</td>
		<td style="width:100px" align="center">-</td>
		<td style="width:20px" align="center">-</td>
		<td style="width:30px" align="center">-</td>
	</tr>
	<tr>
		<td style="width:80px" align="center"><strong>Light Winds</strong></td>
		<td style="width:30px" align="center">-</td>
		<td style="width:100px" align="center">Very back</td>
		<td style="width:20px" align="center">72cm</td>
		<td style="width:30px" align="center">Top of head</td>
	</tr>
	<tr class="alt">
		<td style="width:80px" align="center"><strong>Strong Winds</strong></td>
		<td style="width:30px" align="center">-</td>
		<td style="width:100px" align="center">Very back</td>
		<td style="width:20px" align="center">70cm</td>
		<td style="width:30px" align="center">Top of head</td>
	</tr>
</table><p>
</p>
<p>Overall, Exocet have done a great job with this board and provided an interesting competitor to the F162, Vapor and F2 boards. This board, might have more advantages for lighter riders as it &#8216;may&#8217; have more potential for early planing used with an 11m sail in lighter winds. It is a very easy board to sail/trim upwind however might require a bit more tuning downwind to get the best speed out of the board.</p>
<h3>F2 FX-Z</h3>
<p><a href="http://www.carbonsugar.com/wp-content/uploads/2009/03/f2-z.jpg"><img class="alignleft size-medium wp-image-206" title="F2 - FX-Z Formula Board" src="http://www.carbonsugar.com/wp-content/uploads/2009/03/f2-z-135x300.jpg" alt="F2 - FX-Z Formula Board" width="135" height="300" /></a>F2 did something unusual in response to the IFWC&#8217;s two-year board design lock; they registered two boards, with the FX-VI being produced early on for the 2008 season and the FX-Z only being made available to the &#8216;general&#8217; consumer much later in the 2008 season. Although the boards share some common characteristics, they are two different boards, with F2 shaper Patrik Diethelm working with Gonzalo Costa-Hoevel on the boards before Gonzalo switched to the Exocet team halfway through 2008. The boards appear to have followed two completely different development paths, each following on from the 2006 and the 2007 F2 boards, which were very different in concept.</p>
<p>For the purpose of describing the general characteristics, we will describe both the FX-Z and FX-VI at once.</p>
<p><span style="color: #000000;"><strong><span style="color: #000000;">BOARD DESIGN / CHARACTERISTICS:</span></strong></span></p>
<p>Compared to the other boards on the market, the major design feature of the F2&#8242;s is their incredibly wide tails, with the Z being slightly wider than the VI and both being almost 5cm wider than any other board at the one foot off mark. Both boards sport a very rounded outline in their tail and a lower overall scoop-rocker than previous F2 boards which allows them to have good early planing ability despite the drag of the extra tail width.</p>
<p>Looking at both the boards, they appear very square as the tail is almost the width of the nose, but on the water is where they show their abilities. Both boards have a very &#8216;aggressive&#8217; sailing style which is a little bit more technical to sail comfortably than other boards on the market. The F2 boards are easily railed with their flat vee section in the tail and very sharp rails in the middle however this can also make the boards feel very &#8216;flighty&#8217; in stronger winds and chop and more mast-track forward pressure is needed to keep the nose down.</p>
<p>It is probably a fair comment that these are both &#8216;lightwind&#8217; specialist boards. With the added tail width, it&#8217;s possible to run fins bigger than ever before (Pro Rider Dennis Littel used an 83cm cutdown Kashy fin in light winds with the FX-Z in 2008) as the added leverage from the board&#8217;s tail width allows greater control. The majority of riders will be using much larger cutdown fins in 2009 as large (+76cm) cutdowns are still relatively new on the market. To some extent, the F2 boards have helped drive the need for bigger cutdown fins in other boards on the market.</p>
<p>In stronger winds these boards can become a little more difficult to sail as they require a taller and heavier rider who can use their height to leverage over the board to keep control and stop the board from flying the nose; especially downwind. Of course, the wider the tail the more leverage you get against the fin but also more drag you get whilst sailing. It is a tough comprimise with these F2 boards as they definitely have the best lightwind abilities of any board on the market this year but at the expense of being more difficult in stronger winds and a little more technical to keep the speed up downwind as the tail seems to suck a little on the downwind legs.</p>
<p>F2 recommends the VI as the choice for lighter sailors and the Z for heavier/taller sailors. This is a good recommendation as generally speaking, most of the taller, heavier riders on the tour used the Z versus the smaller guys using the VI when they had both to choose from.</p>
<p><strong><span style="color: #000000;">BOOSTER PIPES / CUTOUT PLATES:</span></strong></p>
<p><a href="http://www.carbonsugar.com/wp-content/uploads/2009/04/f2-vi.jpg"><img class="size-full wp-image-212 alignright" title="F2 FX-VI Formula Board 2009" src="http://www.carbonsugar.com/wp-content/uploads/2009/04/f2-vi.jpg" alt="F2 FX-VI Formula Board 2009" width="156" height="338" /></a>As usual, the F2&#8242;s sport the booster pipes and adjustable cutout plates to help with the tuning difficulties downwind. The concept behind the booster pipes and cutout plates have always generated a lot of discussion in the FW world and many theories are out there as to their effectiveness. Originally, when the pipes were brought in to their FW and slalom range in 2006, F2 stated that the pipes were to eliminate the vacuum created in the large tail cutouts while travelling at speed. From testing the boards in the past seasons that have used the pipes, its been more apparent that the pipes play a better role in reducing the vacuum at low speeds especially when trying to pump on to the plane. The same can be said for the current boards, as the tail width does have the propencity to &#8216;suck&#8217; to the water whilst trying to initiate planing.</p>
<p>The cutout plates, give the rider four options (with plastic ringed spacers allowing the adjustments) by either using no plates, or putting 1-3 rings in between them to make the cutout depth smaller. All of our test riders found the board performed best with 2 rings in on both boards; in either strong or light winds, upwind or downwind.</p>
<p><span style="color: #000000;"><strong><span style="color: #000000;">FINS:</span></strong></span></p>
<p>No doubt, with the insane tail width of these boards, it&#8217;s possible to use bigger fins than ever before. We had tested a smaller amount of fins out with these boards so there may be many more options available, but for tuning purposes, fins that work with the VI will work in the Z. Softer tipped and fins with a little bit more &#8216;geometric twist&#8217; are a must with these boards to help release the board a little bit from the water and help it to rail. The fins need to be fast to generate the best lift but also to be powerful to help rail the board downwind. The best fins showing these characteristics are the Kashy XS/XXS, VMG Blades &#8216;K&#8217; and &#8216;B&#8217; models, the R20 and Ifju LW models.</p>
<p>The fins we recommended for this board are currently:<br />
{column1}<br />
<span style="color: #000000;">Light Winds</span>:</p>
<p>- Kashy 78-80/70 XS<br />
- Ifju LWXS 70*<br />
- VMG Blades K78/70, B78/70<br />
- Deboichet R20<br />
{/column1}</p>
<p>{column2}<br />
<span style="color: #000000;">Strong Winds</span>:</p>
<p>- Kashy 70cm XS<br />
- Ifju LWXS 70<br />
- VMG Blades K70<br />
- Deboichet R20</p>
<p>{/column2}</p>
<h3>F2 FX-Z</h3>
<p></p>
<table class="wptable rowstyle-alt" id="wptable-4"  cellspacing="1" cellpadding="1">
	<thead>
	<tr>
		<td style="width:80px" >&nbsp;</td>
		<th class="sortable" style="width:25px" align="center">FOOTSTRAPS</th>
		<th class="sortable" style="width:100px" align="center">MAST-TRACK</th>
		<th class="sortable" style="width:20px" align="center">FIN SIZE</th>
		<th class="sortable" style="width:35px" align="center">BOOM HEIGHT</th>
		<th class="sortable" style="width:30px" align="center">PLATES</th>
	</tr>
	</thead>
	<tr>
		<td style="width:80px" align="center"><strong>Front Strap</strong></td>
		<td style="width:25px" align="center">Back hole</td>
		<td style="width:100px" align="center">-</td>
		<td style="width:20px" align="center">-</td>
		<td style="width:35px" align="center">-</td>
		<td style="width:30px" align="center">-</td>
	</tr>
	<tr class="alt">
		<td style="width:80px" align="center"><strong>Back Strap</strong></td>
		<td style="width:25px" align="center">Front hole</td>
		<td style="width:100px" align="center">-</td>
		<td style="width:20px" align="center">-</td>
		<td style="width:35px" align="center">-</td>
		<td style="width:30px" align="center">-</td>
	</tr>
	<tr>
		<td style="width:80px" align="center"><strong>Light Winds</strong></td>
		<td style="width:25px" align="center">-</td>
		<td style="width:100px" align="center">3cm in front of middle</td>
		<td style="width:20px" align="center">+76cm</td>
		<td style="width:35px" align="center">Chin Height</td>
		<td style="width:30px" align="center">2 rings</td>
	</tr>
	<tr class="alt">
		<td style="width:80px" align="center"><strong>Strong Winds</strong></td>
		<td style="width:25px" align="center">-</td>
		<td style="width:100px" align="center">3cm in front of middle</td>
		<td style="width:20px" align="center">70cm</td>
		<td style="width:35px" align="center">Eye Height</td>
		<td style="width:30px" align="center">2 rings</td>
	</tr>
</table><p>
</p>
<h3>F2 FX-VI</h3>
<p></p>
<table class="wptable rowstyle-alt" id="wptable-5"  cellspacing="1" cellpadding="1">
	<thead>
	<tr>
		<td style="width:80px" >&nbsp;</td>
		<th class="sortable" style="width:25px" align="center">FOOTSTRAPS</th>
		<th class="sortable" style="width:100px" align="center">MAST-TRACK</th>
		<th class="sortable" style="width:20px" align="center">FIN SIZE</th>
		<th class="sortable" style="width:35px" align="center">BOOM HEIGHT</th>
		<th class="sortable" style="width:30px" align="center">PLATES</th>
	</tr>
	</thead>
	<tr>
		<td style="width:80px" align="center"><strong>Front Strap</strong></td>
		<td style="width:25px" align="center">2nd hole</td>
		<td style="width:100px" align="center">-</td>
		<td style="width:20px" align="center">-</td>
		<td style="width:35px" align="center">-</td>
		<td style="width:30px" align="center">-</td>
	</tr>
	<tr class="alt">
		<td style="width:80px" align="center"><strong>Back Strap</strong></td>
		<td style="width:25px" align="center">Back hole</td>
		<td style="width:100px" align="center">-</td>
		<td style="width:20px" align="center">-</td>
		<td style="width:35px" align="center">-</td>
		<td style="width:30px" align="center">-</td>
	</tr>
	<tr>
		<td style="width:80px" align="center"><strong>Light Winds</strong></td>
		<td style="width:25px" align="center">-</td>
		<td style="width:100px" align="center">Middle</td>
		<td style="width:20px" align="center">+76cm</td>
		<td style="width:35px" align="center">+Head Height</td>
		<td style="width:30px" align="center">2 rings</td>
	</tr>
	<tr class="alt">
		<td style="width:80px" align="center"><strong>Strong Winds</strong></td>
		<td style="width:25px" align="center">-</td>
		<td style="width:100px" align="center">2-3cm in front of middle</td>
		<td style="width:20px" align="center">70cm</td>
		<td style="width:35px" align="center">Eye Height</td>
		<td style="width:30px" align="center">2 rings</td>
	</tr>
</table><p>
</p>
<p>We hope you are able to use this guide to better tune your boards in 2009. CarbonSugar would like to stress that it is actually a &#8216;guide&#8217; and not a definitive tuning methodology. Everyone is different and we only sampled a small number of fins, so please our recommendations as a basis to begin tuning and try your own settings to see if they are faster.</p>
<p>Feel free to post your comments/suggestions and personal experiences about the boards in the comments so the discussion can be built on.</p>
]]></content:encoded>
			<wfw:commentRss>http://www.carbonsugar.com/design/the-ultimate-fw-board-tuning-guide/feed/</wfw:commentRss>
		<slash:comments>75</slash:comments>
		</item>
		<item>
		<title>Sneak Peek at VMG Blades</title>
		<link>http://www.carbonsugar.com/construction/sneak-peek-at-vmg-blades/</link>
		<comments>http://www.carbonsugar.com/construction/sneak-peek-at-vmg-blades/#comments</comments>
		<pubDate>Mon, 09 Feb 2009 10:38:46 +0000</pubDate>
		<dc:creator>Sean OBrien</dc:creator>
				<category><![CDATA[Construction]]></category>
		<category><![CDATA[Design]]></category>
		<category><![CDATA[_Recent]]></category>
		<category><![CDATA[boogie]]></category>
		<category><![CDATA[c3]]></category>
		<category><![CDATA[carbon]]></category>
		<category><![CDATA[chris ting]]></category>
		<category><![CDATA[fins]]></category>
		<category><![CDATA[light]]></category>
		<category><![CDATA[vmg]]></category>
		<category><![CDATA[VMG Blades]]></category>

		<guid isPermaLink="false">http://www.carbonsugar.com/?p=145</guid>
		<description><![CDATA[<p>In recent seasons the number of worldwide custom fin manufacturers has increased and sailors around the world have begun to see new fin names popping up on equipment lists on the World Tour Events. One of those names that has been popping up in recent times is VMG Blades, a new fi&#8230;</p>]]></description>
				<content:encoded><![CDATA[<p>In recent seasons the number of worldwide custom fin manufacturers has increased and sailors around the world have begun to see new fin names popping up on equipment lists on the World Tour Events. One of those names that has been popping up in recent times is VMG Blades, a new fin company based in Australia with origins from the work of Boogie at <a href="http://www.c3-fins.com">www.c3-fins.com</a> who specialise in high-end, full-custom boutique carbon FW fins made at a reasonable price. <strong>CarbonSugar</strong> caught up with Chris Ting from VMG Blades to have a &#8216;sneak-peek&#8217; at what these fins are about and to find out how we can all get one under our feet in 2009. Read on to enjoy the full interview with Chris &#8230; <span id="more-145"></span></p>
<p><strong><span style="color: #000000;">Q &gt;&gt; How did you get into the fin game?</span></strong></p>
<p><strong></strong><img class="size-medium wp-image-245 alignleft" title="VMG Blades" src="http://www.carbonsugar.com/wp-content/uploads/2009/02/vmg-blades-030-300x200.jpg" alt="VMG Blades" width="300" height="200" />I’ve always been active in sailing; both racing competitively and building equipment. I’ve built my own windsurfers (everything from Formula to Speed) and even a state of the art Sports Yachts back in 1993, which was featured on the cover of September 1998 <em>“Australian Sailing Magazine”</em> (see below).</p>
<p>Anyhow, I guess it was no surprise that I started talking with Boogie at C3 Fins back in 2002. C3 Fins had just won the FW World’s with Kevin Pritchard (USA-3). I became a bit more involved, by providing feedback and occasionally inputting into the development. When Boogie retired from making FW fins in 2006, he offered to sell us his IP and tooling.</p>
<p>In the early days we dedicated a lot of time working closely with Boogie, to make sure we re-produced C3’s extremely high standards. From there we started an ongoing development program. We still keep in touch with Boogie to bounce ideas around. (Actually I was just speaking to him yesterday!) I hope we can live up to Boogie’s hard earned reputation.</p>
<p><strong><span style="color: #000000;">Q &gt;&gt; How do your fins differ from other fins currently on the market?</span></strong></p>
<p><strong></strong>Originally, C3 molds started with A, B, C, etc, so we have continued along that line. The latest evolution is the ‘K’. We commissioned Boogie to develop the ‘K’ fin using his latest foil design. We then got down to the detail of developing the best layups to meet our performance requirements.</p>
<p>Looking at the current trends on the FW fin market, other designers have moved toward swept-back outlines with very torsionally stiff layups. We decided to go our own way with an outline with almost neutral twist. This gave us better ability to control the twist characteristics of the fin by the layup; without having to combat or trade-off against the ‘geometric twist’ built into a swept-back outline of other fins.</p>
<p><strong><span style="color: #000000;">Q &gt;&gt; Your fins appear to be ‘lighter’ than other fins on the market? How so?<br />
</span></strong><br />
Yes, that’s usually the first thing a lot of people notice when they pick up one of our fins. We use 100% carbon in the laminate and because of our outline we only have to put the carbon in specifically to control the bend and the twist, not to counteract the twist produced by swept-back outlines. We also cure our fins under extremely high pressure and heat which allows us to get very good fibre to resin ratios which results in a minimal void laminate. We have a few secret ingredients which also help keep the weight of the fin down; developed by C3 Fins. Any weight saving on your rig is a good thing. Have you ever seen a winning skiff with heavy foils these days?</p>
<p><strong><span style="color: #000000;">Q &gt;&gt; Do you have a range of fins?</span><br />
</strong><br />
We’ve pretty much finalised our range of fins. We already have specific bends of the ‘K’ model for different sailing styles and equipment. We’re developing cutdowns, which help extra light-wind performance and balance the super-wide tails of current boards. For the serious racers, we are continuing to build fins to their personal specifications.<br />
We have just finished testing our latest prototypes and are very pleased with the results. The current fin is extremely competitive. The fins have been described as very easy to sail, with an automatic trim and a feeling of hydro foiling.</p>
<div class="ngg-galleryoverview" id="ngg-gallery-8-145">


	<!-- Thumbnails -->
		
	<div id="ngg-image-45" class="ngg-gallery-thumbnail-box"  >
		<div class="ngg-gallery-thumbnail" >
			<a href="http://www.carbonsugar.com/wp-content/uploads/vmgblades/VMG-Blades-013.jpg" title="VMG Blades 76, 73, 70" class="shutterset_set_8" >
								<img title="VMG Blades" alt="VMG Blades" src="http://www.carbonsugar.com/wp-content/uploads/vmgblades/thumbs/thumbs_VMG-Blades-013.jpg" width="100" height="75" />
							</a>
		</div>
	</div>


	<div id="ngg-image-46" class="ngg-gallery-thumbnail-box"  >
		<div class="ngg-gallery-thumbnail" >
			<a href="http://www.carbonsugar.com/wp-content/uploads/vmgblades/VMG-Blades-025.jpg" title="VMG Blades fin covers" class="shutterset_set_8" >
								<img title="VMG Blades" alt="VMG Blades" src="http://www.carbonsugar.com/wp-content/uploads/vmgblades/thumbs/thumbs_VMG-Blades-025.jpg" width="100" height="75" />
							</a>
		</div>
	</div>


	<div id="ngg-image-47" class="ngg-gallery-thumbnail-box"  >
		<div class="ngg-gallery-thumbnail" >
			<a href="http://www.carbonsugar.com/wp-content/uploads/vmgblades/VMG-Blades-030.jpg" title="VMG Blades" class="shutterset_set_8" >
								<img title="VMG Blades" alt="VMG Blades" src="http://www.carbonsugar.com/wp-content/uploads/vmgblades/thumbs/thumbs_VMG-Blades-030.jpg" width="100" height="75" />
							</a>
		</div>
	</div>


	<div id="ngg-image-50" class="ngg-gallery-thumbnail-box"  >
		<div class="ngg-gallery-thumbnail" >
			<a href="http://www.carbonsugar.com/wp-content/uploads/vmgblades/vmg-blades-2.jpg" title="Chris Ting (AUS-5) " class="shutterset_set_8" >
								<img title="VMG Blades" alt="VMG Blades" src="http://www.carbonsugar.com/wp-content/uploads/vmgblades/thumbs/thumbs_vmg-blades-2.jpg" width="100" height="75" />
							</a>
		</div>
	</div>


	<div id="ngg-image-51" class="ngg-gallery-thumbnail-box"  >
		<div class="ngg-gallery-thumbnail" >
			<a href="http://www.carbonsugar.com/wp-content/uploads/vmgblades/vmg-blades.jpg" title="Chris Ting (AUS-5)" class="shutterset_set_8" >
								<img title="VMG Blades" alt="VMG Blades" src="http://www.carbonsugar.com/wp-content/uploads/vmgblades/thumbs/thumbs_vmg-blades.jpg" width="100" height="75" />
							</a>
		</div>
	</div>


	<div id="ngg-image-52" class="ngg-gallery-thumbnail-box"  >
		<div class="ngg-gallery-thumbnail" >
			<a href="http://www.carbonsugar.com/wp-content/uploads/vmgblades/wicked_jpg1.jpg" title="Chris Ting on the cover of Australian Sailing Magazine" class="shutterset_set_8" >
								<img title="Australian Sailing Magazine" alt="Australian Sailing Magazine" src="http://www.carbonsugar.com/wp-content/uploads/vmgblades/thumbs/thumbs_wicked_jpg1.jpg" width="100" height="75" />
							</a>
		</div>
	</div>


	<!-- Pagination -->
 	<div class='ngg-clear'></div>
 	
</div>

<p><strong><span style="color: #000000;"><br />
Q &gt;&gt; Who Is Behind VMG Blades?<br />
</span></strong><br />
Anthony Woodrow, Brett Morris &amp; I.</p>
<p><strong><span style="color: #000000;">Q &gt;&gt; But Who Are You????<br />
</span></strong><br />
I (Chris Ting, AUS-5) am the actual guy who builds the fins. I’ve been actively racing FW since it began in Australia and I headed over to Portugal for the FW Worlds last September. (I hope I can make it to Spain this year!) I am also the President of the Storm-Riders (<a href="http://www.storm-riders.com.au">www.storm-riders.com.au</a>) Windsurfing Club in Sydney which organises the big and growing fleet of regular FW racing on the east coast of Australia. VMG Blades is based in Sydney, Australia, testing in Botany Bay. I hope we can see a lot more sailors head over this way and enjoy our windy summers down under.</p>
<p><strong><span style="color: #000000;">Q &gt;&gt; So when can we order a fin?<br />
</span></strong><br />
Production is limited at the moment. When the doors are fully open and ready for business, I promise <strong>CarbonSugar</strong> will be the first to know!</p>
<p>In the meantime, if you&#8217;d like to enquire about our fins you can get in contact with us at <a href="mailto:vmgblades@gmail.com">vmgblades@gmail.com</a>.</p>
]]></content:encoded>
			<wfw:commentRss>http://www.carbonsugar.com/construction/sneak-peek-at-vmg-blades/feed/</wfw:commentRss>
		<slash:comments>8</slash:comments>
		</item>
		<item>
		<title>Ceri Williams &amp; the GP World Tour</title>
		<link>http://www.carbonsugar.com/interviews/ceri-williams-the-gp-world-tour/</link>
		<comments>http://www.carbonsugar.com/interviews/ceri-williams-the-gp-world-tour/#comments</comments>
		<pubDate>Sun, 01 Jun 2008 04:04:56 +0000</pubDate>
		<dc:creator>Sean OBrien</dc:creator>
				<category><![CDATA[Interviews]]></category>
		<category><![CDATA[ceri williams]]></category>
		<category><![CDATA[fins]]></category>
		<category><![CDATA[formula]]></category>
		<category><![CDATA[fw]]></category>
		<category><![CDATA[interview]]></category>
		<category><![CDATA[kashy]]></category>
		<category><![CDATA[poland]]></category>
		<category><![CDATA[portugal]]></category>
		<category><![CDATA[world tour]]></category>

		<guid isPermaLink="false">http://www.carbonsugar.com/?p=65</guid>
		<description><![CDATA[<p>The playground for the Formula Windsurfing Class has stepped up to a new level in 2008 with the creation of the Grand Prix World Tour; six events across two continents showcasing the talents of the world&#8217;s best windsurfing racers. Already, with a very successful first &#8230;</p>]]></description>
				<content:encoded><![CDATA[<p>The playground for the Formula Windsurfing Class has stepped up to a new level in 2008 with the creation of the Grand Prix World Tour; six events across two continents showcasing the talents of the world&#8217;s best windsurfing racers. Already, with a very successful first event under its belt in <a title="Sines, Portugal GP Tour Event" href="http://www.formulawindsurfing.org/event.php?id=162">Sines, Portugal</a>, the GP World Tour now moves on to the first of two events in Poland, beginning in <a title="Sopot, Poland GP Tour Event" href="http://www.formulawindsurfing.org/news.php?id=1392">Sopot</a> in June and then combined with the FW European Championships in <a title="Leba, Poland GP Tour Event" href="http://www.formulawindsurfing.org/nor.php?id=73">Leba</a> in July. The man chiefly behind this new tour is IFWC Class President Ceri Williams. CarbonSugar caught up with Ceri this week to find out about all things FW, event organising and the future of the class. Enjoy a short interview with Ceri by reading on &#8230;</p>
<p><span id="more-65"></span></p>
<p><a href="http://www.carbonsugar.com/wp-content/uploads/2008/06/ceri-1.jpg"></a></p>
<p>Text:<strong><span style="color: #007de2;"> CarbonSugar</span></strong><br />
Text: Ceri Williams</p>
<p><strong><span style="color: #007de2;"><strong><img class="size-full wp-image-68 alignleft" style="float: left;" title="Ceri Williams" src="http://www.carbonsugar.com/wp-content/uploads/2008/06/ceri-3.jpg" alt="" width="172" height="145" /></strong></span></strong><strong><span style="color: #007de2;"><strong><span style="color: #007de2;">&gt; 2008 Marks the beginning of the FW Grand Prix World Tour. Could you explain to us how the tour came about and what you think it will mean for FW sailing this year and in the near future?</span></strong></span></strong></p>
<p>A world tour for formula has been an aspiration of mine since i became chairman; and only reflects the desires of formula sailors. The Grand Prix concept has been in existance for many years , but we could not put together sufficient events to call it a &#8220;tour&#8221;.</p>
<p><strong><span style="color: #007de2;">&gt; The 2007 FW World Championships in Brazil last December, marked one of the first international events in a long time where the full maximum of 15 races were run. The success of this event has surely played a role in having 3 events of the FW Grand Prix World Tour in Brazil. Could you tell us how Brazil arrived on the map for hosting FW events?</span></strong></p>
<p>Brazil hosted the 2001 Worlds, which was also a good event. Formula has a long history and is very popular in Brazil. That, combined with a respected and motivated organiser, was the catalyst to forge ahead with the 2008 tour. Wilhelm Schurmann (BRA-999) has also played a pivotal role in co-ordinating the project &#8211; being a vital link between the class and BRA organisers (Arrow Marketing and <a title="Wind Brasil" href="http://www.windbrasil.com">Wind Brasil</a>)</p>
<p><strong><span style="color: #007de2;">&gt; After 3 years of FW World Championships being held outside of Europe, do you think having the Worlds back on the mainland, this time in Portugal, will help boost the numbers attending the World Championships?</span><br />
</strong><br />
I am sure the numbers will be up for both 2008 in Portugal and 2009 in Spain. Both events are hosted by tried and trusted oranisers, in good locations, with enthusiastic sponsors. But it is important for any &#8220;international&#8221; class to ensure its premier annual event reaches all continents where formula fleets exist. I hope that we can take the championship to North America in 2010 or 2011.</p>
<p><strong><span style="color: #007de2;"><a href="http://www.carbonsugar.com/wp-content/uploads/ceri-williams/ceri-1-full.jpg"><img class="size-full wp-image-67 alignleft" style="float: left;" title="Ceri Williams" src="http://www.carbonsugar.com/wp-content/uploads/2008/06/ceri-1.jpg" alt="" width="172" height="250" /></a></span></strong></p>
<p><strong><span style="color: #007de2;">&gt; At a past FW World Championships, light winds made it difficult for some top sailors to achieve their normal results at the front of the fleet, and it was written on various forums that tour organisers were thinking of “money” first, before thinking about the ideal wind conditions to run events. Could you explain for us what exactly is looked at when a country puts forth a proposal to host a World Championships; what helps the FW Class decide on one venue over another?</span></strong></p>
<p>Wind stats are important -but not the only consideration; yes we have minimum levels of prize money but also expect a certain level of service (benefits) for all competitors; and a minimm standard of organisational skills. Probably the primary consideration is to take the World Championships around the world- hence Melbourne (Australia) in 2005, where prize mone was not at normal levels.</p>
<p>I also believe that formula has to live up to its promotion as an exciting racing class that can plane in 6/7 knots and still race in 30 knots, with the minimum of equipment. We also have to race in the widest possible range of conditions -and not favour either low or highwind specialists. Top sailors are the most versatile!</p>
<p><strong><span style="color: #007de2;">&gt; With the resurgence in popularity of Slalom racing once again, many National fleets have opted to run combined events whereby FW is run up to 20 knots, and Slalom thereafter. Many event organisers appear to be interested in Slalom (in Poland/Portugal for example); do you think we will see this format appearing on the Pro FW circuit?</span><br />
</strong><br />
I personally have doubts about combining disciplines &#8211; especially if it involves 3 times as much kit to compete in an event. For National events &#8211; involving less time and cost for travelling &#8211; maybe it can work. That is a decision for National Associations to make. For the FW World Tour I think it must be on FW kit only &#8211; that does not rule out downwind courses and the elimination format as a light wind option however.</p>
<p><strong><span style="color: #007de2;">&gt; The Euro-Cup Series, organised by ChoppyWater GmbH, has been the crux of the FW events in Europe for the past few years, but so far they have yet to post a calendar for 2008. Has the FW Grand Prix World Tour taken its place or are ChoppyWater still involved behind the scenes in other avenues?</span></strong></p>
<p>The Grand Prix (GP) World Tour is not restricted to European events and the requirements for hosting a class GP are more rigorous in many ways. I do not think The GP World Tour has been responsible for the demise of the Euro Cup; but I think it has replaced it as the focus of international (formula) competition in Europe. This development is also alongside the growth of regional tours (eg. the Baltic Cup); and the relevance of the formula world ranking calendar to many National Associations where an &#8220;open&#8221; event attracts wider attention.</p>
<p><strong><span style="color: #007de2;">&gt; The PWA is regarded by sailors as being the pinnacle of the sport. With Jimmy Diaz (an avid FW sailor) still onboard as Chairman, could you ever see FW returning to the PWA and do you think that would benefit the Class or not?</span></strong></p>
<p>I am open to any idea that benefits formula racers, and in so doing is good for the sport. Many PWA (slalom) racers are (IWA /IFWC) formula racers. I think it is important for events to happen &#8211; formula very rarely fails to deliver an event (on the water).</p>
<p>I do not forsee a change of course for FW at the moment &#8211; ie, I expect to see further and continued development of the current event stategy &#8211; Championships (World, Continental and National) , the Grand Prix World Tour; regional tours and other &#8220;open&#8221; international events.</p>
<p>Hopefully the PWA can be involved in some way!</p>
<p><strong><span style="color: #007de2;">&gt; With the introduction of the 2-year fixed Board designs (which everyone has welcomed!), sail and board development has appeared to have settled down and it’s not always necessary to have the latest equipment to do well at events. The biggest question on most sailor’s minds is now the Fins. Do you think the availability and increased prices of custom fins has an impact on the sport? As well as the mentality that not everyone can be riding the same fins as the Top Pros are using?</span></strong></p>
<p>I think this is one area that concerns everyone. I think costs will also stabilise as development slows down, and more fin manufacturers will come on board &#8211; increasing competition, and decreasing costs. Of course we need a healthy formula racing scene to sustain that notion &#8211; I hope, I believe, that with current policies that is achievable.</p>
<p><strong><span style="color: #007de2;">Thank you for your time Ceri!</span></strong></p>
<blockquote><p><strong><span style="color: #ff0000;">THE 2008 FW GRAND PRIX WORLD TOUR</span></strong></p>
<p><strong>Sines, Portugal</strong> // 6th &#8211; 10th May<br />
<strong>Sopot, Poland</strong> // 4th &#8211; 7th June<br />
<strong>Leba, Poland</strong> // 29th July &#8211; 3rd August<br />
<strong>Rio de Janeiro, Brazil </strong>// 15th &#8211; 19th October<br />
<strong>Sao Paulo, Brazil </strong>// 22nd &#8211; 26th October<br />
<strong>Forteleza, Brazil </strong>// 24th &#8211; 29th November</p></blockquote>
]]></content:encoded>
			<wfw:commentRss>http://www.carbonsugar.com/interviews/ceri-williams-the-gp-world-tour/feed/</wfw:commentRss>
		<slash:comments>11</slash:comments>
		</item>
		<item>
		<title>To The Leeward Mark: Advanced Tactics</title>
		<link>http://www.carbonsugar.com/racing/to-the-leeward-mark-advanced-tactics/</link>
		<comments>http://www.carbonsugar.com/racing/to-the-leeward-mark-advanced-tactics/#comments</comments>
		<pubDate>Mon, 19 May 2008 11:44:50 +0000</pubDate>
		<dc:creator>Sean OBrien</dc:creator>
				<category><![CDATA[Advanced Tactics]]></category>
		<category><![CDATA[Racing]]></category>
		<category><![CDATA[angles]]></category>
		<category><![CDATA[gps]]></category>
		<category><![CDATA[gybe]]></category>
		<category><![CDATA[leeward]]></category>
		<category><![CDATA[port]]></category>
		<category><![CDATA[starboard]]></category>
		<category><![CDATA[strategy]]></category>
		<category><![CDATA[windward]]></category>

		<guid isPermaLink="false">http://www.carbonsugar.com/?p=55</guid>
		<description><![CDATA[<p>Now that you&#8217;ve made it to the <a href="http://www.carbonsugar.com/racing/to-the-windward-mark-advanced-tactics/">windward mark</a>, you have reached the final section of the lap/race approaching the final drag to the finish. The downwind leg to the leeward mark is usually a fast-paced, sprint race with high tensions and lots of pressure for the lead boats a&#8230;</p>]]></description>
				<content:encoded><![CDATA[<p>Now that you&#8217;ve made it to the <a href="http://www.carbonsugar.com/racing/to-the-windward-mark-advanced-tactics/">windward mark</a>, you have reached the final section of the lap/race approaching the final drag to the finish. The downwind leg to the leeward mark is usually a fast-paced, sprint race with high tensions and lots of pressure for the lead boats as it is almost always the final leg to the finish. The speed at which FW boards travel makes tactical decisions more difficult as everything happens at a rapid pace. With the downwind leg only making up 15% of the total race elapsed time, there isn&#8217;t as many tactical decisions that need to be made however the few that do  have to be an instant <em>reflex</em> response. This week we continue with the articles on <a href="http://www.carbonsugar.com/category/tactics/">Advanced Tactics</a> by getting you from the windward mark to the leeward mark, looking at a few very important rules as well as some tricks you can have up your sleeve to keep your lead into the leeward mark.</p>
<p><span id="more-55"></span> </p>
<p>When approaching the windward mark, always remember the three key rules:</p>
<ul>
<li>If you are lifted markedly heading to the mark on Starboard, gybe immediately on to port after the mark.</li>
<li>If you are knocked markedly heading to the mark on Starboard, stay on the starboard tack to get the most out of the knock.</li>
<li>The side of the course which is favoured on the upwind leg is generally the side to take on the downwind leg.</li>
</ul>
<p>That shouldn&#8217;t be a &#8220;decision&#8221; on the racecourse; it should be a <strong>reflex</strong>. The only revision to the first two rules is if there is a favourable side of the course due to a geographic, tidal or other influence that creates this favoured side.</p>
<h3>Knowing &amp; Understanding Your Angles</h3>
<p>The key to dramatically improving your downwindtime around the course: understanding what angles you can sail in what windstrengths. Simple huh?</p>
<p>Not exactly. Most sailors have a reference point on their boom, which is usually a perpindicular line to the mark (its easy to visual 90 degree angles) whereby when they see the leeward mark through their sail they will gybe when it lines up roughly with this boom reference point. I&#8217;m here to tell you that that isn&#8217;t specific enough and can allow boats in close proximity to gybe earlier/later than you and punish you into the leeward mark. A good way to combat this is to research the angles you can sail downwind in various windstrengths and then learn how to quickly gauge that particular angle by sight.</p>
<p><a href="http://www.carbonsugar.com/wp-content/uploads/2008/05/downwind-angles-chart.jpg"><img class="alignnone size-medium wp-image-60 alignleft" style="float: left;" title="Downwind Angles" src="http://www.carbonsugar.com/wp-content/uploads/2008/05/downwind-angles-chart-300x172.jpg" alt="Downwind Angles" width="300" height="172" /></a>To do this accurately you are better off using a GPS unit to analyse tracks of your sailing in various windstrengths (something we will be writing about here very shortly). Here on the left is a chart I have made for angles that I can sail in relative windstrengths. Using about 3-4 months of GPS data from sailing FW in various windconditions, I have plotted the different downwindangles I have achieved against the wind speed on that particular day. Obviously, there are slight performance differences each session in the same windstrengthbut using a mean trend-line we can get a good estimate of what angle I can sail in what windstrength.</p>
<p><a href="http://www.carbonsugar.com/wp-content/uploads/2008/05/downwind-angles.jpg"><img class="alignnone size-thumbnail wp-image-62 alignleft" style="float: left;" title="Downwind Angles on an FW board" src="http://www.carbonsugar.com/wp-content/uploads/2008/05/downwind-angles-150x150.jpg" alt="Downwind Angles on an FW board" width="150" height="150" /></a>You only need to know a general group of angles, for example 8-12 knots, 15 knots, 20 knots etc. If you can learn what angles you sail in these windstrengths you can improve your downwind laylines immensely. For example, using my chart above, I see that I can usually sail downwind at 120 degrees with an 11m sail in 8-10 knots of breeze <em>(see figure to the left for a visual representation of the Downwind Angles chart)</em>. I have a good idea of what 120 degrees (not to the nearest degree, but roughly enough that I can make an informed decision about where to gybe) looks like when I line the leeward mark up through my sail and I have a good idea of what 8-10 knots feels like when I sail my 11m. With that in information in mind, if you are the leading boat on the downwind, you can know that when you gybe it will be the perfect layline and that if the guys behind you have gybed any earlier, they are going to have to wipe off considerable speed to get down to the mark or to put in two extra gybes; you have protected your lead.</p>
<h3>Protecting Your Lead</h3>
<p>As <a title="Frank Bethwaite - High Performance Sailing" href="http://www.amazon.com/High-Performance-Sailing-Frank-Bethwaite/dp/0070057990">Bethwaite</a> states, a <em>&#8220;boat with a small righting moment (like a Laser) cannot deflect wind too much, but a more powerful boat such as an 18ft skiff </em>(or an FW board)<em>, deflects the wind an incredible amount&#8221;.</em></p>
<p>With this in mind, the most important weapon to protect a lead on the downwind run is to keep your pursuer always in your dirty air and disturbed water. If your pursuer attempts to pass you to leeward (that is, inside you), if possible you can bear off slightly and use your dirty air and wind-shadow to slow the passing boat. It is very difficult to pass on the inside unless the passing boat can sail significantly deeper than the lead boat as you have to sail through the worst of the air deflection from the leading boat, which harms downwind performance immensely. Should the pursuer try to pass to windward, it only requires the lead boat to luff him to windward and force him deeper in to the <a href="http://www.carbonsugar.com/racing/to-the-windward-mark-advanced-tactics/">hopeless position</a>.</p>
<p>In the case of several pursuers, as <a href="http://en.wikipedia.org/wiki/Manfred_Curry">Manfred Curry</a> would suggest: <em>&#8220;one directs one&#8217;s chief attention, as on a beat to windward, to the one nearest&#8221;.</em></p>
<p><strong>Know Your Competition / Force the Gybe:</strong></p>
<p>The next tool in your downwind weaponry is your laylines. Get them correct and you&#8217;ve made it very difficult for the pursuing boat to pass you. Get them wrong andyou will find yourself sitting in someone&#8217;s dirty air at the leeward mark.</p>
<p>Everyone uses a different setup and may take a different fin and so it&#8217;s more than likely that in your fleet there will be some who are faster and can sail deeper than you on the downwind (if not, you have no excuses for not winning each race). To protect a lead it is important to have an idea of what angles the sailors behind you can sail. If you are in an unknown fleet, it should only take you one race or so to work this out. If your main competition can sail deeper than you at a similar speed, there are preventative steps you can take to protect your lead to the leeward mark.</p>
<p>Getting aroundthe windward mark first on the last lap, withonly the downwindto sail to the finish when the guy 10m behindyou is considerably faster than you downwind is a common and frustrating occurence (I&#8217;ve had my fair share). Despite the formentionedtactics above to protect your lead, withthe speeds an FW board travels at, blocking the sailor behind you is not always as easy as it would seem on paper as pursuing sailors can change positions from the <a href="http://www.carbonsugar.com/racing/to-the-windward-mark-advanced-tactics/">hopeless position</a> to a dominant position in less than a second in windy conditions and it is difficult to keep your eyes on the water ahead as well as on what your pursuer is doing. One of your few options to protect your lead in this instance is to play on your opponents mindset that he can sail deeper than you downwind&#8230;</p>
<p>The pursuing boat, knowing that he can sail deeper than you, most likely will gybe when the leading boat gybes and back his ability to sail deeper andfaster, hoping to use his better angle to pass on the windward side and use his wind-shadow on the leading boat as he controls the lead into the leeward mark. If you know your downwind angles in the particular windstrength, try gybing earlier than is possible to make the leeward mark. If the trailing boat is true to form, he may gybe when you do and both of you now will have to make an extra 2 gybes into the leeward mark. You know this before he does, so by heading a little higher out of the gybe you can put him into your dirty air and hold him in the hopeless position andforce him to have to gybe away to get clear air. This tactic is best when you are in a clear position with 1st/2nd together as it may allow the 3rd/4th boats an opportunity to gain if they are close enough and sail the layline correctly. If your pursuer does in fact gybe again to get away from your dirty air, you will both have the same amount of gybes to do however when you meet at the leeward mark you will be approaching on starboard to make your final gybe and will have right-of-way (provided you can fit your gybe in before he gets to you).</p>
<p><strong>Gybing Strategy: </strong></p>
<p>Once you&#8217;ve <a href="http://www.carbonsugar.com/technique/the-learning-plateau-and-how-to-climb-off-part-ii/">practiced</a> enough, you should be able to gybe and keep on the plane all the way through on to the next tack. In winds over 12 knots (ie, when you are able to consistently plane out of each gybe), a good gybe takes only 3-4 seconds to complete and regain full speed. This is considerably less time than a tack and usually you don&#8217;t lose much angle as when you are pumping out the gybe you can point downwind much further than you can actually sail to promote a quick gain back to full speed. In 10 seconds a FW board travels about 80m so you are only losing 25m or so in each gybe. That seems like a lot but in a normal course using a 1.3km <em>rhumb line</em> (shortest distance from windward to leeward mark), 25m is a small disadvantage compared to the advantages made in sailing the correct course downwind rather than the one with the least amount of gybes.</p>
<p>Sailing in onshore conditions in consistent winds, usually the bulk of the fleet sails the downwind run on starboard, taking one gybe to the leeward mark. This happens even in international fleets. In most cases (FW World Championship locations like Leba, Poland; Gangnueng, Korea; Forteleza, Brazil; Melbourne, Australia all had courses like this) the single-gybe run forces the sailors to sail right to the beach where they gybe on to port tack andfollow the beach into the leeward mark close to shore. 9/10 times there is considerably less wind close to the shore as breaking waves, sand dunes, trees, buildings or the land/water temperature differences creates turbulence for the wind andoften forces the clear wind into the air (away from your sails) thus creating light spots along the beach. A sailor who sails into the beach andtakes a little longer to get on to the plane out of the gybe, coupled with the tight angle he will have to sail to get out of the shore-zone and back into the clear air will lose far more than 40m versus a sailor who put in the extra gybes and stayed in the stronger winds out to sea.</p>
<p><strong>3 Gybes? Make It Count:</strong></p>
<p><a href="http://www.carbonsugar.com/wp-content/uploads/2008/05/downwind-angles-laylines.jpg"><img class="alignleft size-thumbnail wp-image-63" title="Downwind in 3 gybes" src="http://www.carbonsugar.com/wp-content/uploads/2008/05/downwind-angles-laylines-150x150.jpg" alt="Downwind in 3 gybes" width="150" height="150" /></a>One thing to note is when you do gybe on to port around the windward mark (you have a minimum of 3 gybes to complete on a standard windward/leeward course now) you should always complete your second gybe <strong>earlier</strong> than the starboard layline to head towards the leeward mark. This allows you to take advantage of any wind direction changes or gusts (see diagram to the left for a visual reference). The difference in downwind angle in 1-2 knot differences of wind is substantial compared to the same wind differences and upwind angle (which is minimal). Approaching the leeward mark on starboard with a final gybe to put you back on to port to round the mark it is important to not oversail the starboard layline as having to head <em>up</em> to make the leeward mark gybe wastes all your advantage in having sailed a different course to the other sailors. You are going to have to gybe back on to port anyhow, so does it make a difference whether its 2m from the leeward mark or 40m?? Better to be safe and always sailing a deep downwind angle than to overshoot and have to head up (crucifying your downwind VMG).</p>
<h3>Attacking From Behind:</h3>
<p>Assuming two boats are equal in downwind speed, it is difficult but not impossible to pass the leading boat on the downwind leg. Your two options are to sail a better layline (gybe earlier/later) and get the advantage into the leeward mark or to pass the leading boat either to windward or leeward with superior speed.</p>
<p><strong>Passing to Windward:</strong></p>
<p>The generally accepted better side to pass on is the windward side, as passing on the leeward side you have to sail through the very disturbed air and wind-shadow of the leading boat which is difficult to do unless you have a fairly big advantage in board speed over the lead boat. Assuming you are always sailing as deep as possible on the downwind run, luffing a little will increase your board speed at the expense of angle. Often times, the increase in board speed allows you to keep your downwind VMG the same and can help you pass the leading boat on the downwind as he may be sailing slower to go the deepest angle possible. He may luff you to try and defend this attack but within reason you can continue to luff higher and higher and increase your speed to overtake; its very rare for a leading boat to luff you all the way to a beam reach; and this allows you an opportunity to try to scoot through on the leeward side while he is not watching. This tactic works best for heavier sailors as they are usually faster on a broad reach angle.</p>
<p><strong>Passing to Leeward:</strong></p>
<p>Although more difficult, there are times when this tactic should be applied. The main instance in when you are pursuing a group of sailors. Often times, many in the group will be sailing a slightly luffed course to keep themselves out of the dirty air of the boats around them. Provided you are at a safe enough distance to not be affected by their dirty air too much, sailing a very deep course allows you to get into a controlling position leading into the gybe, as you will be closer to the leeward mark if you gybe at the same time as the leading boats. Despite the obvious disadvantages in sailing in someone&#8217;s dirty air, if you can sail inside the leading boats you will get the cleanest air when you gybe on to the new tack and if you have sailed deep enough to leeward, you are actually closer to the leeward mark than the leading boats.  </p>
<p>This technique of passing on the second tack rather than the first of the downwind leg is one of the best ways to pass a boat in front of you. The key for it to work is to gybe at the SAME TIME as the lead boat and to make sure you are on or close to the layline. If you make a good gybe you can quickly put yourself in front of the lead boat spilling your dirty air on them and they have no ability to do the same trick to you as you are already on the layline; sailing deeper will not help the former lead boat.</p>
<p>This technique allows lighter sailors to do this more effectively as they are able to sail deeper angles than heavier sailors on the same equipment.</p>
<p><strong>Sail A Better Layline:</strong></p>
<p>The easiest way to pass someone on a downwind leg is to sail the perfect laylines when they don&#8217;t. Easier said than done, but using the above techniques for understanding and knowing your downwind angles there is usually always an opportunity to do this in most races as a combination of nerves and pressure had by the leading boat can often times provoke them to sail a <em>safe-layline </em>(that is, to sail over the layline to make sure the leeward mark is made without an extra gybe). As the pursuing boat, you have nothing to lose by sailing an <em>aggressive layline </em>(gybing so early it is a tight run to make the leeward mark, and hoping for a slight wind heading to allow you to make the mark easier) and the lead boat has EVERYTHING to lose by messing up their laylines. Getting yourself into a good leeward position before you make the gybe will dramatically increase the chances of success in this instance.</p>
<p><strong><span style="color: #00aeef;">End Note&#8230;</span></strong></p>
<p>As always, there is nothing more beneficial to improving your racing than by GOING racing. The more courses you sail the more your laylines and tactics will become a <em>reflex</em> instead of a response and you will begin to assimilate the important sailing rules into your long-term memory, instead of your short-term one. Good luck.</p>
]]></content:encoded>
			<wfw:commentRss>http://www.carbonsugar.com/racing/to-the-leeward-mark-advanced-tactics/feed/</wfw:commentRss>
		<slash:comments>8</slash:comments>
		</item>
		<item>
		<title>Pro FW Desktop Wallpapers</title>
		<link>http://www.carbonsugar.com/downloads/pro-fw-desktop-wallpapers/</link>
		<comments>http://www.carbonsugar.com/downloads/pro-fw-desktop-wallpapers/#comments</comments>
		<pubDate>Tue, 06 May 2008 05:59:54 +0000</pubDate>
		<dc:creator>Sean OBrien</dc:creator>
				<category><![CDATA[Downloads]]></category>
		<category><![CDATA[desktop]]></category>
		<category><![CDATA[download]]></category>
		<category><![CDATA[free]]></category>
		<category><![CDATA[wallpapers]]></category>

		<guid isPermaLink="false">http://www.carbonsugar.com/?p=56</guid>
		<description><![CDATA[<p>A short while ago someone asked if there were any good images out there of Pro Formula sailors they could use as desktop wallpapers. A short scout of the windsurfing sites out there and it was quickly decided that there isn&#8217;t a single desktop wallpaper out there of anyone &#8230;</p>]]></description>
				<content:encoded><![CDATA[<p>A short while ago someone asked if there were any good images out there of Pro Formula sailors they could use as desktop wallpapers. A short scout of the windsurfing sites out there and it was quickly decided that there isn&#8217;t a single desktop wallpaper out there of anyone sailing Formula bar the small few available on <a href="http://www.star-board.com/2008/pages/download/photogallery.php">Star-Board.com</a>. In retaliation, I have compiled a series of 12 of the best images I could find of a few of the top Pro&#8217;s in Formula Windsurfing and made them available to download for FREE right here on CarbonSugar. Various screen-resolutions are available. Enjoy!</p>
<p><span id="more-56"></span></p>
<p>Obviously I haven&#8217;t made them in every single screen-resolution however I&#8217;ve targeted the most commonly used based on the user-stats of this website. I&#8217;ve also provided the screen-ratios so if you have a different screen-resolution you can find the appropriate ratio&#8217;d version and it should still display nicely. For example if you run a 1280&#215;800 resolution, the Widescreen 16:10 version will fit perfectly on your screen.</p>
<p>Briefly, a quick thank-you to all the sailors who donated their photos for me to use for these wallpapers. I will add some more down the track as better images become available. To give credit where its due, the list of wallpapers includes:</p>
<ul>
<li><a href="http://www.pwaworldtour.com/index.php?id=7&amp;tx_pwasailor_pi1%5BshowUid%5D=578&amp;cHash=dc4355dc42">Alberto Menegatti</a></li>
<li><a href="http://www.antoinealbeau.com">Antoine Albeau</a></li>
<li><a href="http://www.pwaworldtour.com/index.php?id=7&amp;tx_pwasailor_pi1%5BshowUid%5D=381&amp;cHash=640fd5867a">Gonzalo Costa Hoevel</a></li>
<li><a href="http://www.vesterstrom.com">Jesper Vesterstrøm</a></li>
<li><a href="http://www.aus120.com">Sean O&#8217;Brien</a></li>
<li><a href="http://www.steveallen.pl">Steve Allen</a></li>
</ul>
<p>Photographers include John Carter, Tam Hohnberg and John O&#8217;Brien however all images have been edited, airbrushed and otherwise touched-up by myself.</p>
<p>Enjoy.</p>
<table border="0" width="100%">
<tbody>
<tr>
<td>
<div style="text-align: center;"><a href="http://www.carbonsugar.com/wp-content/uploads/wallpapers/1280x1024/Alberto-1280x1024.jpg"><img src="http://www.carbonsugar.com/wp-content/uploads/wallpapers/thumbs/Alberto-1280x1024.jpg" border="0" alt="" width="250" height="200" /></a></div>
</td>
<td>
<div style="text-align: center;"><a href="http://www.carbonsugar.com/wp-content/uploads/wallpapers/1280x1024/Antoine-1280x1024.jpg"><img src="http://www.carbonsugar.com/wp-content/uploads/wallpapers/thumbs/Antoine-1280x1024.jpg" border="0" alt="" width="250" height="200" /></a></div>
</td>
</tr>
<tr>
<td>
<p align="center"><strong>Alberto Menegatti (ITA-456)</strong></p>
<p align="center"><a href="http://www.carbonsugar.com/wp-content/uploads/wallpapers/1600x1200/Alberto-1-1600x1200.jpg">1600&#215;1200</a> (Fullscreen 4:3)<br />
<a href="http://www.carbonsugar.com/wp-content/uploads/wallpapers/1680x1050/Alberto-1-1680x1050.jpg">1680&#215;1050</a> (Widescreen 16:10)<br />
<a href="http://www.carbonsugar.com/wp-content/uploads/wallpapers/1280x1024/Alberto-1280x1024.jpg">1280&#215;1024</a> (Fullscreen 5:4)<br />
<a href="http://www.carbonsugar.com/wp-content/uploads/wallpapers/1024x768/Alberto-1024x768.jpg">1024&#215;768</a> (Fullscreen 4:3)</td>
<td>
<p align="center"><strong>Antoine Albeau (FRA-192)</strong></p>
<p align="center"><a href="http://www.carbonsugar.com/wp-content/uploads/wallpapers/1600x1200/Antoine-1600x1200.jpg">1600&#215;1200</a> (Fullscreen 4:3)<br />
<a href="http://www.carbonsugar.com/wp-content/uploads/wallpapers/1680x1050/Antoine-1680x1050.jpg">1680&#215;1050</a> (Widescreen 16:10)<br />
<a href="http://www.carbonsugar.com/wp-content/uploads/wallpapers/1280x1024/Antoine-1280x1024.jpg">1280&#215;1024</a> (Fullscreen 5:4)<br />
<a href="http://www.carbonsugar.com/wp-content/uploads/wallpapers/1024x768/Antoine-1024x768.jpg">1024&#215;768</a> (Fullscreen 4:3)</td>
</tr>
</tbody>
</table>
<table border="0" width="100%">
<tbody>
<tr>
<td>
<div style="text-align: center;"><a href="http://www.carbonsugar.com/wp-content/uploads/wallpapers/1280x1024/Gonzalo-1-1280x1024.jpg"><img src="http://www.carbonsugar.com/wp-content/uploads/wallpapers/thumbs/Gonzalo-1-1280x1024.jpg" border="0" alt="" width="250" height="200" /></a></div>
</td>
<td>
<div style="text-align: center;"><a href="http://www.carbonsugar.com/wp-content/uploads/wallpapers/1280x1024/Start-1280x1024.jpg"><img src="http://www.carbonsugar.com/wp-content/uploads/wallpapers/thumbs/Start-1280x1024.jpg" border="0" alt="" width="250" height="200" /></a></div>
</td>
</tr>
<tr>
<td>
<p align="center"><strong>Gonzalo Costa Hoevel (ARG-3)</strong></p>
<p align="center"><a href="http://www.carbonsugar.com/wp-content/uploads/wallpapers/1600x1200/Gonzalo-1-1600x1200.jpg">1600&#215;1200</a> (Fullscreen 4:3)<br />
<a href="http://www.carbonsugar.com/wp-content/uploads/wallpapers/1680x1050/Gonzalo-1-1680x1050.jpg">1680&#215;1050</a> (Widescreen 16:10)<br />
<a href="http://www.carbonsugar.com/wp-content/uploads/wallpapers/1280x1024/Gonzalo-1-1280x1024.jpg">1280&#215;1024</a> (Fullscreen 5:4)<br />
<a href="http://www.carbonsugar.com/wp-content/uploads/wallpapers/1024x768/Gonzalo-1-1024x768.jpg">1024&#215;768</a> (Fullscreen 4:3)</td>
<td>
<p align="center"><strong>FW Startline</strong></p>
<p align="center"><a href="http://www.carbonsugar.com/wp-content/uploads/wallpapers/1600x1200/Start-1600x1200.jpg">1600&#215;1200</a> (Fullscreen 4:3)<br />
<a href="http://www.carbonsugar.com/wp-content/uploads/wallpapers/1680x1050/Start-1-1680x1050.jpg">1680&#215;1050</a> (Widescreen 16:10)<br />
<a href="http://www.carbonsugar.com/wp-content/uploads/wallpapers/1280x1024/Start-1280x1024.jpg">1280&#215;1024</a> (Fullscreen 5:4)<br />
<a href="http://www.carbonsugar.com/wp-content/uploads/wallpapers/1024x768/Start-1024x768.jpg">1024&#215;768</a> (Fullscreen 4:3)</td>
</tr>
</tbody>
</table>
<table style="text-align: center;" border="0" width="100%">
<tbody>
<tr>
<td>
<div style="text-align: center;"><a href="http://www.carbonsugar.com/wp-content/uploads/wallpapers/1280x1024/AUS120-1-1280x1024.jpg"><img src="http://www.carbonsugar.com/wp-content/uploads/wallpapers/thumbs/AUS120-1-1280x1024.jpg" border="0" alt="" width="250" height="200" /></a></div>
</td>
<td>
<div style="text-align: center;"><a href="http://www.carbonsugar.com/wp-content/uploads/wallpapers/1280x1024/Jesper-1-1280x1024.jpg"><img src="http://www.carbonsugar.com/wp-content/uploads/wallpapers/thumbs/Jesper-1-1280x1024.jpg" border="0" alt="" width="250" height="200" /></a></div>
</td>
</tr>
<tr>
<td>
<p align="center"><strong>Sean O&#8217;Brien (AUS-120)</strong></p>
<p align="center"><a href="http://www.carbonsugar.com/wp-content/uploads/wallpapers/1600x1200/Sean-1-1600x1200.jpg">1600&#215;1200</a> (Fullscreen 4:3)<br />
<a href="http://www.carbonsugar.com/wp-content/uploads/wallpapers/1680x1050/AUS120-1-1680x1050.jpg">1680&#215;1050</a> (Widescreen 16:10)<br />
<a href="http://www.carbonsugar.com/wp-content/uploads/wallpapers/1280x1024/AUS120-1-1280x1024.jpg">1280&#215;1024</a> (Fullscreen 5:4)<br />
<a href="http://www.carbonsugar.com/wp-content/uploads/wallpapers/1680x1050/AUS120-1-1680x1050.jpg">1024&#215;768</a> (Fullscreen 4:3)</td>
<td>
<p align="center"><strong>Jesper Vesterstrøm (DEN-111)</strong></p>
<p align="center"><a href="http://www.carbonsugar.com/wp-content/uploads/wallpapers/1600x1200/Jesper-1-1600x1200.jpg">1600&#215;1200</a> (Fullscreen 4:3)<br />
<a href="http://www.carbonsugar.com/wp-content/uploads/wallpapers/1680x1050/Jesper-1-1680x1050.jpg">1680&#215;1050</a> (Widescreen 16:10)<br />
<a href="http://www.carbonsugar.com/wp-content/uploads/wallpapers/1280x1024/Jesper-1-1280x1024.jpg">1280&#215;1024</a> (Fullscreen 5:4)<br />
<a href="http://www.carbonsugar.com/wp-content/uploads/wallpapers/1024x768/Jesper-1-1024x768.jpg">1024&#215;768</a> (Fullscreen 4:3)</td>
</tr>
</tbody>
</table>
<table border="0" width="100%">
<tbody>
<tr>
<td>
<div style="text-align: center;"><a href="http://www.carbonsugar.com/wp-content/uploads/wallpapers/1280x1024/Sails-1280x1024.jpg"><img src="http://www.carbonsugar.com/wp-content/uploads/wallpapers/thumbs/Sails-1280x1024.jpg" border="0" alt="" width="250" height="200" /></a></div>
</td>
<td>
<div style="text-align: center;"><a href="http://www.carbonsugar.com/wp-content/uploads/wallpapers/1280x1024/Steve-Jesper-1280x1024.jpg"><img src="http://www.carbonsugar.com/wp-content/uploads/wallpapers/thumbs/Steve-Jesper-1280x1024.jpg" border="0" alt="" width="250" height="200" /></a></div>
</td>
</tr>
<tr>
<td>
<p align="center"><strong>Chris Ting / Rick Murray / Murray Towndrow</strong></p>
<p align="center"><a href="http://www.carbonsugar.com/wp-content/uploads/wallpapers/1600x1200/Sails-1600x1200.jpg">1600&#215;1200</a> (Fullscreen 4:3)<br />
<a href="http://www.carbonsugar.com/wp-content/uploads/wallpapers/1680x1050/Sails-1680x1050.jpg">1680&#215;1050</a> (Widescreen 16:10)<br />
<a href="http://www.carbonsugar.com/wp-content/uploads/wallpapers/1280x1024/Sails-1280x1024.jpg">1280&#215;1024</a> (Fullscreen 5:4)<br />
<a href="http://www.carbonsugar.com/wp-content/uploads/wallpapers/1024x768/Sails-1024x768.jpg">1024&#215;768</a> (Fullscreen 4:3)</td>
<td>
<p align="center"><strong>Steve Allen / Jesper Vesterstrøm</strong></p>
<p align="center"><a href="http://www.carbonsugar.com/wp-content/uploads/wallpapers/1600x1200/Steve-Jesper-1600x1200.jpg">1600&#215;1200</a> (Fullscreen 4:3)<br />
<a href="http://www.carbonsugar.com/wp-content/uploads/wallpapers/1680x1050/Steve-Jesper-1680x1050.jpg">1680&#215;1050</a> (Widescreen 16:10)<br />
<a href="http://www.carbonsugar.com/wp-content/uploads/wallpapers/1280x1024/Steve-Jesper-1280x1024.jpg">1280&#215;1024</a> (Fullscreen 5:4)<br />
<a href="http://www.carbonsugar.com/wp-content/uploads/wallpapers/1024x768/Steve-Jesper-1024x768.jpg">1024&#215;768</a> (Fullscreen 4:3)</td>
</tr>
</tbody>
</table>
<table border="0" width="100%">
<tbody>
<tr>
<td>
<div style="text-align: center;"><a href="http://www.carbonsugar.com/wp-content/uploads/wallpapers/1280x1024/AUS120-2-1280x1024.jpg"><img src="http://www.carbonsugar.com/wp-content/uploads/wallpapers/thumbs/AUS120-2-1280x1024.jpg" border="0" alt="" width="250" height="200" /></a></div>
</td>
<td>
<div style="text-align: center;"><a href="http://www.carbonsugar.com/wp-content/uploads/wallpapers/1280x1024/Jesper-2-1280x1024.jpg"><img src="http://www.carbonsugar.com/wp-content/uploads/wallpapers/thumbs/Jesper-2-1280x1024.jpg" border="0" alt="" width="250" height="200" /></a></div>
</td>
</tr>
<tr>
<td>
<p align="center"><strong>Sean O&#8217;Brien (AUS-120)</strong></p>
<p align="center"><a href="http://www.carbonsugar.com/wp-content/uploads/wallpapers/1600x1200/Sean-2-1600x1200.jpg">1600&#215;1200</a> (Fullscreen 4:3)<br />
<a href="http://www.carbonsugar.com/wp-content/uploads/wallpapers/1680x1050/AUS120-2-1680x1050.jpg">1680&#215;1050</a> (Widescreen 16:10)<br />
<a href="http://www.carbonsugar.com/wp-content/uploads/wallpapers/1280x1024/AUS120-2-1280x1024.jpg">1280&#215;1024</a> (Fullscreen 5:4)<br />
<a href="http://www.carbonsugar.com/wp-content/uploads/wallpapers/1024x768/AUS120-2-1024x768.jpg">1024&#215;768</a> (Fullscreen 4:3)</td>
<td>
<p align="center"><strong>Jesper Vesterstrøm (DEN-111)</strong></p>
<p align="center"><a href="http://www.carbonsugar.com/wp-content/uploads/wallpapers/1600x1200/Jesper-2-1600x1200.jpg">1600&#215;1200</a> (Fullscreen 4:3)<br />
<a href="http://www.carbonsugar.com/wp-content/uploads/wallpapers/1680x1050/Jesper-2-1680x1050.jpg">1680&#215;1050</a> (Widescreen 16:10)<br />
<a href="http://www.carbonsugar.com/wp-content/uploads/wallpapers/1280x1024/Jesper-2-1280x1024.jpg">1280&#215;1024</a> (Fullscreen 5:4)<br />
<a href="http://www.carbonsugar.com/wp-content/uploads/wallpapers/1024x768/Jesper-2-1024x768.jpg">1024&#215;768</a> (Fullscreen 4:3)</td>
</tr>
</tbody>
</table>
<table border="0" width="100%">
<tbody>
<tr>
<td>
<div style="text-align: center;"><a href="http://www.carbonsugar.com/wp-content/uploads/wallpapers/1280x1024/Gonzalo-2-1280x1024.jpg"><img src="http://www.carbonsugar.com/wp-content/uploads/wallpapers/thumbs/Gonzalo-2-1280x1024.jpg" border="0" alt="" width="250" height="200" /></a></div>
</td>
<td>
<div style="text-align: center;"><a href="http://www.carbonsugar.com/wp-content/uploads/wallpapers/1280x1024/Carbon-1280x1024.jpg"><img src="http://www.carbonsugar.com/wp-content/uploads/wallpapers/thumbs/Carbon-1280x1024.jpg" border="0" alt="" width="250" height="200" /></a></div>
</td>
</tr>
<tr>
<td>
<p align="center"><strong>Gonzalo Costa Hoevel (ARG-3)</strong></p>
<p align="center"><a href="http://www.carbonsugar.com/wp-content/uploads/wallpapers/1600x1200/Gonzalo-2-1600x1200.jpg">1600&#215;1200</a> (Fullscreen 4:3)<br />
<a href="http://www.carbonsugar.com/wp-content/uploads/wallpapers/1680x1050/Gonzalo-2-1680x1050.jpg">1680&#215;1050</a> (Widescreen 16:10)<br />
<a href="http://www.carbonsugar.com/wp-content/uploads/wallpapers/1280x1024/Gonzalo-2-1280x1024.jpg">1280&#215;1024</a> (Fullscreen 5:4)<br />
<a href="http://www.carbonsugar.com/wp-content/uploads/wallpapers/1024x768/Gonzalo-2-1024x768.jpg">1024&#215;768</a> (Fullscreen 4:3)</td>
<td>
<p align="center"><strong>CarbonSugar.com</strong></p>
<p align="center"><a href="http://www.carbonsugar.com/wp-content/uploads/wallpapers/1600x1200/Carbon-1600x1200.jpg">1600&#215;1200</a> (Fullscreen 4:3)<br />
<a href="http://www.carbonsugar.com/wp-content/uploads/wallpapers/1680x1050/Carbon-1680x1050.jpg">1680&#215;1050</a> (Widescreen 16:10)<br />
<a href="http://www.carbonsugar.com/wp-content/uploads/wallpapers/1280x1024/Carbon-1280x1024.jpg">1280&#215;1024</a> (Fullscreen 5:4)<br />
<a href="http://www.carbonsugar.com/wp-content/uploads/wallpapers/1024x768/Carbon-1024x768.jpg">1024&#215;768</a> (Fullscreen 4:3)</td>
</tr>
</tbody>
</table>
]]></content:encoded>
			<wfw:commentRss>http://www.carbonsugar.com/downloads/pro-fw-desktop-wallpapers/feed/</wfw:commentRss>
		<slash:comments>14</slash:comments>
		</item>
		<item>
		<title>Everything You Should Know About FW Fins.</title>
		<link>http://www.carbonsugar.com/design/everything-you-should-know-about-fw-fins/</link>
		<comments>http://www.carbonsugar.com/design/everything-you-should-know-about-fw-fins/#comments</comments>
		<pubDate>Wed, 16 Apr 2008 13:48:19 +0000</pubDate>
		<dc:creator>Sean OBrien</dc:creator>
				<category><![CDATA[Design]]></category>
		<category><![CDATA[Racing]]></category>
		<category><![CDATA[_Featured]]></category>
		<category><![CDATA[deboichet]]></category>
		<category><![CDATA[degrees]]></category>
		<category><![CDATA[drag]]></category>
		<category><![CDATA[fins]]></category>
		<category><![CDATA[flex]]></category>
		<category><![CDATA[geometric twist]]></category>
		<category><![CDATA[hurricane]]></category>
		<category><![CDATA[induced]]></category>
		<category><![CDATA[kashy]]></category>
		<category><![CDATA[leading edge]]></category>
		<category><![CDATA[market]]></category>
		<category><![CDATA[rake]]></category>
		<category><![CDATA[scale]]></category>
		<category><![CDATA[select]]></category>
		<category><![CDATA[soft]]></category>
		<category><![CDATA[stiffness]]></category>
		<category><![CDATA[torsional]]></category>
		<category><![CDATA[torsional-stiffness]]></category>
		<category><![CDATA[twist]]></category>
		<category><![CDATA[vertical]]></category>
		<category><![CDATA[vmg]]></category>

		<guid isPermaLink="false">http://www.carbonsugar.com/?p=46</guid>
		<description><![CDATA[<p>One of the single most important aspects to your FW setup is what is under your feet; <strong>fins</strong>. As a result, fins have been somewhat an aspect that people obsess about a little too much. As it stands right now, there are 4 mainstream fin makers in the World who&#8217;s fins are activ&#8230;</p>]]></description>
				<content:encoded><![CDATA[<p>One of the single most important aspects to your FW setup is what is under your feet; <strong>fins</strong>. As a result, fins have been somewhat an aspect that people obsess about a little too much. As it stands right now, there are 4 mainstream fin makers in the World who&#8217;s fins are actively being used on the FW Pro Circuit (apologies to the smaller, lesser known fin companies who I have left out): <a href="http://www.deboichetcustom.com/">Deboichet</a>, <a href="http://www.mauisails.com/forum/viewtopic.php?pid=5268">Kashy</a>, <a href="http://www.select-hydrofoils.com/">Select</a>, <a href="http://www.hurricanefins.de/">Hurricane</a>, whereby nearly 70% of those are Deboichet made. Each fin company makes a variety of foils in a number of flex stiffnesses, torsional stiffnesses, rakes and twist, which doesn&#8217;t make buying a new fin an easily made decision. Coupled with long queues on fin orders and high price tags, many people end up spending money on fins that aren&#8217;t helping them. Understanding some basic theory and terminology used in the fin-world might just help you make an informed decision before you part with your hard earned money. Understanding what the fin does to the trim of your board and what you should be looking for when you test fins against each other, might even be <em>more</em> useful. Here we will attempt to do both &#8230;</p>
<p><span id="more-46"></span></p>
<p>First and foremost, it is important to clarify a few aspects of terminology used when people talk about fins, as scouring the popular windsurfing forums over the past few years you will find a plethora of information where people are using terms incorrectly and are only adding to the confusion. Here are a few of the key terms used in fin-ology.</p>
<h3>Rake:</h3>
<p><a href="http://www.carbonsugar.com/wp-content/uploads/2008/04/rake.jpg"><img class="alignleft size-thumbnail wp-image-49" style="float: left;" title="Rake" src="http://www.carbonsugar.com/wp-content/uploads/2008/04/rake-150x150.jpg" alt="" width="150" height="150" /></a>Rake is simply the angle of the leading edge of the fin, relative to a line perpendicular to the bottom of the board. Everyone started thinking about modifying the rake of their fins in a more mainstream sense around the 2003 FW Worlds. As Deboichet represented about 95% of the fin market at that time, the &#8216;rake&#8217; scale became popularised under a number system only applicable to Deboichet fins.</p>
<p>Deboichet uses a scale such as +4cm, +6cm, +8cm etc (where +11cm is vertical). Both Kashy and Hurricane use a scale such as 2 degrees, 3 degrees etc (where 0 degrees is vertical).</p>
<p style="text-align: center;">Deboichet: <strong>+8cm = 2.5 degrees = 30mm back from vertical.</strong></p>
<p><em>Ps. Remember that MORE rake, means the fin is LESS upright (more swept-back at the tip). Because Deboichet&#8217;s scale is counting up as you decrease the rake, a lot of people have mistakenly written on forums about more rake when they are actually talking about moving fins from +6cm to +8cm, which is LESS rake.</em></p>
<p>Generally speaking, the more upright your fin is, the more lift it generates at the expense of induced drag. In light winds, people usually have relatively upright fins and in strong winds, some may have their fins with a little more rake to keep control of the board. Another important point to understand about rake is that by changing the rake of a fin, you are also influencing the <strong>twist. </strong></p>
<h3>Twist:</h3>
<p><a href="http://www.carbonsugar.com/wp-content/uploads/2008/04/geometrictwist.jpg"><img class="alignnone size-thumbnail wp-image-53 alignleft" style="float: left;" title="Geometric Twist" src="http://www.carbonsugar.com/wp-content/uploads/2008/04/geometrictwist-150x150.jpg" alt="" width="150" height="150" /></a>Twist is probably one of the least well understood characteristics of a fin. It is most commonly mistaken as being &#8216;torsional-stiffness&#8217;, when it is in fact, something completely different. When sailing, the righting moment of the sailor is countered by the side-force (or lateral resistance) of the board and the lift provided by the fin. Twist (or in aerodynamic terminology,<em> &#8220;geometric twist&#8221;</em>) is the result of the lift developed by the fin acting very close to 1/4 of the chord, back from the leading edge, while the neutral axis for bending is about 40% back from the leading edge; so there is a torsional moment when the fin bends. Simply put, as you flex a fin when you sail, this causes the fin to twist.</p>
<p>The geometric twist is more pronounced if you have a fin that is more swept-back (raked). So you will probably get more twist with an R13 at +4cm than you would with an identical R13 at +8cm.</p>
<p>Twist is important for the performance of a fin both upwind and downwind. Having no twist in a fin allows you to generate a better upwind angle but at the expense of becoming uncomfortable (or difficult) to sail downwind. This is probably because twist reduces the induced drag of a fin (or vortex drag from the tip) which is a significant portion of the total drag of a fin at the speeds a windsurfer travels. The induced drag is reduced when the angle of attack [aoa] at the tip of the fin is less than the aoa at the root of the fin (particularly for a fin with a planform of a tapered leading edge, such as an R13).</p>
<p><em>*I&#8217;ve tried to keep this article relatively simple, but if you&#8217;d like to read some more about induced drag and geometric twist, try these:</em></p>
<ul>
<li><a href="http://www.auf.asn.au/groundschool/umodule4.html">http://www.auf.asn.au/groundschool/umodule4.html</a></li>
<li><a href="http://en.wikipedia.org/wiki/Induced_drag">http://en.wikipedia.org/wiki/Induced_drag</a></li>
</ul>
<p>Many top sailors will talk about the performance of their fins downwind, as much as they talk about it upwind. To be fast around the course you generally want a fin that performs downwind just as well as it did upwind. If you talk to some of the Pro&#8217;s on the circuit about downwind performance in fins you might hear them say that their fin is &#8216;working&#8217; for them off the wind and allowing them to &#8216;drive&#8217; off the fin to go extra deep. Most likely they are referring to the twist in their fin, as the twist allows the fin to &#8216;depower&#8217; to some extent and let you drive off it, deeper downwind, whereas some fins with no twist are creating too much lift downwind and force you to head upwind, giving you that &#8216;uncomfortable&#8217; feeling downwind.</p>
<p>Similarly, it&#8217;s been said by some Pro&#8217;s that soft fins that twist are actually faster upwind in high-winds (despite what&#8217;s in your mind about stiffer fins being better in high winds). The twist in the fin can help it depower when you&#8217;ve generated too much lift in a gust and help to settle the board down. Having a board with a very wide tail (+81cm) will help with the control in high winds also.</p>
<h3>Torsional-Stiffness:</h3>
<p><a href="http://www.carbonsugar.com/wp-content/uploads/2008/04/tortionalstiffness.jpg"><img class="alignleft size-thumbnail wp-image-52" style="float: left;" title="Tortional Stiffness" src="http://www.carbonsugar.com/wp-content/uploads/2008/04/tortionalstiffness-150x150.jpg" alt="" width="150" height="150" /></a>Put a fin in your board and then grip the tip of the fin with your thumb and index finger. Twist the fin tip like you are unscrewing the lid of a Coke bottle. What you are witnessing is &#8216;torsional stiffness&#8217; and although it is related, it is <strong>NOT</strong> &#8216;twist&#8217; in the sense of how a fin manufacturer will be measuring it.</p>
<p>High torsional stiffness has been recently receiving more focus with the popularity of the Kashy fins on the market. Most of the better Kashy fins I have seen are more torsionally stiff than the majority of Deboichet/Hurricane fins and I believe this helps the Kashy fins retain a constant angle of attack which helps increase lift whilst maintaining good upwind speed.</p>
<p>The confusing thing about twist vs torsional-stiffness is probably because some people may assume that a softer fin is always going to have less torsional-stiffness and therefore more twist, but in actual fact that is not true. Both twist and torsional-stiffness are dependent on the planform, rake and most importantly, the fibre directions when the fin is layed-up during manufacture. As a result, a fin with extremely high torsional-stiffness can be built to twist a lot, or it can be built to have no twist at all. It is not possible to check twist with your fingers using the method above; it is possible however, to gauge torsional-stiffness with your fingers using this method.</p>
<h3>Flex-Stiffness:</h3>
<p><a href="http://www.carbonsugar.com/wp-content/uploads/2008/04/flexstiffness.jpg"><img class="alignleft size-thumbnail wp-image-48" style="float: left;" title="Flex Stiffness" src="http://www.carbonsugar.com/wp-content/uploads/2008/04/flexstiffness-150x150.jpg" alt="" width="150" height="150" /></a>This is the stiffness you generally hear referred to when you buy a fin. A soft fin, a S&#8211;, an XXS, a 651; or so the lingo goes. Choosing the right stiffness of fin for the conditions you are sailing is very important, however the choices are about as individual as they come and depends heavily on your technique, sail brand, board brand and wind/wave conditions.</p>
<p>In flat water (eg. a lake), you put a more constant load on your fin when sailing upwind whereas on the ocean with swell and wind blown chop on the swell, the load on the fin is spiking as you go over waves or if you get slightly airborne over a chop. The other thing to consider is rider weight and sail size. A 90kg rider holding his 11m in 25 knots is most likely putting a considerable amount more load on his fin than a 72kg rider on his 9.8m in the same wind.</p>
<h2>Selecting A New Fin</h2>
<p>So you are going to go and buy yourself a nice new shiny fin. First, you should ask yourself a few questions about what you want the fin for.</p>
<ul>
<li>Light winds? You most likely want a soft, powerful fin.</li>
<li>Light winds in shifty/flukey conditions (ie, if you sail on an inland lake, with fresh water or in off-shore winds)? You most likely want a fin that points super high, even if it is slow; pointing high allows you to get into the new wind quicker.</li>
<li>Medium-strong winds on the ocean? It&#8217;s possible you might want a fin that travels faster, even at the expense of a little height, to be able to dodge between swells and help with your downwind speed.</li>
</ul>
<h2>Now What? Some Ideas on Fin Tuning</h2>
<p>Now that we&#8217;ve covered a little bit of terminology and some super basic ideas to think about when selecting a fin to buy, it&#8217;s time to move over to how to tune a fin and what to think about when you are testing fins against other fins. It is quite difficult to explain what you are looking for when you tune any aspect of your gear, let alone fins. Tuning fins is about an intuitive <em>feeling</em> for going fast, pointing high or going deep downwind and this key skill that the Pro&#8217;s possess is something that mere mortals find difficult to grasp. Notwithstanding what I have just said, I still believe it is important that someone at least makes an attempt to explain what this feeling is, because that knowledge is one of the most sought after pieces of information in competitive windsurfing and probably something that most Pro&#8217;s will not want to give away.</p>
<p>On that note&#8230; here goes&#8230;</p>
<p>The approach I suggest you use when testing fins involves 3 stages:</p>
<ol>
<li>Trying the new fin; understanding and learning its &#8217;effect&#8217; on the board</li>
<li>Testing the fin against the best fin you already have</li>
<li>Testing against a training partner</li>
</ol>
<h3>Stage 1: The &#8220;Effect&#8221;</h3>
<p>The first thing you should think about when you try a new fin is its &#8220;effect&#8221; on the board; paying most of your attention to the &#8216;trim&#8217; of the board. Most boards, generally speaking, like to be sailed with the nose riding high (lifting a little) and railing well upwind with even pressure between the front and back legs (or a little more pressure on your back leg if necessary). Some fins do this naturally (like a standard R13), but with other fins (even some that may be faster than an R13) you may need to work hard to develop this response from the fin.</p>
<p>There is no substitute for time-on-water. Just go sailing and get used to the feeling off your new fin. Forget about changing settings at this stage. Just sail your new fin.</p>
<h3>Stage 2: Test the Best</h3>
<p>To test any fin, you should always test it against the best fin you already have. Go for a run on your current best fin and find the setup that gets the most out of that fin in the conditions you are currently sailing (boom height, mast-track position etc). Now without changing any gear settings, go for a run on the new fin and pay close attention to how this fin effects the trim of the board (does the board feel stickier? sluggish? more responsive? lifting the nose too much and losing control?). If there is a difference, the first thing to try is moving your mast-track. I always suggest moving your mast-track in larger movements; 3cm at a time can sometimes be good to get a first impression on trim. When you are more dialled in to the <em>feeling</em> you can start moving it 1cm at a time.</p>
<p>If there is no difference in how the board sails/rails upwind then try moving your mast-track around anyhow. It&#8217;s possible, this new fin, even though it hasn&#8217;t changed the trim of your board, could have more control at the top end and allow you to run the mast-track further back than your best fin, which may be a faster setting on your fw board.</p>
<p>Downwind, mostly you want to find a fin that helps <a href="http://www.carbonsugar.com/technique/how-fast-can-your-fw-kit-go/">fly-the-fin</a>, which is, excessively railing to reduce the wetted surface-area of the board. Traditional tapered leading-edge fins with a little twist such as an R13 or Hurricane 4a will rail the board almost with no concentration necessary. Some of the newer, softer fins with more torsional-stiffness, (such as a new Select R07 or some model Kashy&#8217;s) might require a slightly more upright stance or different mast-track position to fly-the-fin more efficiently. The fins that will do this the best will depend on the board/sail combination being used.</p>
<h3>Stage 3: Race Your Buddy</h3>
<p>Now that you&#8217;ve tuned your gear to compliment your new fin, go and test it against your training partner to check its performance. It&#8217;s important in this stage to have a consistent training partner of a similar speed and one who appreciates the rules of &#8217;2-boat tuning&#8217; and doesn&#8217;t just put you in the <a href="http://www.carbonsugar.com/racing/to-the-windward-mark-advanced-tactics/">hopeless position</a> all the time. You need to swap positions regularly when you run to make sure your position isn&#8217;t affecting the other sailor&#8217;s performance and it is likely, with two sailors, that one sailor might point higher and the other might go faster on their current setups. Every so often on the run upwind, change positions from windward to leeward boat, to see if you can judge whether one fin is going better than the other.</p>
<p>It&#8217;s important to understand how much &#8216;better&#8217; one fin is going in the scope of the original points that were mentioned &#8220;when selecting a new fin&#8221;. HIGHER is different to FASTER. Imagine those strengths/weaknesses if you were in a race. It&#8217;s not much good being excited your new fin is faster upwind than your friend&#8217;s if he is going higher than you - when you purchased this fin to sail in shifty offshore conditions on a fresh-water lake. He will most likely punish you around the course and you&#8217;ll be 300 euros poorer.</p>
<p>Don&#8217;t forget downwind performance!</p>
<h2>That&#8217;s It, We&#8217;re Done!</h2>
<p>This is a pretty &#8216;general&#8217; write-up about tuning fins, simply because the variables in windsurfing are too great to write a decent article on this unless you are writing about using a particular sail-brand, on a particular board, for guys at a particular body weight sailing in particular conditions. What I hoped to achieve, is to create a reference point and lay-down a few important points about creating your own system to efficiently let you test fins (with or without a training partner/gps-unit analysis) and get people thinking more about &#8220;what fins do to your board trim&#8221;, rather than obsessing over <em>what fin is Antoine using</em>.</p>
<p>If you remember the few key pointers about fin testing and learn a little about the terminology of fins, it will help you get more out of the millions of forum posts out there on fins (ie, I suggest you Google anything that <a href="http://speedsailingdesign.blogspot.com/">Boogie</a> has written on a forum in the last 6 years).</p>
<p>Hopefully this article will help with the next fin purchase. Down the track we will attempt to write something more specific to boards as with the new 2-year lock on board shapes, we are stuck with the current gear for some time now &#8230; In the meantime, here are a few frequently asked questions on fins from various windsurfing forums around the world.</p>
<h2>Frequently Asked Questions Regarding Fins.</h2>
<p><strong>Q &gt; I&#8217;ve read some Pro&#8217;s now prefer softer fins for high-wind; I thought stiffer fins were better for high-winds?</strong></p>
<ul>
<li><a href="http://www.star-board.com/forum/showthread.php?t=3526">http://www.star-board.com/forum/showthread.php?t=3526</a></li>
</ul>
<p>I think you will find that statement to have been true about 3-4 seasons ago, but it doesn&#8217;t apply to the current gear. Since 2006, with the Starboard 160 (and now 161, 162). The tail-widths of the FW boards have increased dramatically; the same for nearly all board brands, not just Starboards. As a result, with even more power from the tail of the board we can run bigger and more powerful fins than ever before.</p>
<p>Although cutdown fins have been around a long time, they probably weren&#8217;t as mainstream back in the Starboard 147/158 days, but now look at the R19 (as a 76cm cutdown), which is the &#8220;standard&#8221; foil to come with a 161/162 board.</p>
<p>If you want more power in a fin, generally speaking, you make it bigger (ie, a cutdown) or you make it softer. So now we are seeing more people using soft fins in all conditions, not just lightwinds. And some (myself included to some extent), using one fin for nearly all conditions &#8211; the lightwind fin that works great in highwinds.</p>
<p>So with the extra control we now have with our wider tail boards and everyone using softer and softer fins, the brands have worked on the nose shapes, making them thinner and more boat-like (specifically on the 162 and Gaastra Vapor), which has allowed us to control these soft powerful fins downwind, where before it was uncomfortable with such power under your feet.</p>
<p>Another aspect that I suspect that plays a role is the &#8220;twist&#8221; in these fins. Hard to know exactly what happens with a fin under your feet, but I suspect the extra twist in the softer fins allows them to depower as they flex when you sail downwind and help with control, whereas a Medium fin would be trickier downwind and a Hard fin even trickier again as they can&#8217;t release the power and so end up forcing you upwind instead of allowing you the control to drive downwind.</p>
<p><strong>Q &gt; This new fin I have is making the board sail very flat, is this slow?</strong></p>
<p>Probably. Depends on your board. As mentioned above in the tuning section, you are most likely sailing with one of these newer, softer and more powerful fins (a good example is a Kashy or what Deboichet is most likely trying to replicate with an R20). These fins create a small amount of vertical lift which in a sense, lifts the tail of your board which in turn, drops the nose of your board. I&#8217;ve read on some forums that with these fins the boards <em>need</em> to be sailed very flat, but I think you&#8217;ll find the fin is <em>making</em> your board sail flat (in other words, you don&#8217;t need to work so hard to get the optimum trim out of the fin; it is doing it for you).</p>
<p><a href="http://www.carbonsugar.com/wp-content/uploads/2008/04/deboichet.jpg"><img class="alignnone size-full wp-image-54" title="Deboichet R20 Fin" src="http://www.carbonsugar.com/wp-content/uploads/2008/04/deboichet-300x62.jpg" alt="Deboichet R20 Proto Fin" /></a></p>
<p>Now go windsurfing!<!-- / message --><!-- sig --></p>
]]></content:encoded>
			<wfw:commentRss>http://www.carbonsugar.com/design/everything-you-should-know-about-fw-fins/feed/</wfw:commentRss>
		<slash:comments>31</slash:comments>
		</item>
		<item>
		<title>Yes, I listen; something new.</title>
		<link>http://www.carbonsugar.com/sidenotes/yes-i-listen-something-new/</link>
		<comments>http://www.carbonsugar.com/sidenotes/yes-i-listen-something-new/#comments</comments>
		<pubDate>Mon, 07 Apr 2008 14:37:06 +0000</pubDate>
		<dc:creator>Sean OBrien</dc:creator>
				<category><![CDATA[Sidenotes]]></category>
		<category><![CDATA[Design]]></category>
		<category><![CDATA[website]]></category>

		<guid isPermaLink="false">http://www.carbonsugar.com/?p=43</guid>
		<description><![CDATA[<p>There&#8217;s been a number of emails received here about the contrast and clarity issues associated with a dark website with light text. As a result, I&#8217;ve decided to update the design to reflect the opposite; dark text on a light background. Please bear with me as I iro&#8230;</p>]]></description>
				<content:encoded><![CDATA[<p>There&#8217;s been a number of emails received here about the contrast and clarity issues associated with a dark website with light text. As a result, I&#8217;ve decided to update the design to reflect the opposite; dark text on a light background. Please bear with me as I iron out all the new bugs associated with doing anything web related when all you really want to be doing is windsurfing!</p>
<p>And kudos to all the support and positive emails I have been receiving regarding this site so far &#8230;</p>
]]></content:encoded>
			<wfw:commentRss>http://www.carbonsugar.com/sidenotes/yes-i-listen-something-new/feed/</wfw:commentRss>
		<slash:comments>7</slash:comments>
		</item>
		<item>
		<title>GPS Training: Improve Your Tactics (Pt I)</title>
		<link>http://www.carbonsugar.com/racing/gps-training-improve-your-tactics-pt-i/</link>
		<comments>http://www.carbonsugar.com/racing/gps-training-improve-your-tactics-pt-i/#comments</comments>
		<pubDate>Sun, 06 Apr 2008 04:25:24 +0000</pubDate>
		<dc:creator>Sean OBrien</dc:creator>
				<category><![CDATA[Advanced Tactics]]></category>
		<category><![CDATA[Racing]]></category>
		<category><![CDATA[Tutorial]]></category>
		<category><![CDATA[action replay]]></category>
		<category><![CDATA[fleet]]></category>
		<category><![CDATA[gps]]></category>
		<category><![CDATA[gpsar]]></category>
		<category><![CDATA[map]]></category>

		<guid isPermaLink="false">http://www.carbonsugar.com/?p=39</guid>
		<description><![CDATA[<p>One of the most difficult aspects of improving your time around the course is understanding and applying <a href="http://www.carbonsugar.com/category/tactics/">tactics</a>. A plethora of fantastic <a href="http://www.amazon.com/Wind-Strategy-Sail-David-Houghton/dp/0906754798/ref=sr_1_29?ie=UTF8&#38;s=books&#38;qid=1198159188&#38;sr=8-29">sailing books</a> have been written on tactics but the simple fact of the matter is you only get so good by reading; real world experience goes &#8230;</p>]]></description>
				<content:encoded><![CDATA[<p>One of the most difficult aspects of improving your time around the course is understanding and applying <a href="http://www.carbonsugar.com/category/tactics/">tactics</a>. A plethora of fantastic <a href="http://www.amazon.com/Wind-Strategy-Sail-David-Houghton/dp/0906754798/ref=sr_1_29?ie=UTF8&amp;s=books&amp;qid=1198159188&amp;sr=8-29">sailing books</a> have been written on tactics but the simple fact of the matter is you only get so good by reading; real world experience goes a <em>very</em> long way and most likely has a lot to do with why the best windsurfing racers in the World are all in their 30&#8242;s. Since handheld personal GPS units have become available and popular it has opened a whole new kettle of fish into how we can learn, train and critique our tactics around the course. In this article I am going to show you how to create GPSAR (GPS Action Replays) of your local fleet&#8217;s racing which will let you play back the races in real-time; a perfect way to fine tune your tactics to be ready for the second day of racing.</p>
<p><span id="more-39"></span></p>
<p>Since this will be a long article, I&#8217;ve decided to break it up into two parts. The first will be a tutorial on how to create a GPSAR (GPS Action Replay is a program designed to replay GPS tracks simultaneously for review) to review any race you have competed in. The second part will be how to analyse this data more efficiently and some tips on the easiest things to improve, now that you have a way of reviewing your racing.</p>
<p>For the record, GPSAR was brought to the forefront of the Formula Windsurfing public eye by Devon Boulon and Ian Fox at the 2005 FW Worlds in Australia. Unbeknownst to many at that event, a few of us in Sydney, Australia, had already be doing these replays for over 2 seasons and felt quite robbed by Devon taking the glory. In fact, some of what was done in Australia with the help of Jan (creator of GPSAR) has paved the way for the new version of GPSAR Pro.</p>
<p>To give you some examples of what I am talking about here, please visit the site below. This is a windsurfing club in Sydney, Australia, at which we have run our races for many years with the top riders using GPS units while they race. (You will require only Java Runtime Environment to view these files, see below for a download):</p>
<ul>
<li><a href="http://www.storm-riders.com.au/results/gps-action-replays/">www.storm-riders.com.au/gpsar/</a></li>
</ul>
<p>GPSAR allows you to upload any number of GPS tracks simultaneously onto one screen, and even underlay that screen with a map of the location. With this program, you can change the speed and view of the race whilst you watch and then very easily see how everyone got to the finish line in the positions they did (whereas in reality, you can only see who&#8217;s within earshot of you on the racecourse). All you need to do is next time you go sailing, take your GPS unit and make sure a couple of rivals also have theirs. Record the tracks at the end of the day onto one computer then follow this tutorial&#8230;</p>
<p>So let&#8217;s begin the tutorial.</p>
<div class="ngg-galleryoverview" id="ngg-gallery-7-39">


	<!-- Thumbnails -->
		
	<div id="ngg-image-36" class="ngg-gallery-thumbnail-box"  >
		<div class="ngg-gallery-thumbnail" >
			<a href="http://www.carbonsugar.com/wp-content/uploads/gps-1/Step1.gif" title="Figure 1" class="shutterset_set_7" >
								<img title="Step1.gif" alt="Step1.gif" src="http://www.carbonsugar.com/wp-content/uploads/gps-1/thumbs/thumbs_Step1.gif" width="100" height="75" />
							</a>
		</div>
	</div>


	<div id="ngg-image-37" class="ngg-gallery-thumbnail-box"  >
		<div class="ngg-gallery-thumbnail" >
			<a href="http://www.carbonsugar.com/wp-content/uploads/gps-1/Step2.jpg" title="Figure 2" class="shutterset_set_7" >
								<img title="Step2.jpg" alt="Step2.jpg" src="http://www.carbonsugar.com/wp-content/uploads/gps-1/thumbs/thumbs_Step2.jpg" width="100" height="75" />
							</a>
		</div>
	</div>


	<div id="ngg-image-38" class="ngg-gallery-thumbnail-box"  >
		<div class="ngg-gallery-thumbnail" >
			<a href="http://www.carbonsugar.com/wp-content/uploads/gps-1/Step3.jpg" title="Figure 3" class="shutterset_set_7" >
								<img title="Step3.jpg" alt="Step3.jpg" src="http://www.carbonsugar.com/wp-content/uploads/gps-1/thumbs/thumbs_Step3.jpg" width="100" height="75" />
							</a>
		</div>
	</div>


	<div id="ngg-image-39" class="ngg-gallery-thumbnail-box"  >
		<div class="ngg-gallery-thumbnail" >
			<a href="http://www.carbonsugar.com/wp-content/uploads/gps-1/Step4-0.jpg" title="Figure 4.1" class="shutterset_set_7" >
								<img title="Step4-0.jpg" alt="Step4-0.jpg" src="http://www.carbonsugar.com/wp-content/uploads/gps-1/thumbs/thumbs_Step4-0.jpg" width="100" height="75" />
							</a>
		</div>
	</div>


	<div id="ngg-image-40" class="ngg-gallery-thumbnail-box"  >
		<div class="ngg-gallery-thumbnail" >
			<a href="http://www.carbonsugar.com/wp-content/uploads/gps-1/Step4-1.jpg" title="Figure 4.2" class="shutterset_set_7" >
								<img title="Step4-1.jpg" alt="Step4-1.jpg" src="http://www.carbonsugar.com/wp-content/uploads/gps-1/thumbs/thumbs_Step4-1.jpg" width="100" height="75" />
							</a>
		</div>
	</div>


	<div id="ngg-image-41" class="ngg-gallery-thumbnail-box"  >
		<div class="ngg-gallery-thumbnail" >
			<a href="http://www.carbonsugar.com/wp-content/uploads/gps-1/Step5.jpg" title="Figure 5" class="shutterset_set_7" >
								<img title="Step5.jpg" alt="Step5.jpg" src="http://www.carbonsugar.com/wp-content/uploads/gps-1/thumbs/thumbs_Step5.jpg" width="100" height="75" />
							</a>
		</div>
	</div>


	<div id="ngg-image-42" class="ngg-gallery-thumbnail-box"  >
		<div class="ngg-gallery-thumbnail" >
			<a href="http://www.carbonsugar.com/wp-content/uploads/gps-1/Step6-1.jpg" title="Figure 6.1" class="shutterset_set_7" >
								<img title="Step6-1.jpg" alt="Step6-1.jpg" src="http://www.carbonsugar.com/wp-content/uploads/gps-1/thumbs/thumbs_Step6-1.jpg" width="100" height="75" />
							</a>
		</div>
	</div>


	<div id="ngg-image-43" class="ngg-gallery-thumbnail-box"  >
		<div class="ngg-gallery-thumbnail" >
			<a href="http://www.carbonsugar.com/wp-content/uploads/gps-1/Step6-2.jpg" title="Figure 6.2" class="shutterset_set_7" >
								<img title="Step6-2.jpg" alt="Step6-2.jpg" src="http://www.carbonsugar.com/wp-content/uploads/gps-1/thumbs/thumbs_Step6-2.jpg" width="100" height="75" />
							</a>
		</div>
	</div>


	<div id="ngg-image-44" class="ngg-gallery-thumbnail-box"  >
		<div class="ngg-gallery-thumbnail" >
			<a href="http://www.carbonsugar.com/wp-content/uploads/gps-1/Step7.jpg" title="Figure 7" class="shutterset_set_7" >
								<img title="Step7.jpg" alt="Step7.jpg" src="http://www.carbonsugar.com/wp-content/uploads/gps-1/thumbs/thumbs_Step7.jpg" width="100" height="75" />
							</a>
		</div>
	</div>


	<!-- Pagination -->
 	<div class='ngg-clear'></div>
 	
</div>

<p>Please note, the pictures in this gallery are named accordingly with the STEPS in this tutorial to help you understand better. I have also included a link to each figure within the title of each step, to help us lazy people who hate scrolling back up anytime.</p>
<h2>GPSAR TUTORIAL</h2>
<p>To be able to make the GPSAR&#8217;s you will require the following software. I have done this by using FREE software rather than programs you need to pay for:</p>
<ul>
<li><a href="http://gpsactionreplay.free.fr/index.php?menu=4">GPSAR ver 3.3.3</a> (old &#8220;classic&#8221; version) – the new version is paid for.</li>
<li><a href="http://www.java.com/en/download/manual.jsp">Java Runtime Environment</a></li>
<li><a href="http://www.gpsinformation.org/ronh/">G7toWin</a> (used to cut the tracks into separate days etc, GPSAR can only work on tracks used for one day, G7towin can do +2 days. It can also handle various file formats and is needed to create the waypoints that sync the maps)</li>
<li><a href="http://earth.google.com/">Google Earth</a> (used to create maps and it gives you the coordinates to place your maps)</li>
<li><a href="http://webdesign.about.com/od/notepad/Microsoft_NotePad.htm">Microsoft Notepad</a> (used as a html editor) &#8211; any text editor will work here. I actually use Dreamweaver MX but its paid for.</li>
<li><a href="http://office.microsoft.com/en-us/help/HP010017211033.aspx">Microsoft Picture Manager</a> (used as a photo editor) &#8211; any photo editor will work here. I use Photoshop but again, this is paid for and I&#8217;m aiming to do this for free.</li>
<li>NAVi users: <a href="http://www.manfred-fuchs.de/download_e.html">GPS Results</a>, <a href="http://gpsactionreplay.free.fr/index.php?menu=4">GPSAR Pro</a>, or <a href="http://www.intellimass.com/RealSpeed/Index.htm">RealSpeed</a>. (please note, these are all PAID FOR programs and are required to convert the .sbn files to .gpx format. Sorry guys, why don&#8217;t you just buy a Garmin?)</li>
</ul>
<p><em>For the record, I prefer Garmin GPS units for FW analysis. I apologise to all the avid NAVi GPS fans out there but in the time I&#8217;ve edited tracks of FW races to put into GPSAR&#8217;s, I&#8217;m yet to see a clean NAVi track. They seem to be more vulnerable to losing the signal in patches; despite what version software is used. The Garmin Edge/Forerunner series are flawless, everytime.</em></p>
<p>To begin, you require all the tracks from everyone who sailed that day who you wish to include in the replay. About 4-8 people is best, as more than this and the screen becomes cluttered and more difficult to view the tactics. Take the best 4-8 people in your fleet who wear GPS units.</p>
<h3>STEP 1 (Edit the Files into One Day) <a href="http://www.carbonsugar.com/wp-content/uploads/gps-1/Step1.gif" target="_blank">[Figure 1]</a></h3>
<p>GPSAR has a 24 hour clock inbedded and cannot handle multiple days of data. If someone gives you a track with 3 days of data (as everyone who owns a NAVi seems to do!), you need to use G7toWin to split the track into 3 separate days. The aim is to create files that have 1 day on them.</p>
<p>To edit, highlight the first line of the track to be removed, then scroll down until you find the next day of data and highlight the last of the first day. Right-click and select DELETE SELECTED TRACK ELEMENTS. Save this file as a new file with a name like <strong>&#8216;day1_aus120.gpx&#8217;</strong>.</p>
<h3>STEP 2 (Manage the Files) <a href="http://www.carbonsugar.com/wp-content/uploads/gps-1/Step2.jpg" target="_blank">[Figure 2]</a></h3>
<p>Make a directory with each day’s racing and put the edited tracks into this directory.</p>
<ul>
<li>I suggest you come up with a nice and unified way of naming your files to keep it organised and clean. Something like <strong>day1_aus120.gpx</strong> (where I&#8217;ve used the sail number of who&#8217;s track it is and the date).</li>
</ul>
<p>Open GPSAR and open each sailor&#8217;s edited track and give them a name (ie, SAIL NUMBER) and then a unique colour (think about what colour map you are going to use to pick colours, so that they stand out), then save the individual tracks again with this new information. To change the name and colour, click the NAME and COLOR buttons on the right hand sidebar underneath the Trajectories.</p>
<h3>STEP 3 (Start/Finish Times) <a href="http://www.carbonsugar.com/wp-content/uploads/gps-1/Step3.jpg" target="_blank">[Figure 3]</a></h3>
<p>Pick someone who is in the top of the fleet (easiest to do with the winner). Open his track in GPSAR and using the scroll bar at the bottom, scroll through his track and find the times (roughly) where he starts the race and finishes. GPSAR can only cut the tracks to the nearest 5:00 mins so write on a piece of paper the nearest 5:00 mins before the start and roughly 10-15 mins after he finishes (depending on the level of your fleet who’s tracks you are using &#8211; ie, you want everyone to have finished within that 10-15 min window).</p>
<h3>STEP 4 (Let’s do Race 1) <a href="http://www.carbonsugar.com/wp-content/uploads/gps-1/Step4-0.jpg" target="_blank">[Figure 4.1]</a> <a href="http://www.carbonsugar.com/wp-content/uploads/gps-1/Step4-1.jpg" target="_blank">[Figure 4.2]</a></h3>
<p>Clear GPSAR and then load everyone’s track one by one so all the data is on the screen. I suggest you load them in numerical order (just to be consistent and keep everyone in the same spot each race). Set the start time and finish time by using the appropriate items on the VIRTUAL RUN &amp; STATS menu, then cut it using CUT TRACKS (WITHIN TIME SETTINGS) on the FILE menu. Save that as Race1.gpx. You are basically saving the entire race now.</p>
<p>If you want a shortcut to this step and you have a LOT of ram in your computer: load everyone in and then save all the tracks as one file called DAY1.gpx. Then using the start and finish times, cut it and save it as Race1.gpx. So next time you open it you can just open DAY1 instead of the individual tracks each time. This is quicker, but you would need at least 3-4GB of RAM to be able to handle this, otherwise your computer may explode!</p>
<p>Repeat this step for as many races as you want replays for. ie, Race1, Race2, Race3, Race4, Race5 etc etc&#8230;</p>
<h3>STEP 5 (Create a Pirate&#8217;s Treasure Map) <a href="http://www.carbonsugar.com/wp-content/uploads/gps-1/Step5.jpg" target="_blank">[Figure 5]</a></h3>
<p>To create a map, take your original sailor who’s track you used to define the start/finish times. Take his FIRST race and save it as a file. Go into GoogleEarth and find the location of where you have been sailing, then do a screen dump [Print Screen button] of this location. Then take the coordinates (using your mouse hovering over the screen, you will be given longitude/latitude coordinates on the taskbar) from the very top left corner and bottom right corner of the screen.</p>
<p>Use any photoeditor (I like Photoshop) to edit the picture so you only can see the map, not the control panel of GoogleEarth. Save the edited map file as a <strong>.jpg</strong> file.</p>
<ul>
<li>TIP: put the grid on in GoogleEarth, to help you get your bearings, then take it off before you do the screendump.</li>
</ul>
<p>Put the .jpg file of your map into a directory called /maps/ within the directory you have all your tracks in(needs to be smallcase).</p>
<h3>STEP 6 (Calibrating the Map) <a href="http://www.carbonsugar.com/wp-content/uploads/gps-1/Step6-1.jpg" target="_blank">[Figure 6.1]</a> <a href="http://www.carbonsugar.com/wp-content/uploads/gps-1/Step6-2.jpg" target="_blank">[Figure 6.2]</a></h3>
<p>Open up the original sailor&#8217;s track you used in Step 6 in G7toWin and insert waypoints for the top left and bottom right corners of the track by using CREATE on the WAYPOINTS menu. [See Figure 6 in the gallery to make sure you've entered the coordinates correctly]. Save this file.</p>
<p>Open GPSAR and load the track (now with waypoints) and switch waypoints on (tick box on right sidebar) and load the .jpg map file using FILE ~ CREATE A NEW MAP. Zoom the scale out so you can see the map in its entirety and the waypoints (WP1, WP2) and then hold down the SHIFT and CONTROL keys and using your mouse you drag the waypoints over the map. This is explained on pages 65-70 on the <a href="http://www.carbonsugar.com/wp-admin/GPSAR Pro Manual">GPSAR Pro Full Manual</a>. Then save the map: FILE ~ SAVE MAPS.</p>
<p>The map is now calibrated.</p>
<h3>STEP 7 (Setup the Applet) <a href="http://www.carbonsugar.com/wp-content/uploads/gps-1/Step7.jpg" target="_blank">[Figure 7]</a></h3>
<p>You need to make a new folder with these 9 files in it (for 4 races); the extra file is the <strong>gpsar.jar </strong>file. Here&#8217;s one I prepared earlier (download mine, because you MUST have all these files included):</p>
<ul>
<li><a href="http://www.carbonsugar.com/wp-content/uploads/2008/04/carbonsugar-gps.zip">DOWNLOAD GPSAR Sample Folder</a> (1.12 MB zip file)</li>
</ul>
<p>I have included in their all the race files called <strong>race1.html </strong>etc. Use these standard files and edit it with your HTML Editor, making note of the screen resolution (you can put a nice heading in it as well) and then save it, like <strong>&#8220;Race 1 &#8211; Champion of the Universe Grand Prix&#8221;. </strong>In Figure 7 you can see highlighted in pink what parts of the .html file need to be edited.</p>
<p>Open the HTML file in your web browser. It should load the maps (it may ask for cookies or an ActiveX application, select yes). Make sure you remembered to install the Java Runtime Environment, otherwise this could get ugly&#8230;</p>
<h3>STEP 8 (Optimising for Better Analysis)</h3>
<p>You&#8217;ve actually finished by this stage, but to help you better analyse the racing here&#8217;s a few tips on setting up GPSAR to look nice and clean&#8230;</p>
<p><strong>A) Compare Side-by-Side Performance:</strong></p>
<p>Pick on the fastest guy on the course, centre to him by right-clicking your mouse on him. Select FOOTPRINTS on the View Settings panel on the right side. Wind the speed up to around x6 on the top bar and adjust the zoom scale to maximum.</p>
<p><strong>B) Identify Tactics:</strong></p>
<p>If you want to analyse the tactics, tide influences, wind shifts and course differences, adjust the scale to fit the entire race into the screen. Wind the speed up to around x10-15 and select NEIGHBOURHOOD on the View Settings Panel.</p>
<p>If you want, you can get fancy with Photoshop and put the buoys in&#8230; But I’ve noticed doing this that buoys actually drift further than you think over a day’s racing!!</p>
<p>That&#8217;s it.</p>
]]></content:encoded>
			<wfw:commentRss>http://www.carbonsugar.com/racing/gps-training-improve-your-tactics-pt-i/feed/</wfw:commentRss>
		<slash:comments>6</slash:comments>
		</item>
		<item>
		<title>The Learning Plateau and how to climb off (Part II)</title>
		<link>http://www.carbonsugar.com/technique/the-learning-plateau-and-how-to-climb-off-part-ii/</link>
		<comments>http://www.carbonsugar.com/technique/the-learning-plateau-and-how-to-climb-off-part-ii/#comments</comments>
		<pubDate>Thu, 27 Mar 2008 07:21:09 +0000</pubDate>
		<dc:creator>Sean OBrien</dc:creator>
				<category><![CDATA[Technique]]></category>
		<category><![CDATA[Tutorial]]></category>
		<category><![CDATA[gybe]]></category>
		<category><![CDATA[gybing]]></category>
		<category><![CDATA[learnin]]></category>
		<category><![CDATA[planing]]></category>
		<category><![CDATA[practice]]></category>

		<guid isPermaLink="false">http://www.carbonsugar.com/technique/the-learning-plateau-and-how-to-climb-off-part-ii/</guid>
		<description><![CDATA[<p>In the previous article we saw that the leaning curve for formula will have some plateaus and most likely if you spend some time analysing why this learning plateau has occurred, you just might find a few insights on how to improve. More often than not, it is the sailor, rather th&#8230;</p>]]></description>
				<content:encoded><![CDATA[<p>In the previous article we saw that the leaning curve for formula will have some plateaus and most likely if you spend some time analysing why this learning plateau has occurred, you just might find a few insights on how to improve. More often than not, it is the sailor, rather than the sails or having the right fin helping fuel these problems. This is not to say that having the best equipment and tuning worked out is not important, because in FW it very crucial, BUT most of us do not lose the race on account of not having the right equipment; far more do because our technique is not up to scratch. Not being able to quickly initiate planing out of the start or out of manoeuvres means you will always be sailing in the <a title="Hopeless Position" href="http://www.carbonsugar.com/racing/to-the-windward-mark-advanced-tactics/">dirty winds</a> created by others. Technique is vital for being able to get out of the pack and get yourself into clean air. Jan Witteveen (NED-22) continues his <a href="http://www.carbonsugar.com/technique/the-learning-plateau-and-how-to-climb-off-part-i/">Learning Plateau</a> articles this week, focusing on the training for gybes.</p>
<p><span id="more-37"></span>There are three vital aspects in technique training:</p>
<ul>
<li>Understanding the technique and theory behind how to do the manoeuvre</li>
<li>Repetitive training of the manoeuvre and (if possible) getting feedback on the technique from an observer/coach</li>
<li>Train, train and train until you can do the manoeuvre under stress in a variety of wind conditions</li>
</ul>
<p>The fun of all this is that you can improve your sailing ability and thereby your results in competition through real training programs on technique. It still intrigues me why so many of us just go sailing and somehow hope to get better while they do not consequently work on their weaker points of sailing. Sailing combines the complications of strength, technique, tuning, tactics as well as the understanding of weather and difficult decision making processes. Why would you only train 40% of these when you could be training 100% of these aspects?</p>
<p>OK, I have to admit, I also make the same mistake over and over again: cruising around instead of specific training and constant testing if I’m faster than my buddy. Very rarely I take the time to train my manoeuvres and I know I lack consistency and lose a lot of time around the course because of this, so for me it is good to also write this article and get back to the real-deal; starting training with a goal in mind. I know that by doing so I will not only get better very quickly but on top of that I also will enjoy the process of training and fine-tuning my manoeuvres. Let us, this time, look at <strong>gybing</strong>:</p>
<h3>GYBING (hands, hands again): </h3>
<p>Are you able to gybe your FW board whilst maintaining planing? Can you do this in 8 knots as well as in 20 knots? Can you gybe the board any time you feel like it, or do you need to wait for that perfect swell to ride down? Do you know your own weak points on the manoeuvre? Have you been training the manoeuvre or are you satisfied with the 5 gybes you do every afternoon whilst training?! What is crucial in the technique?</p>
<p>Firstly, a good gybe is a <strong>quick gybe</strong>. But do not get confused, because a good gybe is a very smooth manoeuvre aiming to not disturb the momentum you already have before initiating the turn. Imagine yourself doing a perfect gybe on your FW board, what is it like? How does it feel, close your eyes and feel the manoeuvre. Let me tell you how mine will go:</p>
<blockquote><p>I have great speed going downwind while my sail is very full with minimal outhaul applied. I have already thought about where I want to execute the gybe as this will give me the right focus leading into the turn. First I will move my backhand further backwards to create a wider grip. Almost simultaneously I get my back foot out of the strap and place it on the leeward side just in the middle of the footstraps. With this I start the curve and while doing so I push the sail with my forward hand while pulling the sail with my backhand. It is the same movement how you would start a laydown gybe on your slalom equipment. As soon as the turn is ‘locked in’ I move my forward hand all the way towards the mast. My grip is now at the widest and I have a lot of control over my sail. Before I go through the wind I change my stance which is directly followed by flipping the sail.</p></blockquote>
<p>Still, I see a lot of guys flipping far to late, they wait until the board and the sail is through the wind and then start flipping. <strong>This is far to late</strong>. The board will stall and you are far too late to rebuild the power in the sail and maintain the momentum. Because of this you will stop planing and loose all you may have gained by using the most sexy new fin your money could buy&#8230;</p>
<p>Get your manoeuvre right. Start early when changing your stance from one side of the board to the other and flipping the sail. If you have your forward hand close to the mast the flip will be smooth and you will be able to easy cross over with your other hand and maintain the momentum. After the cross get your hand far back on the boom while stepping backwards on the board. Lower your butt and pop the cambers through a powerfull pull on the sail. You may feel stupid lowering your butt so much but it is the only way to fully be in control of the things going on. It will enable you to maintain the planing momentum and you can gain a lot of ground by this, so please feel a little stupid and overdo this lowering of the butt.</p>
<p>A few key pointers to remember whilst gybing:</p>
<ul>
<li>Always do a boom-to-boom gybe. Holding the mast at any point in time is inefficient</li>
<li>The lower you can get your body after flipping the sail, the easier it is to sheet the sail in without getting pulled over the front</li>
</ul>
<p>Ok, now the manoeuvre is almost completed. If you started changing your stance and flipping the sail on time then the board is still on a downwind course the moment you start sailing again on the new tack and you will be able to hook into the harness easily. Only if you started too late with the flipping and stance-change your board is on a halfwind course or even on an upwind course and you have no chance what so ever to maintain the planing mode, just read the most essential elements below and get in control of your gybing.</p>
<h3>FW Gybing, Step-By-Step:</h3>
<ol>
<li>Plan ahead where and when to start the manoeuvre</li>
<li>If you go too fast then start by luffing a little just prior to the gybe; I call it the ‘S’ shape start of the gybe</li>
<li>Widen your boom grip by placing your backhand even further towards the back of the boom (close to your outhaul cleats even). You need to tuck the sail slightly by pulling aggressively inwards with your back hand and dropping the front of the sail away from you</li>
<li>At the same time, get out of the back strap and place your backfoot on the leeward rail, engaging the pressure</li>
<li>Lean forward and across your board. This helps with tucking the sail and keeping the rail pressure on the board which allows you to cut through any chop (without tucking the sail, you can&#8217;t as easily generate the rail pressure necessary to commit the gybe and you will struggle gybing in choppy conditions)</li>
<li>Once you are 60% through your turn (60% if you are already heading downwind when beginning the gybe), driving from your back leg (still on the leeward rail), pull the sail upright as well as forward, using both arms. Its an action like throwing a shot-put and you must aggressively force your hips with your back arm and actually PUSH the sail away from you &#8211; this is initiating the sail flip</li>
<li>Don&#8217;t just &#8220;flip&#8221; the sail. Push it away with your backhand. With your front hand, aggressively pull the sail towards you from a grip that is closest to the mast as possible. This pulling will help the sail flip quicker as well as using the momentum created by your hip-drive to keep the board moving</li>
<li>As you flip the sail, your back leg moves to the front position on the new tack. In windy conditions you can do a strap-to-strap gybe if necessary (ie, your back leg goes straight into the front strap to help you with control when sheeting in)</li>
<li>As the sail is flipping, you are still pulling with your current front hand and then taking a grip in the same position (close to the mast) on the new side of the sail with your old back hand. Your hands will cross over to do this</li>
<li>The board should still be on a downwind course when you have sheeted in on the new side &#8211; this will help keep the board planing</li>
<li>Take a wide grip on the boom (back hand close to the outhaul cleat) and lower your butt significantly, to be able to sheet in with another pump of the sail to pop the cams</li>
<li>Hook into the harness before you put your foot in the back strap</li>
</ol>
<h3>The Planing FW Gybing in 8 knots:</h3>
<p>Yes it is possible. Having a bit of swell to roll down helps. The technique is very similar to the above however there&#8217;s a few key steps you need to do PRECISELY otherwise you will stall and some mug from 4th place will beat you to the finish line on that last downwind leg.</p>
<ul>
<li>The sail flip has to be initiated 60% into the turn. Later and you will stall. Earlier and you will crash. 40% works best if you are already sailing on a downwind leg, so therefore you only need to turn just over 90 degrees to complete the gybe (not almost 180 degrees like a slalom gybe). So in actual fact, 60% has already brought you through the eye of the wind.</li>
<li>When making the sail flip, focus a lot on the sail upward-thrust of both the rig and your body. With a wide grip on the boom, use your hips to the extent you are even twisting your body with your hips (the same direction the sail is flipping) as you move. As you twist, push very hard with your back hand to &#8220;throw&#8221; the sail away from you as you pull hard with your front hand to pull the sail back towards you. This allows the sail to flip quickly.</li>
<li>In light winds you can switch your feet to the new side of the board a lot earlier. Move your back leg to the new windward side of the board in front of the front strap (never IN the front strap). Move your front leg to the new side just in front of the back strap (never IN the back strap).</li>
<li>On the new side of the board and with the sail still in the process of flipping you can begin to pump the board with your legs. Drop your body weight very low (bend those knees!) and with both legs simultaneously drive upwards, with the motion of pushing the board &#8220;forward&#8221; with your legs. This is difficult to explain on paper, but easily replicated on the board. You are pumping the board with your legs and not pumping the sail.</li>
<li>Pumping the board with your legs a few times as you are sheeting in on the new side is the key to keeping the board&#8217;s momentum. Sheeting in on the new side with the board pointing very far downwind also helps as you can spin the board the last few degrees as you sheet in.</li>
<li>Pumping until you are powered enough to hook in is also mandatory. If you have timed your gybe nicely to finish coming down a swell you can use the pumping of the board with your legs to keep the board moving down that swell and ease into pumping the sail more efficiently.</li>
<li>Practice and practice is the key to this gybe. It takes a while to master.</li>
</ul>
<p>Working on the gybing techniques it is important to visualise yourself executing this manoeuvre in your mind, imagining how the manoeuvre might feel like and if possible looking at videos where the manoeuvre is executed perfectly. Then start practising the technique on the water. Having someone watching you doing the manoeuvre helps you pin-point any mistakes. An easy way to do this is to train in pairs with each of you watching each other gybe from behind. Even better, have someone videotape the sessions so you can see yourself and evaluate what you are doing for better or worse. If you can perform it again and again at a good level then it is time to train the manoeuvre under stress&#8230;</p>
<p>Think of any form of competition in which the manoeuvre is key. In the previous article I gave one possible training option which you can also do downwind. Go with your friend (or in a group) and have the leader of the pack shout ‘GYBE’ or any other signal at which everyone has to execute the gybe right away. The idea of the training is to get downwind as fast as possible. A slowly executed gybe will get you behind others but also a fast gybe in which you change the stance too late and flip the sail too late, finishing pointing upwind too far, will lose you valuable ground to those who execute better and/or are better able to maintain downwind momentum. Keep training until you come out on top, do not rest until you have a solid belief in yourself that you can and will perform a great gybe any time you have to. Being able to execute a great gybe even when you are tired will help you in Race 4 for the day.</p>
<p>Other possible training options are up and downwind battles in which you as a group decide on doing at least 6 tacks and gybes on the up and downwind and then have competition who is best. Train under stress. Do not go sailing without focus. Get out there with the mentality to always perform your best, as there is no substitute for TOW (time-on-water). Do not miss any opportunity to grow, unless you are one of the lucky guys that live in Hawaii or similar exceptional places on the Earth: then you have all the opportunity’s one can dream of.</p>
<p>Remember that learning plateau’s seem to always occur, even at the higher levels. Only those who really examine the reasons behind them will find the learning curve going up again. There is no easy way but what the heck, there is no better place to be then on the water doing what we all love so much, go (formula) sailing and having the best time of your life. Please buy yourself free time to train rather then spending all money on the newest gear constantly (then I will do just that and hope it will outperform all your training!)</p>
<p>Jan Witteveen.</p>
]]></content:encoded>
			<wfw:commentRss>http://www.carbonsugar.com/technique/the-learning-plateau-and-how-to-climb-off-part-ii/feed/</wfw:commentRss>
		<slash:comments>12</slash:comments>
		</item>
		<item>
		<title>The Learning Plateau and how to climb off (Part I)</title>
		<link>http://www.carbonsugar.com/technique/the-learning-plateau-and-how-to-climb-off-part-i/</link>
		<comments>http://www.carbonsugar.com/technique/the-learning-plateau-and-how-to-climb-off-part-i/#comments</comments>
		<pubDate>Thu, 13 Mar 2008 07:34:33 +0000</pubDate>
		<dc:creator>Sean OBrien</dc:creator>
				<category><![CDATA[Technique]]></category>
		<category><![CDATA[Tutorial]]></category>
		<category><![CDATA[gybe]]></category>
		<category><![CDATA[gybing]]></category>
		<category><![CDATA[learning]]></category>

		<guid isPermaLink="false">http://www.carbonsugar.com/technique/the-learning-plateau-and-how-to-climb-off-part-i/</guid>
		<description><![CDATA[<p>In the early stages of formula racing you may be on a steady learning curve. You improve the trim/tuning of your equipment and you gain confidence in sailing around a race course and applying the tactics you have learnt through experience. And then suddenly it happens&#8&#8230;</p>]]></description>
				<content:encoded><![CDATA[<p>In the early stages of formula racing you may be on a steady learning curve. You improve the trim/tuning of your equipment and you gain confidence in sailing around a race course and applying the tactics you have learnt through experience. And then suddenly it happens&#8230; You have arrived at the mystical <em>learning plateau</em>. Most sailors that have seen this happening to them begin to get a little frustrated because they are at a loss at how to improve their speed around the course any further. Some have money to spend and start buying all kinds of new gear, hoping that this will help them improve and others (heaven forbid) start critisising the formula format for being to hard. Either way it appears to be a factor in many sailor&#8217;s decision to stop competing in this great game of FW racing. Personally speaking, you yourself have not given up yet because you are reading this to improve right? Dutch windsurfer Jan Witteveen (NED-22) gives us this article outlining some simple aspects of your sailing you can work on to improve your speed around the course and climb off the learning plateau you&#8217;ve just reached. <span id="more-35"></span></p>
<blockquote><p>Jan Witteveen has been racing formula since it began and has been a Dutch Champion in windsurfing way back in the Div II days before some of us were even old enough to hold an uphaul. He&#8217;s now heavily involved with organising the popular Regio Cup racing events in the Netherlands and an avid FW racer&#8230;</p></blockquote>
<p>Let&#8217;s take a step back from your sailing and see what is happening on the learning plateau. All the big, early improvements have already happened for you. You are not making the really big tactical mistakes on the course anymore; your equipment trim is basically ok, as is your ability to sail around the course without dropping the sail. Now it is time to see what is holding you back and why you are on this plateau. There may be a number of reasons but from what I have seen in the past 20 years of competing it is mainly in the way we all going about our training. Most go straight to the water and begin sailing. Maybe tweak to some extent your downhaul and change a fin, but realistically, at the end of the day a couple of up and downwind sessions is all you have accomplished as has been the way with most previous training sessions. You need to step out of this groove and start thinking about what you need to improve on and get your training on to a new path&#8230;</p>
<p>In this article we will look at a common reason for being stuck on the learning plateau: <strong>when your technical skills are holding back further improvements.</strong></p>
<p>Are you able to tack and initiate planing upwind quickly and effectively out of each tack? So that you can get out of dirty air and not find yourself in the <a title="To The Windward Mark: Advanced Tactics (article)" href="http://www.carbonsugar.com/racing/to-the-windward-mark-advanced-tactics/">hopeless position</a>? Are you able to gybe your board and keep it on the plane even in marginal conditions? If not, stop and think briefly about some moments out on the racecourse where the leaders of the fleet are going through their manouvres. Whats the difference between the top guys and yourself? A really good manouvre can get you at least 10-20 meters closer/faster to the finish then a normal executed manouvre. Just imagine that your manouvres are not even on par with normal ?? Typically you may tack 4 times in a race. If you are 5 seconds slower than someone else in your tacks then you&#8217;ve already lost 20 seconds. A formula board travels at 8m/sec in medium winds. That means you&#8217;ve just lost 160m around the racecourse. Is that how much they are beating you by? Thought so&#8230;</p>
<p>The big question now is how to improve then?</p>
<ul>
<li>First look at your technique (tacking and gybing)</li>
<li>Then work on this technique in your training sessions so you become used to how it is done correctly and fluently</li>
<li>Then start training the technique under pressure against other sailors</li>
</ul>
<h3>Mastering Technique (hands are your friends):</h3>
<p>A major mistake I often see in tacking and gybing is the way the boom is handled. The <em>handwork</em> is the most important aspect in both the tack and gybe manoeuvre. Most sailors perform their footwork very well but their handwork is so bad that they lose a lot of efficiency in these manoeuvres.</p>
<div class="ngg-galleryoverview" id="ngg-gallery-6-35">


	<!-- Thumbnails -->
		
	<div id="ngg-image-30" class="ngg-gallery-thumbnail-box"  >
		<div class="ngg-gallery-thumbnail" >
			<a href="http://www.carbonsugar.com/wp-content/uploads/learning-1/Tacking-1.jpg" title="Tacking 1" class="shutterset_set_6" >
								<img title="Tacking-1.jpg" alt="Tacking-1.jpg" src="http://www.carbonsugar.com/wp-content/uploads/learning-1/thumbs/thumbs_Tacking-1.jpg" width="100" height="75" />
							</a>
		</div>
	</div>


	<div id="ngg-image-31" class="ngg-gallery-thumbnail-box"  >
		<div class="ngg-gallery-thumbnail" >
			<a href="http://www.carbonsugar.com/wp-content/uploads/learning-1/Tacking-2.jpg" title="Tacking 2" class="shutterset_set_6" >
								<img title="Tacking-2.jpg" alt="Tacking-2.jpg" src="http://www.carbonsugar.com/wp-content/uploads/learning-1/thumbs/thumbs_Tacking-2.jpg" width="100" height="75" />
							</a>
		</div>
	</div>


	<div id="ngg-image-32" class="ngg-gallery-thumbnail-box"  >
		<div class="ngg-gallery-thumbnail" >
			<a href="http://www.carbonsugar.com/wp-content/uploads/learning-1/Tacking-3.jpg" title="Tacking 3" class="shutterset_set_6" >
								<img title="Tacking-3.jpg" alt="Tacking-3.jpg" src="http://www.carbonsugar.com/wp-content/uploads/learning-1/thumbs/thumbs_Tacking-3.jpg" width="100" height="75" />
							</a>
		</div>
	</div>


	<div id="ngg-image-33" class="ngg-gallery-thumbnail-box"  >
		<div class="ngg-gallery-thumbnail" >
			<a href="http://www.carbonsugar.com/wp-content/uploads/learning-1/Tacking-4.jpg" title="Tacking 4" class="shutterset_set_6" >
								<img title="Tacking-4.jpg" alt="Tacking-4.jpg" src="http://www.carbonsugar.com/wp-content/uploads/learning-1/thumbs/thumbs_Tacking-4.jpg" width="100" height="75" />
							</a>
		</div>
	</div>


	<div id="ngg-image-34" class="ngg-gallery-thumbnail-box"  >
		<div class="ngg-gallery-thumbnail" >
			<a href="http://www.carbonsugar.com/wp-content/uploads/learning-1/Tacking-5.jpg" title="Tacking 5" class="shutterset_set_6" >
								<img title="Tacking-5.jpg" alt="Tacking-5.jpg" src="http://www.carbonsugar.com/wp-content/uploads/learning-1/thumbs/thumbs_Tacking-5.jpg" width="100" height="75" />
							</a>
		</div>
	</div>


	<div id="ngg-image-35" class="ngg-gallery-thumbnail-box"  >
		<div class="ngg-gallery-thumbnail" >
			<a href="http://www.carbonsugar.com/wp-content/uploads/learning-1/Tacking-6.jpg" title="Tacking 6" class="shutterset_set_6" >
								<img title="Tacking-6.jpg" alt="Tacking-6.jpg" src="http://www.carbonsugar.com/wp-content/uploads/learning-1/thumbs/thumbs_Tacking-6.jpg" width="100" height="75" />
							</a>
		</div>
	</div>


	<!-- Pagination -->
 	<div class='ngg-clear'></div>
 	
</div>

<p> </p>
<p>First lets focus on <strong>tacking </strong>[Fig 1]. The first thing to work on is bringing your backhand a little further to the back of the boom so you can sheet in very aggressively when initiating the tack [Fig 2]. Tacking should be AGGRESSIVE. With your hands further down the boom you can oversheet more easily and quickly force the board direction into the wind. With your feet you are first coming out of the back strap to help the board pointing into the wind and getting ready to move to the other side of the sail. As soon as the board is far enough into the wind (that the sails feels very light in your hands) and you are getting ready to jump to the other side of the sail, move your front hand to the very front of the boom [Fig 3] near the mast (on the SAME side as you are currently sailing on). This step seems to be missed often by sailors who don&#8217;t tack very well.</p>
<p>You should have a very wide grip at this moment, giving you a lot of control. Your front hand is right at the front of the boom and your back hand a long way back somewhere behind your harness lines. When you make the jump to the other side of the sail with your body, let go of your backhand first and cross over to the other side of the boom with your back hand. In the process of doing this, with large sails you can actually use your front hand to begin pulling the sail towards you and more upright [Fig 4] (notice I am pulling hard with my right hand in Fig 4).</p>
<p>As you jump around the sail, with your back hand, grab the boom at the front on the new side of the sail [Fig 5]. At this point the sail will most likely still be raked back from pointing so hard to windward to go into the tack. Use your new front hand to aggressively pull the sail back to the upright position and begin to reach back to a wide position with your backhand on the new side of the boom [Fig 5]. Now on the other side of your sail your new forward foot is as close to the mast as possible and your back foot is in front of the back straps but more towards the rail of the board than the centre. Try to grab the boom as far back as possible to get a powerful grip and lower your centre of effort by bending your knees a little [Fig 6]. Start pushing the board downwind wind to get ready to pump and into the new wind.</p>
<p>Push the board aggressively. Punish it. Hard. HARDER. Use your back foot to pull towards you and your front foot to push off downwind, forcing the board quickly into a beamreach position which will allow you to start pumping and get up to speed. As you start to pump you can manoeuvre your feet into the footstraps (wind strength will define how quickly you get into the straps &#8211; the windier it is, the quicker you want to be safe inside them).  </p>
<p>Job done. Now you are cruising back upwind on the next tack. Relax and think what you&#8217;ve just done over before trying the exercise again.</p>
<p>The best way to train tacking/gybing is simply to drill it into yourself. Repeat this tacking sequence over and over in your head, visualising all the steps while you imagine and feel that you are perfroming it live. Do it on the water as well as in your chair in front of the TV. Practice the technique constantly. It is likely that you may first be worse on the tacks before you start to improve significantly. After practice the &#8220;training phase&#8221; must start. At best this can be done in pairs or a with a group:</p>
<h3>Training Phase: </h3>
<p>In your group (or pair) of sailing partners, one of the group is the leader. The leader decides when to tack by shouting “TACK” or any other signal for that matter. You all agree on this signal to tack immediately. You all need to get as quickly upwind as possible by performing quick and effective tack techniques. Be sure to make really short upwind legs before tacking again. The goal for everyone who takes part is to get as far upwind as possible and to tack faster than the boats around you. After twenty or so tacks you can stop and see who has won this leg. Really push yourself to perform the best tacks you can. By pushing hard you train in the same frame of mind (and exhaustion state) as if you are in a real race. Then sail downwind and start the sequence again with another leader. If you are lucky enough to not sail alone this is great for improving your tacks/gybing and in itself is also great for your windsurf endurance and strength.</p>
<ul>
<li><span style="color: #00aeff;">Extra Tip:</span> If possible, it would be very beneficial to get your tacking/gybing technique on film so that you can examine and critique your technique afterwards.</li>
</ul>
<p>This is really what learning and improving is about. Just give it a try. It may help you find those extra seconds around the course and find a new way to improve your racing &#8211; climbing off that learning plateau that has been punishing you and your motivation this season.</p>
<p><em>Next article I will talk about gybing to complete this series about handling the boom. Have some great TOW.</em></p>
<p><em>Jan Witteveen.</em></p>
]]></content:encoded>
			<wfw:commentRss>http://www.carbonsugar.com/technique/the-learning-plateau-and-how-to-climb-off-part-i/feed/</wfw:commentRss>
		<slash:comments>5</slash:comments>
		</item>
		<item>
		<title>To The Windward Mark: Advanced Tactics</title>
		<link>http://www.carbonsugar.com/racing/to-the-windward-mark-advanced-tactics/</link>
		<comments>http://www.carbonsugar.com/racing/to-the-windward-mark-advanced-tactics/#comments</comments>
		<pubDate>Thu, 28 Feb 2008 01:15:29 +0000</pubDate>
		<dc:creator>Sean OBrien</dc:creator>
				<category><![CDATA[Advanced Tactics]]></category>
		<category><![CDATA[Racing]]></category>
		<category><![CDATA[leeward]]></category>
		<category><![CDATA[sheeting]]></category>
		<category><![CDATA[Tutorial]]></category>
		<category><![CDATA[upwind]]></category>

		<guid isPermaLink="false">http://www.carbonsugar.com/racing/to-the-windward-mark-advanced-tactics/</guid>
		<description><![CDATA[<p>We&#8217;ve already looked at <a title="Why Your FW Starts Need to be Better" href="http://www.carbonsugar.com/tutorial/why-your-fw-starts-need-to-be-better/">how to get a great start in FW racing</a>, but what about after the start? The first upwind beat to the windward mark is certainly the most important leg of the race, and with the trend for shorter races on the Pro FW Circuit these days, your position at th&#8230;</p>]]></description>
				<content:encoded><![CDATA[<p>We&#8217;ve already looked at <a title="Why Your FW Starts Need to be Better" href="http://www.carbonsugar.com/tutorial/why-your-fw-starts-need-to-be-better/">how to get a great start in FW racing</a>, but what about after the start? The first upwind beat to the windward mark is certainly the most important leg of the race, and with the trend for shorter races on the Pro FW Circuit these days, your position at the first mark can often reflect your position at the finish line. This week will mark the first in a series of articles on <a title="Category - Advanced Tactics" href="http://www.carbonsugar.com/category/tactics/">Advanced Tactics</a>. In particular, introducing some new concepts (unless you&#8217;ve read a few books in your time) such as the <em>&#8220;hopeless position&#8221;</em>, <em>&#8220;safe leeward position&#8221;</em> and <em>&#8220;close hauled&#8221;</em> &#8211; or as I like to call it, pinching like a b*tch. Now, to fine tune your skills and get to that windward mark quicker, listen very carefully, or you will break the internet &#8230;</p>
<p><span id="more-32"></span></p>
<p><a title="Dr Manfred Curry" href="http://en.wikipedia.org/wiki/Manfred_Curry">Dr. Manfred Curry</a> wrote a famous book in 1928 about yacht racing and the aerodynamics of sails. Thankfully, things have come a long way in terms of boat design since then but nearly everything he wrote about racing tactics are as true today, as they were in 1928. Curry talks a lot about the importance of sailing the &#8216;next&#8217; tack, rather than the tack you are currently on; thinking ahead and positioning yourself for an advantage on the next tack. To take a line from his book:</p>
<blockquote><p><em>&#8220;&#8230;racing; it is a game of chess of the highest order&#8230;It is a game, in which you must reckon out every move beforehand and not only anticipate but also be prepared for the numberless attacks that can or may be made, but with the disadvantage, that you do not have as much time as you may like for your next move&#8230;&#8221;</em></p></blockquote>
<p>This article is focusing on the second tack of a windward leg &#8211; which generally speaking should be bringing you to the layline close to the windward mark or to the windward mark on starboard (depending on how you have sailed the course). To get started, a few terms need to be explained and also why this tack should be focused on in a race.</p>
<h3>Hopeless Position:</h3>
<p><a title="Safe Leeward Position" href="http://www.carbonsugar.com/wp-content/uploads/2008/02/safe-leeward.jpg"><img src="http://www.carbonsugar.com/wp-content/uploads/2008/02/safe-leeward.thumbnail.jpg" alt="Safe Leeward Position" align="left" /></a>It sounds hopeless. Mainly because it is. Generally speaking, this position refers to anytime you are in someone&#8217;s &#8220;dirty air&#8221;, that is, directly behind them, behind and downwind of them, or behind and upwind of them. Take a look at the photo on the left for a fantastic diagram of the hopeless position. To explain the diagram, Boat II is in the hopeless position. The curved lines (a) refer to the wind. See how it curves almost 15 degrees as it displaces off the sail of the Boat I &#8211; that&#8217;s why you get punished sailing behind someone in their dirty air. If you are in the zone of (b), you are really in a hopeless position and most likely need to tack out of there as you are sheltered from the wind and likely to be sailing slow and at a poor angle. The line (c) is the bad air displacement coming from Boat I upwind. Notice how even upwind of Boat I, Boat II is still getting dirty air. He needs to be almost five boat-lengths upwind of Boat I to reach the safe leeward position and get out of jail (his options are to follow course 1  or 2)&#8230;</p>
<h3>Safe Leeward Position:</h3>
<p>This is where you want to be. The position of dreams (and of race winners). Have a look at a few more diagrams from Manfred Curry in the gallery below, showing you the safe leeward position. His diagrams are a little vague, but give you the general idea. The safe leeward position refers to the boat who is either in front (spilling dirty air on the boats behind him) or upwind and out of the (c) zone and dirty air of the boat in front &#8211; as shown in the above image. The safe leeward position is the white boat in [Diagram A,B,C,D] and the black boat in [Diagram E,F,G] to further explain. This position allows you to control the boats behind you and start to dictate the race &#8211; instead of just &#8220;sailing&#8221; it. It&#8217;s what top sailors do all the time.</p>
<h3>Close Hauling:</h3>
<p>I merely use this term to go along with Manfred Curry&#8217;s lingo (in case you have his book and would like to study up). It&#8217;s a sailing term and doesn&#8217;t really relate to windsurfing in that sense, but just think of it as sheeting in really hard, squeezing with your body and sail trim to pinch as high as you can. You know what I&#8217;m talking about&#8230;dropping your speed down to 12 knots upwind and really going for a super tight angle. The guys using the uphaul rope technique upwind seem to be able to do this well.</p>
<p>Ok, now we know the terms lets get to work on how you can apply it&#8230;</p>
<div class="ngg-galleryoverview" id="ngg-gallery-5-32">


	<!-- Thumbnails -->
		
	<div id="ngg-image-22" class="ngg-gallery-thumbnail-box"  >
		<div class="ngg-gallery-thumbnail" >
			<a href="http://www.carbonsugar.com/wp-content/uploads/safe-leeward/Diagram-A.jpg" title="Diagram A" class="shutterset_set_5" >
								<img title="Diagram-A.jpg" alt="Diagram-A.jpg" src="http://www.carbonsugar.com/wp-content/uploads/safe-leeward/thumbs/thumbs_Diagram-A.jpg" width="100" height="75" />
							</a>
		</div>
	</div>


	<div id="ngg-image-23" class="ngg-gallery-thumbnail-box"  >
		<div class="ngg-gallery-thumbnail" >
			<a href="http://www.carbonsugar.com/wp-content/uploads/safe-leeward/Diagram-B.jpg" title="Diagram B" class="shutterset_set_5" >
								<img title="Diagram-B.jpg" alt="Diagram-B.jpg" src="http://www.carbonsugar.com/wp-content/uploads/safe-leeward/thumbs/thumbs_Diagram-B.jpg" width="100" height="75" />
							</a>
		</div>
	</div>


	<div id="ngg-image-24" class="ngg-gallery-thumbnail-box"  >
		<div class="ngg-gallery-thumbnail" >
			<a href="http://www.carbonsugar.com/wp-content/uploads/safe-leeward/Diagram-C.jpg" title="Diagram C" class="shutterset_set_5" >
								<img title="Diagram-C.jpg" alt="Diagram-C.jpg" src="http://www.carbonsugar.com/wp-content/uploads/safe-leeward/thumbs/thumbs_Diagram-C.jpg" width="100" height="75" />
							</a>
		</div>
	</div>


	<div id="ngg-image-25" class="ngg-gallery-thumbnail-box"  >
		<div class="ngg-gallery-thumbnail" >
			<a href="http://www.carbonsugar.com/wp-content/uploads/safe-leeward/Diagram-D.jpg" title="Diagram D" class="shutterset_set_5" >
								<img title="Diagram-D.jpg" alt="Diagram-D.jpg" src="http://www.carbonsugar.com/wp-content/uploads/safe-leeward/thumbs/thumbs_Diagram-D.jpg" width="100" height="75" />
							</a>
		</div>
	</div>


	<div id="ngg-image-26" class="ngg-gallery-thumbnail-box"  >
		<div class="ngg-gallery-thumbnail" >
			<a href="http://www.carbonsugar.com/wp-content/uploads/safe-leeward/Diagram-E.jpg" title="Diagram E" class="shutterset_set_5" >
								<img title="Diagram-E.jpg" alt="Diagram-E.jpg" src="http://www.carbonsugar.com/wp-content/uploads/safe-leeward/thumbs/thumbs_Diagram-E.jpg" width="100" height="75" />
							</a>
		</div>
	</div>


	<div id="ngg-image-27" class="ngg-gallery-thumbnail-box"  >
		<div class="ngg-gallery-thumbnail" >
			<a href="http://www.carbonsugar.com/wp-content/uploads/safe-leeward/Diagram-F.jpg" title="Diagram F" class="shutterset_set_5" >
								<img title="Diagram-F.jpg" alt="Diagram-F.jpg" src="http://www.carbonsugar.com/wp-content/uploads/safe-leeward/thumbs/thumbs_Diagram-F.jpg" width="100" height="75" />
							</a>
		</div>
	</div>


	<div id="ngg-image-28" class="ngg-gallery-thumbnail-box"  >
		<div class="ngg-gallery-thumbnail" >
			<a href="http://www.carbonsugar.com/wp-content/uploads/safe-leeward/Diagram-G.jpg" title="Diagram G" class="shutterset_set_5" >
								<img title="Diagram-G.jpg" alt="Diagram-G.jpg" src="http://www.carbonsugar.com/wp-content/uploads/safe-leeward/thumbs/thumbs_Diagram-G.jpg" width="100" height="75" />
							</a>
		</div>
	</div>


	<div id="ngg-image-29" class="ngg-gallery-thumbnail-box"  >
		<div class="ngg-gallery-thumbnail" >
			<a href="http://www.carbonsugar.com/wp-content/uploads/safe-leeward/Safe-Leeward-Positions-Full.jpg" title="Safe Leeward Positions - Full" class="shutterset_set_5" >
								<img title="Safe-Leeward-Positions-Full.jpg" alt="Safe-Leeward-Positions-Full.jpg" src="http://www.carbonsugar.com/wp-content/uploads/safe-leeward/thumbs/thumbs_Safe-Leeward-Positions-Full.jpg" width="100" height="75" />
							</a>
		</div>
	</div>


	<!-- Pagination -->
 	<div class='ngg-clear'></div>
 	
</div>

<p>Imagine you come off the startline on starboard with clear air and good speed. Your main competitor is directly behind you, upwind about 2 boatlengths but still in the hopeless position (the black boat in [Diagram C]). You are in the safe leeward position and controlling the race by controlling your main opponent behind you. Two things can happen here: you can close-haul really hard, going slow to out-point him and push him into a very hopeless position (like the black boat in [Diagram B]), forcing him to tack off to get out of your dirty air; or you can go about your race casually and let him force YOU into the hopeless position (white boat in [Diagram E]).</p>
<h3><span style="color: #00aeef;">Attacking From The Hopeless Position:</span></h3>
<p>Let&#8217;s imagine you are the black boat in [Diagram C]. Currently you are in the hopeless position on starboard coming out of the startline. If you are a comparable speed to the boat in front and you are sailing to the favoured side of the course it&#8217;s important not to give up and tack away early but focus on the NEXT tack on port toward the layline. If you can hold your angle (you will likely be going slower) and stay within a few boatlengths of this leading sailor then you can tack at the same time as him, pump aggressively to get upwind a few metres (every metre is important here) and instantly put HIM into the hopeless position. Does this make sense?</p>
<p>A quick tack and initiation of planing at the moment the leading boat tacks is important here. Since you are a few boatlengths behind but upwind of this leading boat it is only natural that if you tack at the same time then you are now in front but downwind of him. With an intense focus on making sure the first few pumps out of the tack are heading you aggressively to windward you can begin to spill dirty air on him and push him into the hopeless position, before he has time to sail over the top of you. If you have sailed all the way to the starboard layline than he will really be in trouble because he can not tack away from your dirty air (he is already on the layline). Now YOU control the race.</p>
<p>That is a quick and simple explanation of how to attack from the hopeless position on the second tack of a race. Lets imagine this another way. It&#8217;s the second lap of a windward return course and you are currently rounding the bottom mark in 2nd, only 20m behind the leading boat. If you can close-haul super hard and keep upwind of him (still in the hopeless position, unless you are more than 10% faster/higher than this sailor, in which case you can just sail right over the top of him) you should focus on the SECOND tack of this lap, rather than the awful position you are currently in. When sailing to the layline (to tack on to starboard to run to the mark) you can tack fractionally earlier than him, and squeeze to put him in the same position you were in only a moment ago. He can&#8217;t tack away because you are already on the layline and if you are a similar speed he most likely can&#8217;t overrun you into the mark if you&#8217;ve put him into the hopeless position. Once around the mark ahead of him you are well on your way to winning that race &#8230; This idea only works if you are withing 5 boatlengths of the leading boat. Any further back and he will have time to run over the top of you from his higher position after the tack.</p>
<h3><span style="color: #00aeef;">Defending From the Safe Leeward Position:</span></h3>
<p>These last two examples I have talked about coming from the hopeless position into the safe leeward position by means of a faster and more efficient tack than the leading boat (focusing on thinking about the next leg, rather than the leg you are on). Thats all good and well but it is certainly easier to defend from the safe leeward position than attack from the hopeless position.</p>
<p>Positioning on the first upwind leg of a race is one of the most important aspects of your racing (once you have got your gear tuned and starts perfected). You should always be aiming to get into the safe leeward position to the boats around you, especially if one of these boats is your main competitor. It allows you to control the race, rather than just sail it. Once in the safe leeward position, you can then wipe off your speed and point super high. The boat behind you won&#8217;t be able to sail over you if you are comparable in speed and will be forced to tack away or sail under you at a terrible angle. That being said, never be complacent in the safe leeward position as a good sailor will be always thinking of the NEXT tack and getting ready to put YOU into the hopeless position if you are sloppy in your tack.</p>
<p>The key to defending from the safe leeward position on starboard tack out of the start is remembering these points:</p>
<ul>
<li>You must NOT sail over the layline to tack on to port. Doing this will allow the hopeless sailor to tack earlier and put you in the hopeless position on the second leg.</li>
<li>Depending on the course, it is usually best to tack earlier than the starboard layline if your main competitor is in the hopeless position (even if this means you have to dip below him after the tack, when he is still on starboard). That way you can take advantage of any lifts into the mark on port and also helps you to avoid sailing OVER the layline.</li>
<li>If you are close to the layline, tack when your competitor tacks. Keep him in the hopeless position and continue to spill dirty air. If he goes too early, let him go, you are in clean air and heading to the favoured side &#8211; right?</li>
</ul>
<p>Hopefully this gets everyone thinking about their tactics more than just thinking <em>&#8220;oh, I&#8217;m in this guy&#8217;s dirty wind, I may as well give up on this race!&#8221; </em></p>
<p>A great way to analyse your tactics is by using a GPS unit to record the tracks of your race. Having the other competitor&#8217;s tracks is also a good way to analyse and criticise (improve) your tactics&#8230; but that&#8217;s a whole other article&#8230;</p>
]]></content:encoded>
			<wfw:commentRss>http://www.carbonsugar.com/racing/to-the-windward-mark-advanced-tactics/feed/</wfw:commentRss>
		<slash:comments>19</slash:comments>
		</item>
		<item>
		<title>Power to Weight: Your Stance vs Antoine&#8217;s</title>
		<link>http://www.carbonsugar.com/featured/power-to-weight-your-stance-vs-antoines/</link>
		<comments>http://www.carbonsugar.com/featured/power-to-weight-your-stance-vs-antoines/#comments</comments>
		<pubDate>Tue, 12 Feb 2008 14:17:16 +0000</pubDate>
		<dc:creator>Sean OBrien</dc:creator>
				<category><![CDATA[Racing]]></category>
		<category><![CDATA[Technique]]></category>
		<category><![CDATA[Tutorial]]></category>
		<category><![CDATA[_Featured]]></category>
		<category><![CDATA[antoine]]></category>
		<category><![CDATA[arms]]></category>
		<category><![CDATA[bethwaite]]></category>
		<category><![CDATA[breathing]]></category>
		<category><![CDATA[carrying]]></category>
		<category><![CDATA[lateral resistance]]></category>
		<category><![CDATA[legs]]></category>
		<category><![CDATA[physiological]]></category>
		<category><![CDATA[power]]></category>
		<category><![CDATA[sail]]></category>
		<category><![CDATA[skiff]]></category>
		<category><![CDATA[stance]]></category>
		<category><![CDATA[weight]]></category>

		<guid isPermaLink="false">http://carbonsugar.com/?p=24</guid>
		<description><![CDATA[<p>After the <a title="Antoine Albeau - Official Website" href="http://www.antoinealbeau.com">Antoine Albeau</a> domination of the 2007 FW Worlds in Brazil, a great post was written by <a title="G-42 Blog" href="http://g-42.blogspot.com/2007/12/fw-worlds-lessons-from-antoines.html">Andreas Macke</a> posing some ideas on how one man could dominate an event so much. One thing to consider is that Antoine is around 100kg whereas 2nd placed <a title="Steve Allen - Official Website" href="http://www.steveallen.pl">Steve Allen</a> was 82kg at the even&#8230;</p>]]></description>
				<content:encoded><![CDATA[<p>After the <a title="Antoine Albeau - Official Website" href="http://www.antoinealbeau.com">Antoine Albeau</a> domination of the 2007 FW Worlds in Brazil, a great post was written by <a title="G-42 Blog" href="http://g-42.blogspot.com/2007/12/fw-worlds-lessons-from-antoines.html">Andreas Macke</a> posing some ideas on how one man could dominate an event so much. One thing to consider is that Antoine is around 100kg whereas 2nd placed <a title="Steve Allen - Official Website" href="http://www.steveallen.pl">Steve Allen</a> was 82kg at the event. Power-to-weight plays a very important role in your speed around the course, so let&#8217;s have a look at it more closely and see how you can improve your stance to get the most out of your gear. We will begin with some ideas from the master of theory himself, <a title="Frank Bethwaite" href="http://www.bethwaite.com/about/1/">Frank Bethwaite</a> and then move on to look at the techniques of the top FW sailors.</p>
<p><span id="more-24"></span></p>
<p><a title="Comparing Sail Carrying Power Ratios" href="http://www.carbonsugar.com/wp-content/uploads/2008/02/Power-to-weight.jpg"><img src="http://www.carbonsugar.com/wp-content/uploads/2008/02/sail-carrying-power-ratio.jpg" alt="Sail Carrying Power - Ratio" align="left" /></a><a title="High Performance Sailing - Frank Bethwaite" href="http://www.amazon.com/High-Performance-Sailing-Frank-Bethwaite/dp/0070057990">Frank Bethwaite</a> was at the forefront of development of the 18ft Skiffs from the 1970&#8242;s through to the 1990&#8242;s. He suggested that the performance of boats that sail with the apparent wind forward of the beam at all times (as does a FW board) is governed by the ratio of the <em>sail carrying power</em> versus the <em>total weight.</em></p>
<p>(See the above picture and read the full chapter, &#8220;<em>The Quest for Speed&#8221;</em>; pg 164 -High Performance Sailing)</p>
<p>This chapter was written about 18ft Skiffs. A modern FW&#8217;er emulates the performance of an 18ft Skiff. A good comparison was the Ronstan Bridge-to-Bridge race in San Francisco. Micah Buzianis (USA-34) and Kevin Pritchard (USA-3) competed against many top 18ft Skiff boats from Australia (including the World Champion from England) as well as the best of the best in kitesurfing. Micah narrowly beat the 18ft Skiff in this race highlighting their similarity in boatspeed:</p>
<ul>
<li><a href="http://www.kiter.com/events/bridge2bridge.asp">http://www.kiter.com/events/bridge2bridge.asp</a></li>
<li><a href="http://www.formulawindsurfing.org/news.php?id=587">http://w</a><a href="http://www.formulawindsurfing.org/news.php?id=587">ww.formulawindsurfing.org/news.php?id=587</a></li>
</ul>
<p>The &#8220;<em>sail carrying power/total weight&#8221;</em> ratio for a sailor like Antoine Albeau on FW gear is in the vicinity of 55% compared with 61% that Bethwaite identifies for a modern 18ft Skiff. The total equipment weight of FW gear is around 26kg (unless you have the new Exocet board!). With the hydrodynamic lift that a FW board generates when planing, the &#8220;<em>sail carrying power&#8221;</em> is perhaps a better determining factor in going fast, rather than Bethwaite&#8217;s <em>sail carrying power/total weight</em> ratio.</p>
<p><strong>SAIL CARRYING POWER =<br />
Righting Moment / Distance between the centre of effort of the sail and the combined lateral resistance of the hull and fin.</strong></p>
<p>Antoine, at 100kg has a sail carrying power which is 20% more than someone like Steve Allen at 82kg. With the development of the FW class, raceboards have become wider (up to 100.5cm now) and in the last two seasons, even wider in the tail. This allows for more sail carrying power which has been helped by the stability and handling of the newer wide-luff race sails.</p>
<p>All that being said, there&#8217;s more to winning a race than simply eating a few too many meat-pies before you go sailing, which is proved by a guy like Steve Allen coming 2nd overall at a relatively light weight of 82kg. So let&#8217;s focus less on what you can do physiologically and look at some things you can &#8220;actually&#8221; do to help you go faster around the course at whatever weight you are&#8230;</p>
<p><a title="Silvaplana 2007" href="http://www.carbonsugar.com/wp-content/uploads/2008/02/silvaplana-2007.jpg"><img src="http://www.carbonsugar.com/wp-content/uploads/2008/02/silvaplana-2007.thumbnail.jpg" alt="Silvaplana 2007" align="left" /></a>Have a look at this photo from the racing in Silvaplana, 2007. The lead boat is Alberto Menegatti (ITA-456), behind him Markus Bouman (NED-6) and 3rd in the line is myself (AUS-120). Notice our distinctly different techniques. With Alberto on the uphaul rope he can get his body much further hiked and still have the sail quite upright. Markus gets out a little further than me but isn&#8217;t sheeted in too well in this picture. I believe I am too upright in the photo and have since worked on my technique to improve my stance.</p>
<div class="ngg-galleryoverview" id="ngg-gallery-4-24">


	<!-- Thumbnails -->
		
	<div id="ngg-image-12" class="ngg-gallery-thumbnail-box"  >
		<div class="ngg-gallery-thumbnail" >
			<a href="http://www.carbonsugar.com/wp-content/uploads/power-to-weight/15.jpg" title=" " class="shutterset_set_4" >
								<img title="Steve Allen (AUS-0)" alt="Steve Allen (AUS-0)" src="http://www.carbonsugar.com/wp-content/uploads/power-to-weight/thumbs/thumbs_15.jpg" width="100" height="75" />
							</a>
		</div>
	</div>


	<div id="ngg-image-13" class="ngg-gallery-thumbnail-box"  >
		<div class="ngg-gallery-thumbnail" >
			<a href="http://www.carbonsugar.com/wp-content/uploads/power-to-weight/18.jpg" title=" " class="shutterset_set_4" >
								<img title="Willhelm Schurmann (BRA-999)" alt="Willhelm Schurmann (BRA-999)" src="http://www.carbonsugar.com/wp-content/uploads/power-to-weight/thumbs/thumbs_18.jpg" width="100" height="75" />
							</a>
		</div>
	</div>


	<div id="ngg-image-14" class="ngg-gallery-thumbnail-box"  >
		<div class="ngg-gallery-thumbnail" >
			<a href="http://www.carbonsugar.com/wp-content/uploads/power-to-weight/18[1].jpg" title=" " class="shutterset_set_4" >
								<img title="Wojtek Brzozowski (POL-10)" alt="Wojtek Brzozowski (POL-10)" src="http://www.carbonsugar.com/wp-content/uploads/power-to-weight/thumbs/thumbs_18[1].jpg" width="100" height="75" />
							</a>
		</div>
	</div>


	<div id="ngg-image-15" class="ngg-gallery-thumbnail-box"  >
		<div class="ngg-gallery-thumbnail" >
			<a href="http://www.carbonsugar.com/wp-content/uploads/power-to-weight/20.jpg" title=" " class="shutterset_set_4" >
								<img title="POL-1" alt="POL-1" src="http://www.carbonsugar.com/wp-content/uploads/power-to-weight/thumbs/thumbs_20.jpg" width="100" height="75" />
							</a>
		</div>
	</div>


	<div id="ngg-image-16" class="ngg-gallery-thumbnail-box"  >
		<div class="ngg-gallery-thumbnail" >
			<a href="http://www.carbonsugar.com/wp-content/uploads/power-to-weight/33.jpg" title=" " class="shutterset_set_4" >
								<img title="POR-5 / Marco Begalli (ITA)" alt="POR-5 / Marco Begalli (ITA)" src="http://www.carbonsugar.com/wp-content/uploads/power-to-weight/thumbs/thumbs_33.jpg" width="100" height="75" />
							</a>
		</div>
	</div>


	<div id="ngg-image-17" class="ngg-gallery-thumbnail-box"  >
		<div class="ngg-gallery-thumbnail" >
			<a href="http://www.carbonsugar.com/wp-content/uploads/power-to-weight/5.jpg" title=" " class="shutterset_set_4" >
								<img title="Steve Allen (AUS-0)" alt="Steve Allen (AUS-0)" src="http://www.carbonsugar.com/wp-content/uploads/power-to-weight/thumbs/thumbs_5.jpg" width="100" height="75" />
							</a>
		</div>
	</div>


	<div id="ngg-image-18" class="ngg-gallery-thumbnail-box"  >
		<div class="ngg-gallery-thumbnail" >
			<a href="http://www.carbonsugar.com/wp-content/uploads/power-to-weight/Gonzalo.jpg" title=" " class="shutterset_set_4" >
								<img title="Gonzalo Costa-Hoevel (ARG-3)" alt="Gonzalo Costa-Hoevel (ARG-3)" src="http://www.carbonsugar.com/wp-content/uploads/power-to-weight/thumbs/thumbs_Gonzalo.jpg" width="100" height="75" />
							</a>
		</div>
	</div>


	<div id="ngg-image-19" class="ngg-gallery-thumbnail-box"  >
		<div class="ngg-gallery-thumbnail" >
			<a href="http://www.carbonsugar.com/wp-content/uploads/power-to-weight/S02_D8_US-3.jpg" title=" " class="shutterset_set_4" >
								<img title="Kevin Pritchard (US-3)" alt="Kevin Pritchard (US-3)" src="http://www.carbonsugar.com/wp-content/uploads/power-to-weight/thumbs/thumbs_S02_D8_US-3.jpg" width="100" height="75" />
							</a>
		</div>
	</div>


	<div id="ngg-image-20" class="ngg-gallery-thumbnail-box"  >
		<div class="ngg-gallery-thumbnail" >
			<a href="http://www.carbonsugar.com/wp-content/uploads/power-to-weight/_MG_0344.jpg" title=" " class="shutterset_set_4" >
								<img title="Alberto Menegatti (ITA-456)" alt="Alberto Menegatti (ITA-456)" src="http://www.carbonsugar.com/wp-content/uploads/power-to-weight/thumbs/thumbs__MG_0344.jpg" width="100" height="75" />
							</a>
		</div>
	</div>


	<div id="ngg-image-21" class="ngg-gallery-thumbnail-box"  >
		<div class="ngg-gallery-thumbnail" >
			<a href="http://www.carbonsugar.com/wp-content/uploads/power-to-weight/_MG_0389.jpg" title=" " class="shutterset_set_4" >
								<img title="Steve Allen (AUS-0) / Jesper Vesterstrom (DEN-111)" alt="Steve Allen (AUS-0) / Jesper Vesterstrom (DEN-111)" src="http://www.carbonsugar.com/wp-content/uploads/power-to-weight/thumbs/thumbs__MG_0389.jpg" width="100" height="75" />
							</a>
		</div>
	</div>


	<!-- Pagination -->
 	<div class='ngg-clear'></div>
 	
</div>

<p>Now have a look at this photo gallery here; a few photos of some of the top guys in FW going to windward. Notice everyone&#8217;s technique is slightly different but most of them have the sail very upright and are very hiked out, getting their body as far from the sail as possible. My favourite is the photo of Kevin Pritchard (USA-3) from the 2002 FW Worlds in Germany. His sail could be a little more upright but check out how far hiked he is! No wonder he won two Worlds in a row!</p>
<p>It is hard to get the sail upright and keep sheeted in at the same time. The two things seem to contradict each other when you try it. Work on getting your body hiked and away from the sail first, as it&#8217;s the easiest to correct. When you do, you will most likely be sailing with the rig too far on top of yourself. Once you start to drag the sail on top of you, the lift forces you are generating from the fin begin to decrease, so the second part of your training should be to work on ways of getting the sail more upright whilst still keeping your body hiked out. Here&#8217;s some tips to get you started&#8230;</p>
<h3>Feet:</h3>
<p>Feet are VERY important in railing the board and positioning your body for a good stance. Make sure you are on the balls of your feet. In lighter winds you can use your front foot to pull up on the front strap and help rail the board &#8211; in the extremes you can even do this with your back foot. Keep light on the board as heavy pressure will only dig the winward rail in (that&#8217;s slow!). Keep light on your feet; think like a ballerina.</p>
<h3>Legs:</h3>
<p>The best technique involves having a straighter front leg than your back leg. It shouldn&#8217;t be dead straight, but just a slight bend to allow you to absorb chop with your legs (by bending them slightly over the swells) and be comfortable when you sail. The concept should be to apply more weight to your back leg and lifting your front foot to rail the board, which allows you to power the fin and still rail the board. Practice will help with this&#8230;</p>
<h3>Arms:</h3>
<p>There&#8217;s no right or wrong here but I personally believe you can get further away from the rig with a pronated grip (both hands over the boom, as opposed to having your front hand under the boom). Everyone has a personal preference and once you have a good technique down-pat, you can do it with either grip &#8211; but to help learn this technique quickly I would suggest trying the pronated grip. A pronated grip allows you to roll your shoulders forward and effectively lengthen your arms a few cm.</p>
<h3>Body:</h3>
<p>Try to avoid twisting your body to windward. The best sailors have a relatively straight stance if you look at them from directly upwind. Have a look at the photo in the gallery of Wojtek Brzozowski (POL-10), he stands very straight on the board which means he can keep the sail very upright and still hike out. Twisting your shoulder forward as some people do when they are overpowered can lead to dragging the sail on top of you more.</p>
<h3>Breathing:</h3>
<p>Believe it or not, breathing is important with this technique. When you breathe deeper, you open your diaphragm up and can relax your shoulders more to get them rolling forward to lengthen your armspan. Probably, it&#8217;s hard to remember your breathing in 25 knots, but give it a thought on that 10 knot day when you next go sailing.</p>
<h3>Equipment:</h3>
<p>Equipment plays a big role in helping you hike. Your boom height, harness lines, mast-track position and fin will change the way the sail feels in your hands and the pressures it allows you to apply to the fin. This is all personal preference. Try it all. Get a friend with a camera to take some photos of you sailing and see what setup helps you to get more hiked.</p>
<h3>Uphaul Rope:</h3>
<p>The jury is still out on this one. Many top sailors use it in light winds, many go the same speed without it. My personal opinion is that the theory behind it is good, because the guys using the uphaul are hiked out incredibly far whilst still having the sail upright. There are plenty of guys who can get their bodies out that far without the uphaul rope, so whatever works for you &#8211; works for you.</p>
<p>Take some time next time you race to have a look at the stance of the guy&#8217;s winning the races. If the fleet is at a decent level, then chances are the guys winning will have a great stance keeping the rig upright and hiking out far from their board to generate maximum lift. That is why they beat you around the course without forking out so much money for a new fin like you did. Now, imagine you&#8217;ve worked on your stance AS WELL as buying that new fin &#8230;</p>
]]></content:encoded>
			<wfw:commentRss>http://www.carbonsugar.com/featured/power-to-weight-your-stance-vs-antoines/feed/</wfw:commentRss>
		<slash:comments>26</slash:comments>
		</item>
	</channel>
</rss>
